Build categories
Admin → Product
Scroll to Product categories, pick a tab, Add.

Getting Started with Rundoo · Setup
Group every product so your reports, prices, and counts line up.
You know your store's layout like the back of your hand. Which aisle has the brushes, which shelf has the rollers, which bin holds the bolts. Rundoo needs that same logic so your sales, inventory, and margin reports come out just as organized. You build it with three nesting levels of categories, Department, Class, and Fineline, and then every product drops into the right group. It's a little prep work up front, and it pays you back every time you pull a report, print a label, or run a count.
Think of it as your store, mapped. Department is the big-picture aisle, say Sundries. Class is a section on that aisle, like Brushes. And Fineline gets down to the specific family or brand, like Wooster Brushes. Each level nests inside the one above it: every fineline belongs to a class, and every class belongs to a department.
Only Department is required on a product. Class and Fineline are optional refinements, there when you want a finer report line and skippable when you don't. Smaller stores often stop at Department; larger ones with lots of vendors lean on Class and Fineline too.
Everything lives in one spot. In Admin mode, open Product in the left sidebar, then scroll down to the Product categories section.
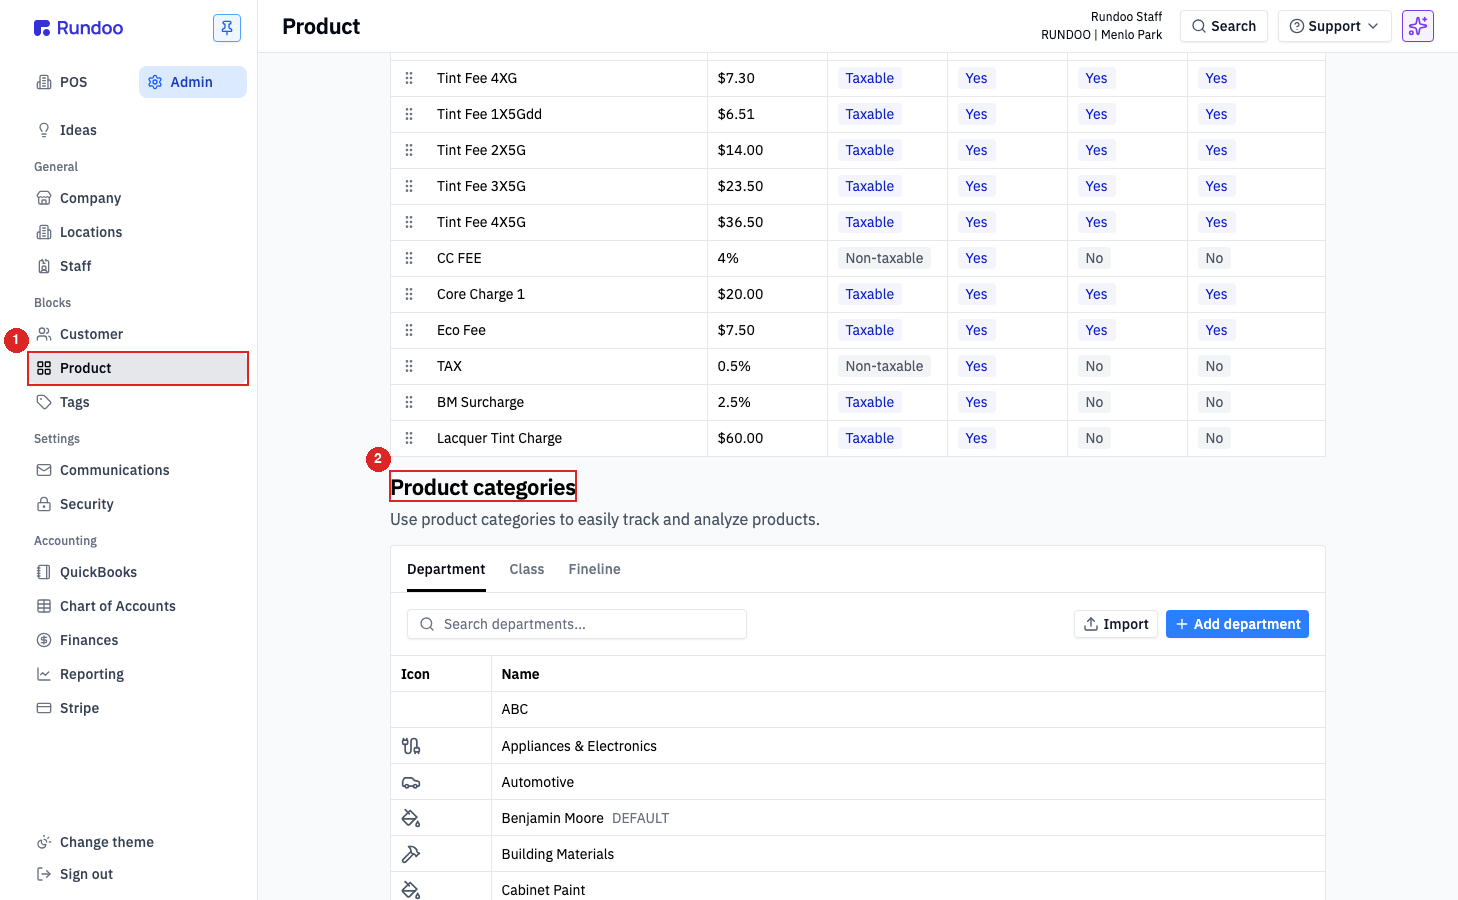
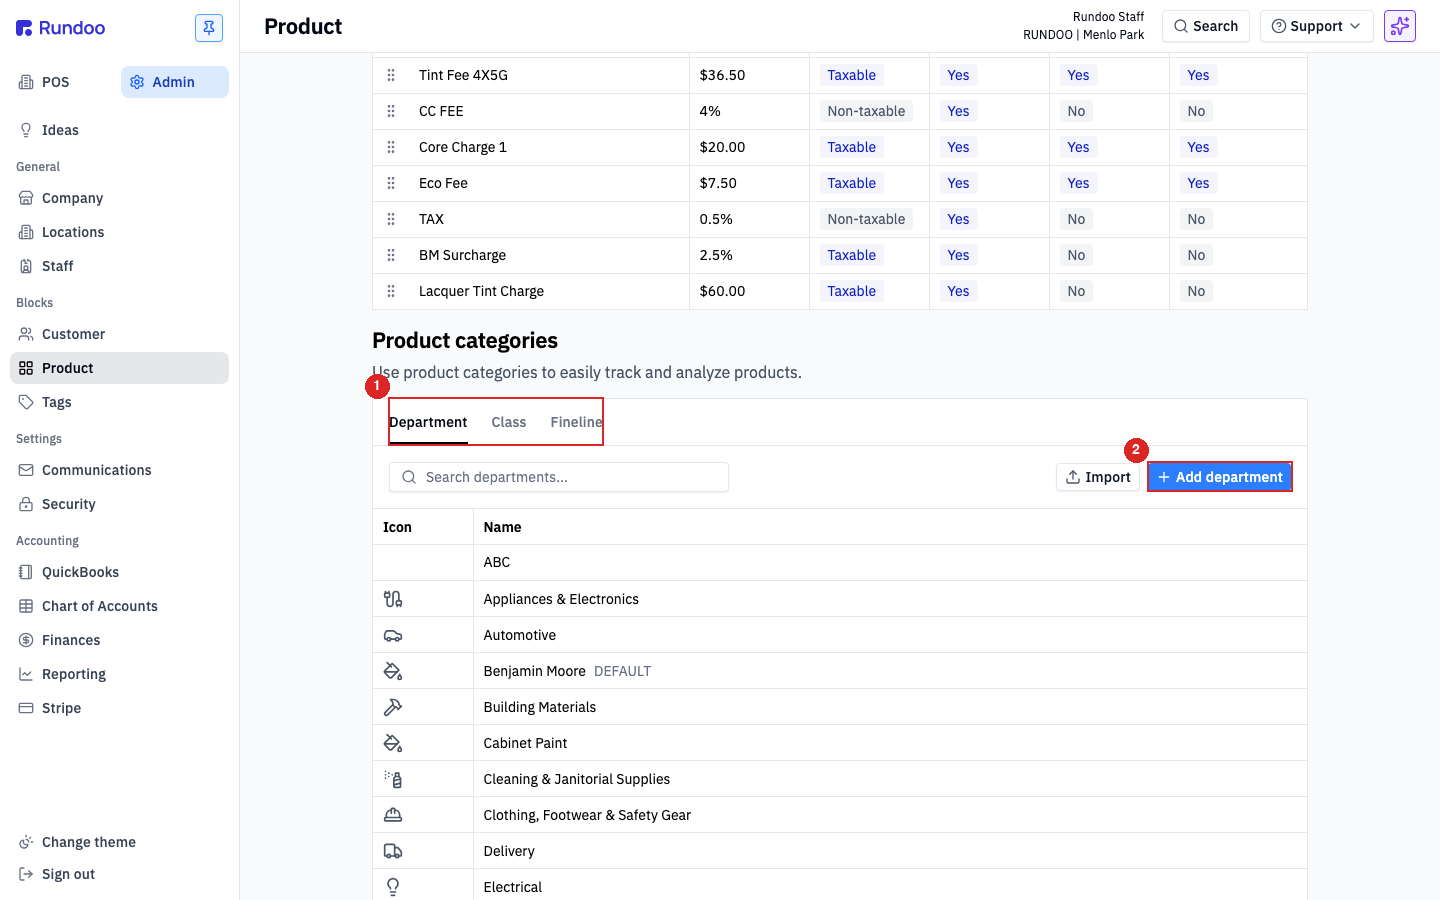
In the Product categories section, make sure the Department tab is selected, then click the blue Add department button in the top-right. The tab you're on decides which level you're adding, so always pick the tab first.
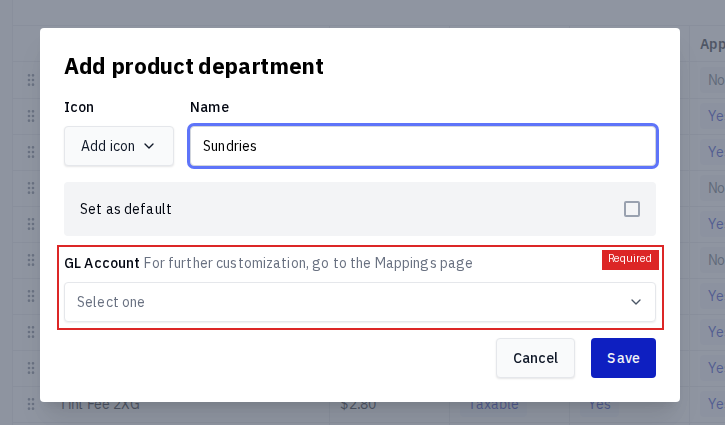
In the modal, type the name (we'll use Sundries) in the Name field. A department also needs a GL Account, which is the accounting bucket its sales post to. Rundoo won't let you Save until you pick one from the Select one dropdown. In your practice store, just choose the suggested account and keep moving. When you do this for real, give your bookkeeper or your Rundoo guide a heads-up on any new department so it maps to the right place in your books. Then click Save.
Switch to the Class tab and click Add class. Name it Brushes, then use the Department dropdown to tell Rundoo it lives inside Sundries. A class needs a name plus a parent department, no GL account this time. Click Save.
Over on the Fineline tab, click Add fineline. Name it Wooster Brushes and pick Brushes from the Class dropdown. That connects it up the whole chain: Wooster Brushes sits inside Brushes, which sits inside Sundries. Click Save.
Now group an item. Switch to Point of Sale, open Products in the left sidebar, and click a brush to open its detail page. Click the Settings tab, then scroll to the Categorization section.
In Categorization, set the Department to Sundries. The Class dropdown then only shows classes in that department, so pick Brushes; the Fineline dropdown narrows to that class, so pick Wooster Brushes. Click Save inside the Categorization section. Each settings section has its own Save, so saving this one doesn't touch the rest of the product.
Build categories
Admin → Product
Scroll to Product categories, pick a tab, Add.
Assign a product
POS → Products → Settings
Categorization section, then Save that section.
Required level
Department only
Class and Fineline are optional refinements.
Doing hundreds
Product imports
The spreadsheet matches on category name.
Good to know