
The Rundoo Primer
Billing, All in One Place
Add or change your payment method, view your agreement, and find your invoices, all in one place.
Do this
-
Open Admin, then Billing
In Rundoo, click Admin, then click Billing in the left sidebar under Settings. This is your billing home, where your payment method, invoices, and agreement all live.
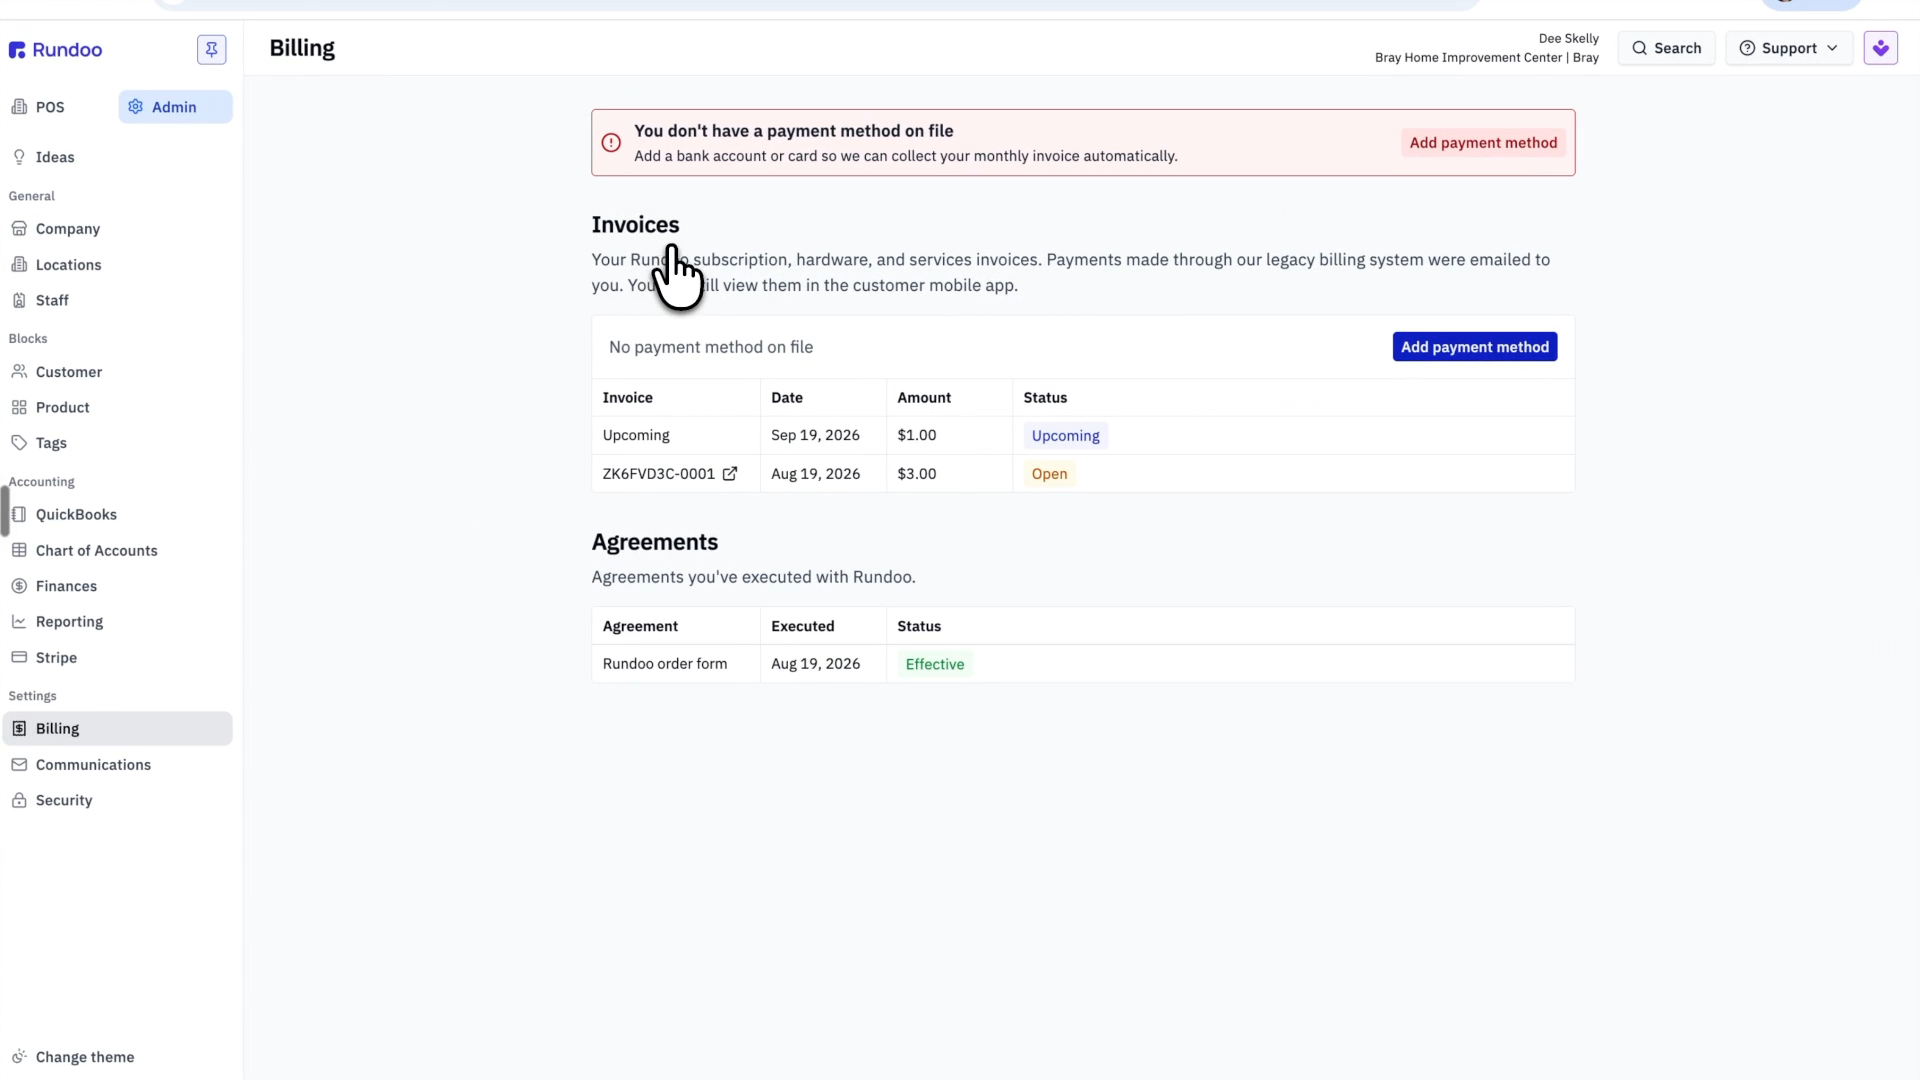
The Billing page, under Admin in the left sidebar. -
Add or change a payment method
Click Add payment method, or Change payment method if one is already saved. Choose a US bank account or a card, enter your details, and click Save. Rundoo keeps one card or bank account on file to collect your monthly invoice.
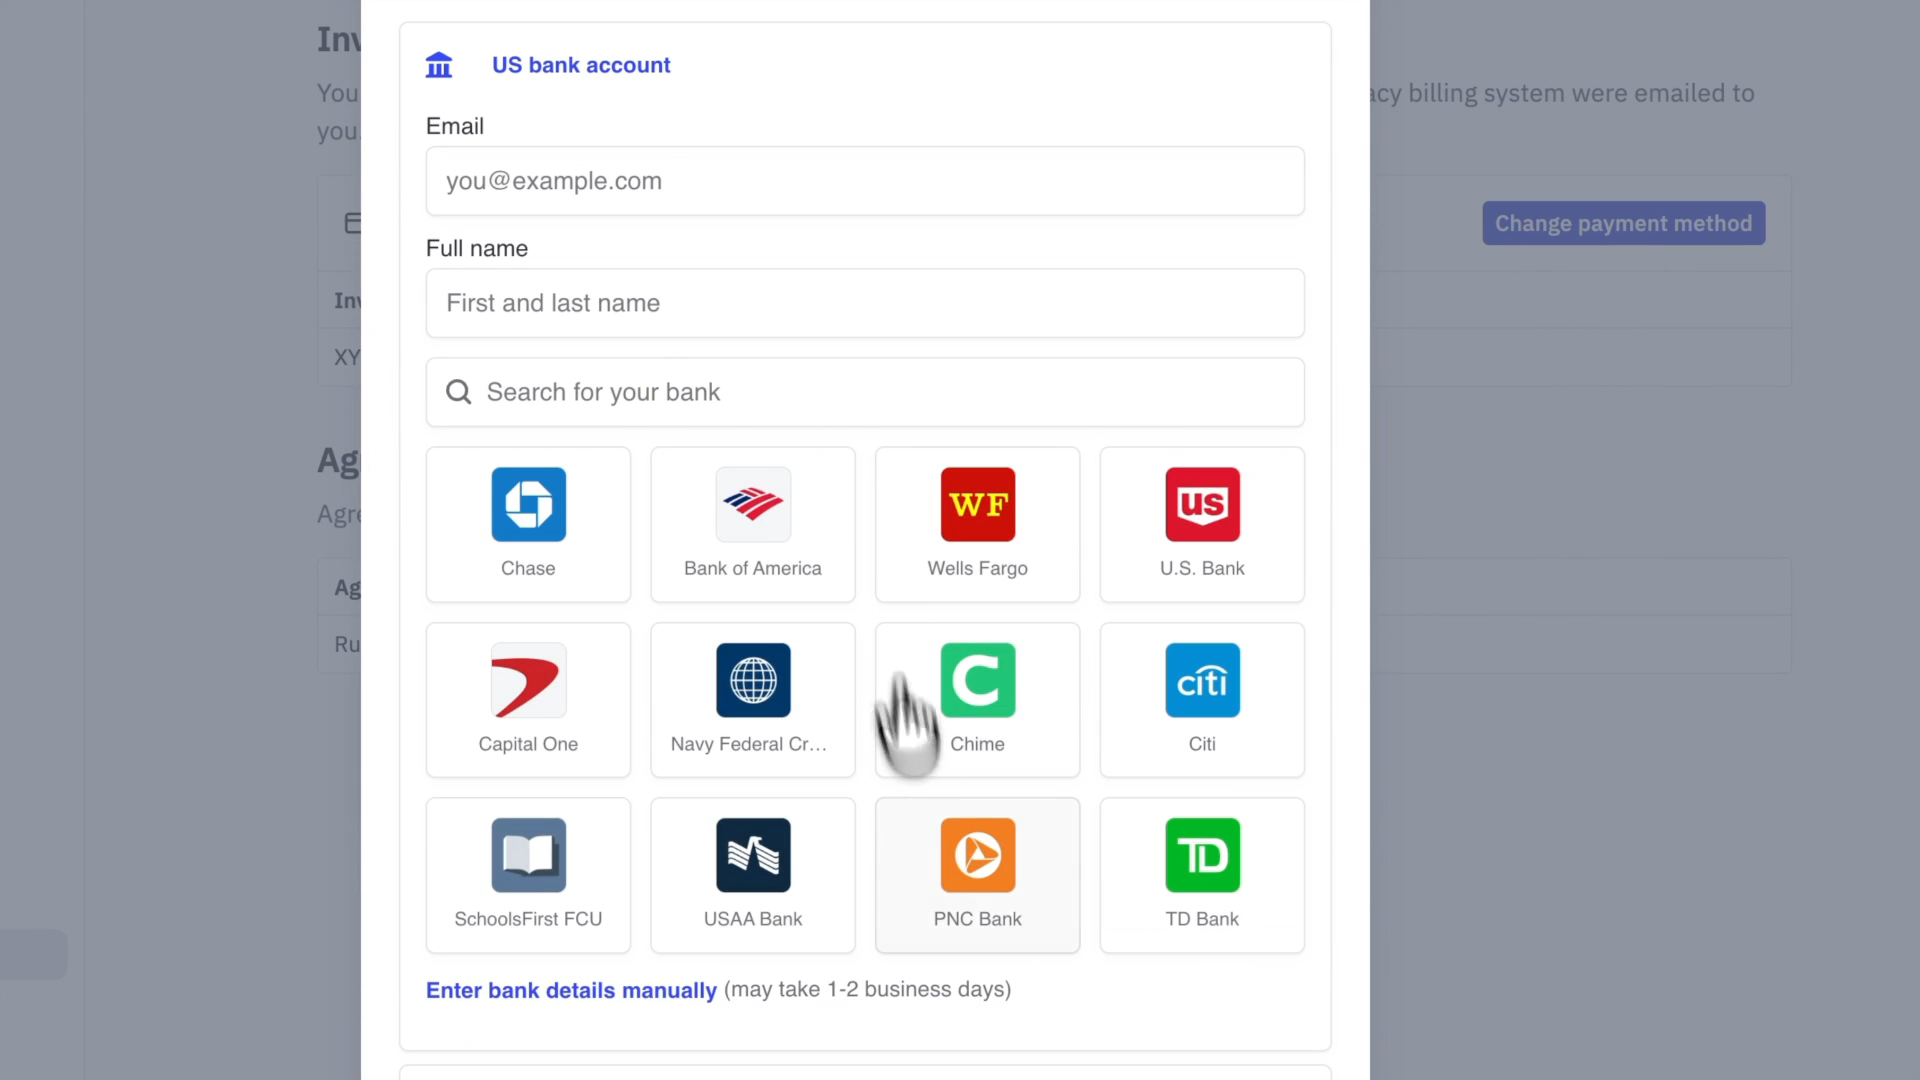
Pick your bank or enter a card, then save. -
See your agreement for reference
Under Agreements, click your agreement to open the PDF. It is the copy of what you signed with Rundoo, so you can check the specifics anytime without digging through email.
-
See past receipts and upcoming payments
Under Invoices you will see two kinds of rows. The little link icon next to the invoice number is what tells them apart.

An upcoming payment (top row) shows only the date and amount. A past payment (bottom row) carries a link icon. A past payment has a small link icon next to its invoice number. Click it to open the itemized receipt, broken out line by line.
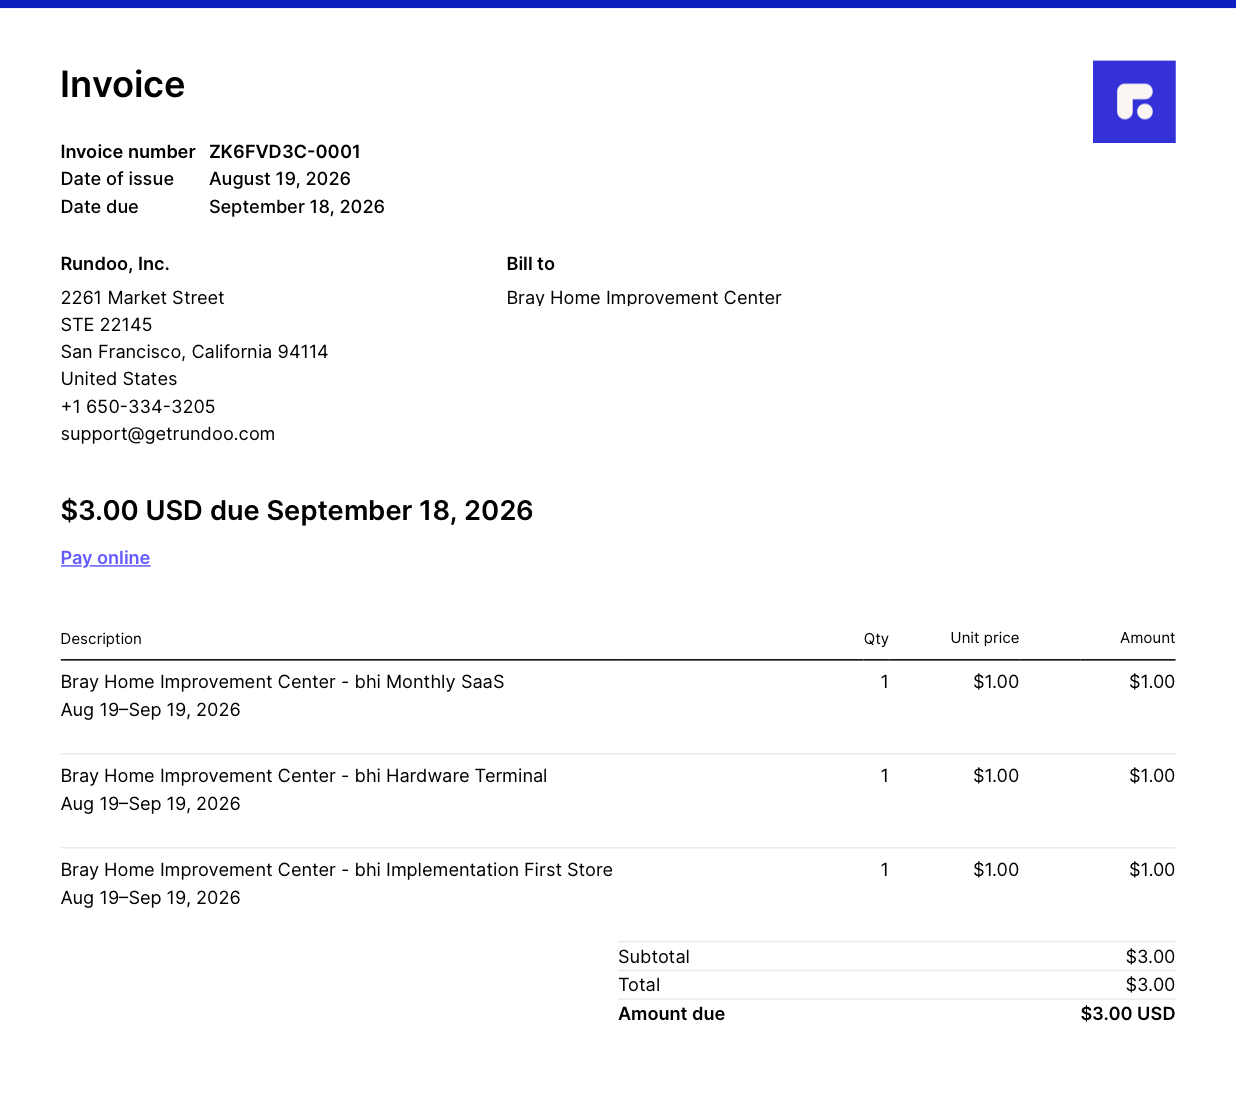
The itemized receipt you get when you open a past payment. An upcoming payment shows the date and the amount due, but has no link icon and no itemized receipt yet. That receipt becomes available the day before the payment date.
Note: historical receipts from before your store moved to billing in Rundoo will not appear here.
Manage access
Billing is a permission, so you decide who on your team can see the Billing tab.
-
Open Staff
Click Staff in the left sidebar.
-
Find the staff member
Click the person whose access you want to change to open their profile, then go to their Permissions tab.
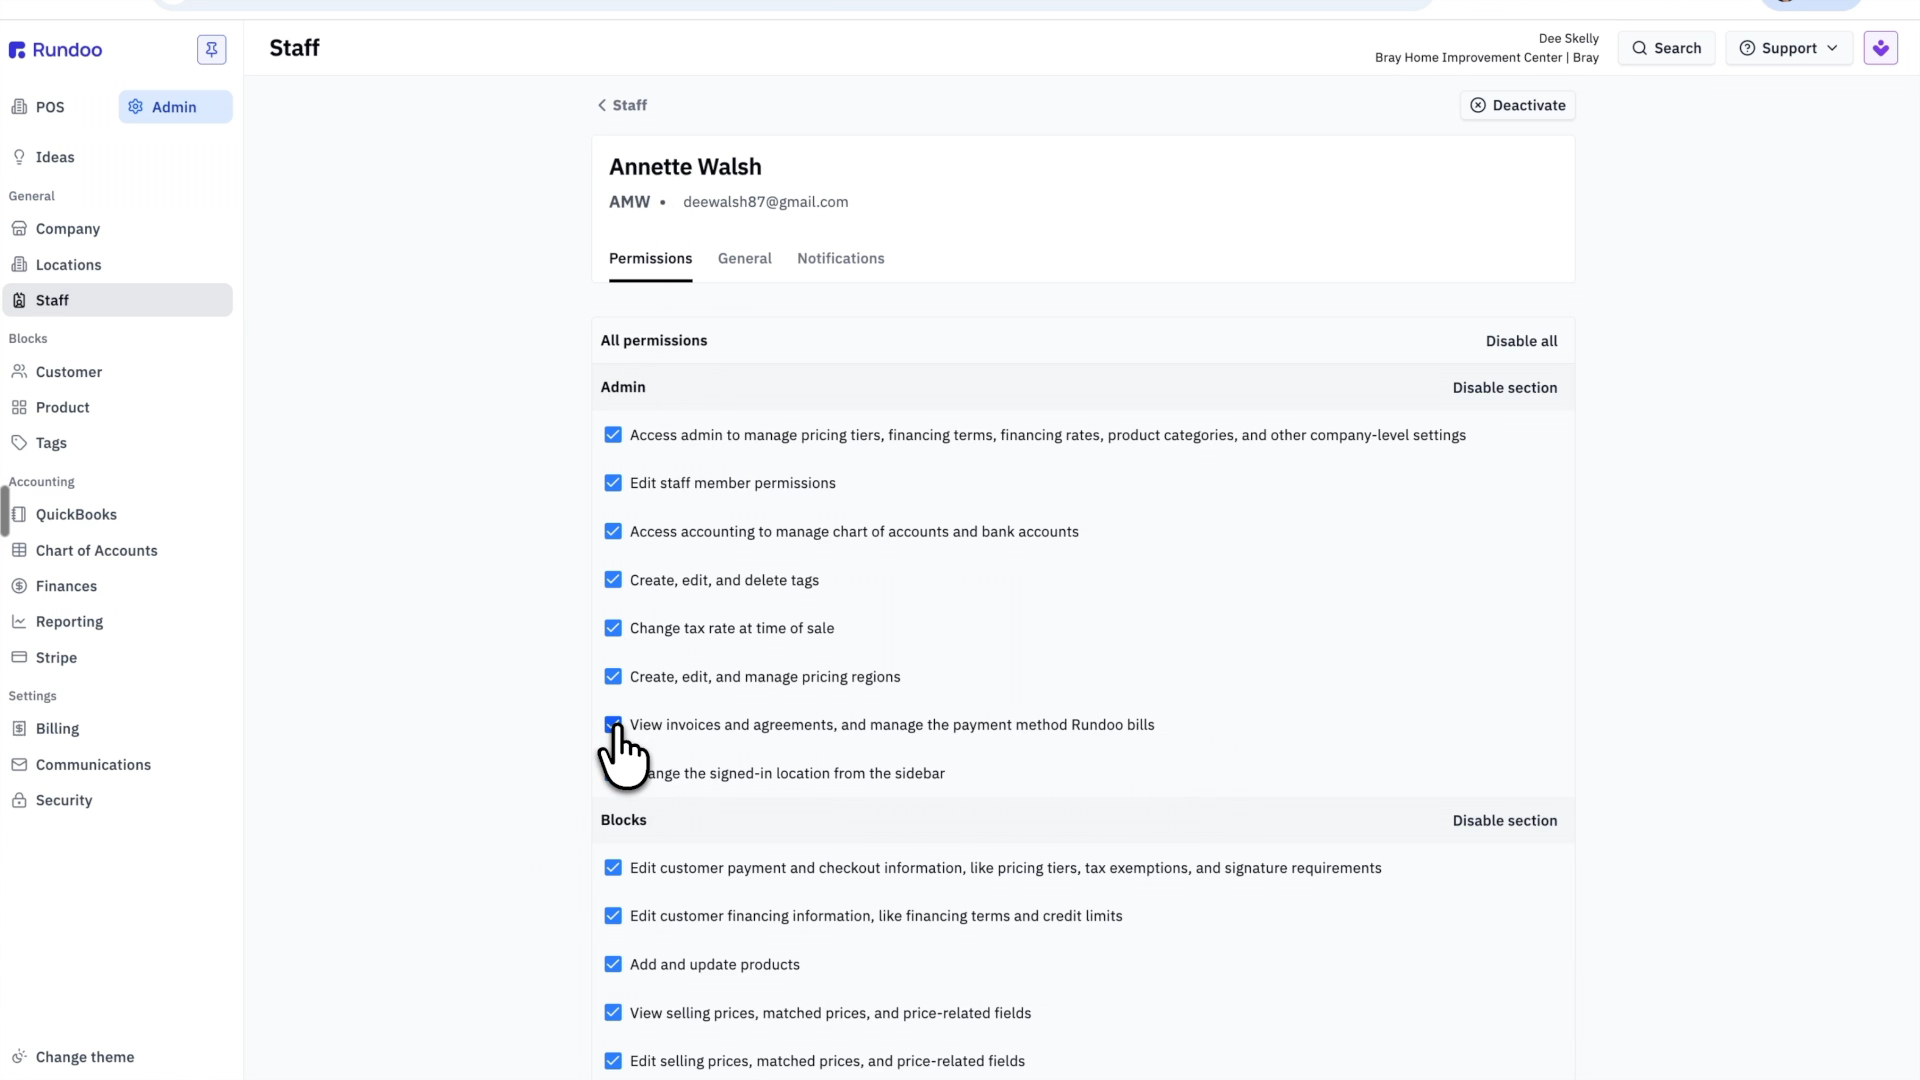
A staff member's Permissions tab, under the Admin section. -
Turn their billing permission on or off
In the Admin section, find View invoices and agreements, and manage the payment method Rundoo bills and toggle it. On means they can see the Billing tab; off means they cannot.

The exact permission to toggle for the Billing tab.