Card
Tap, insert, swipe, or key in
Selected by default. Choose a reader, or enter it manually for phone orders.

Getting Started with Rundoo · Transactions
Ringing up any sale at the counter.
A customer walks up to the counter with a handful of items. This is the moment you do more than any other all day, so it pays to have the rhythm down cold. In Rundoo, every sale runs the same way no matter how the customer pays. You build the cart on the right, hit one button, and pick a tender. Cash, card, check, or charge on account all finish from the same panel.
In POS mode, open the Transactions tab on the left and stay on the New top tab. That is the sale builder. The customer goes on the left, and you build the cart on the right. The strip of top tabs, New, Drafts, Quotes, Will call, Special orders, Completed, and Voided, is how you jump between carts in progress and work you have already saved.
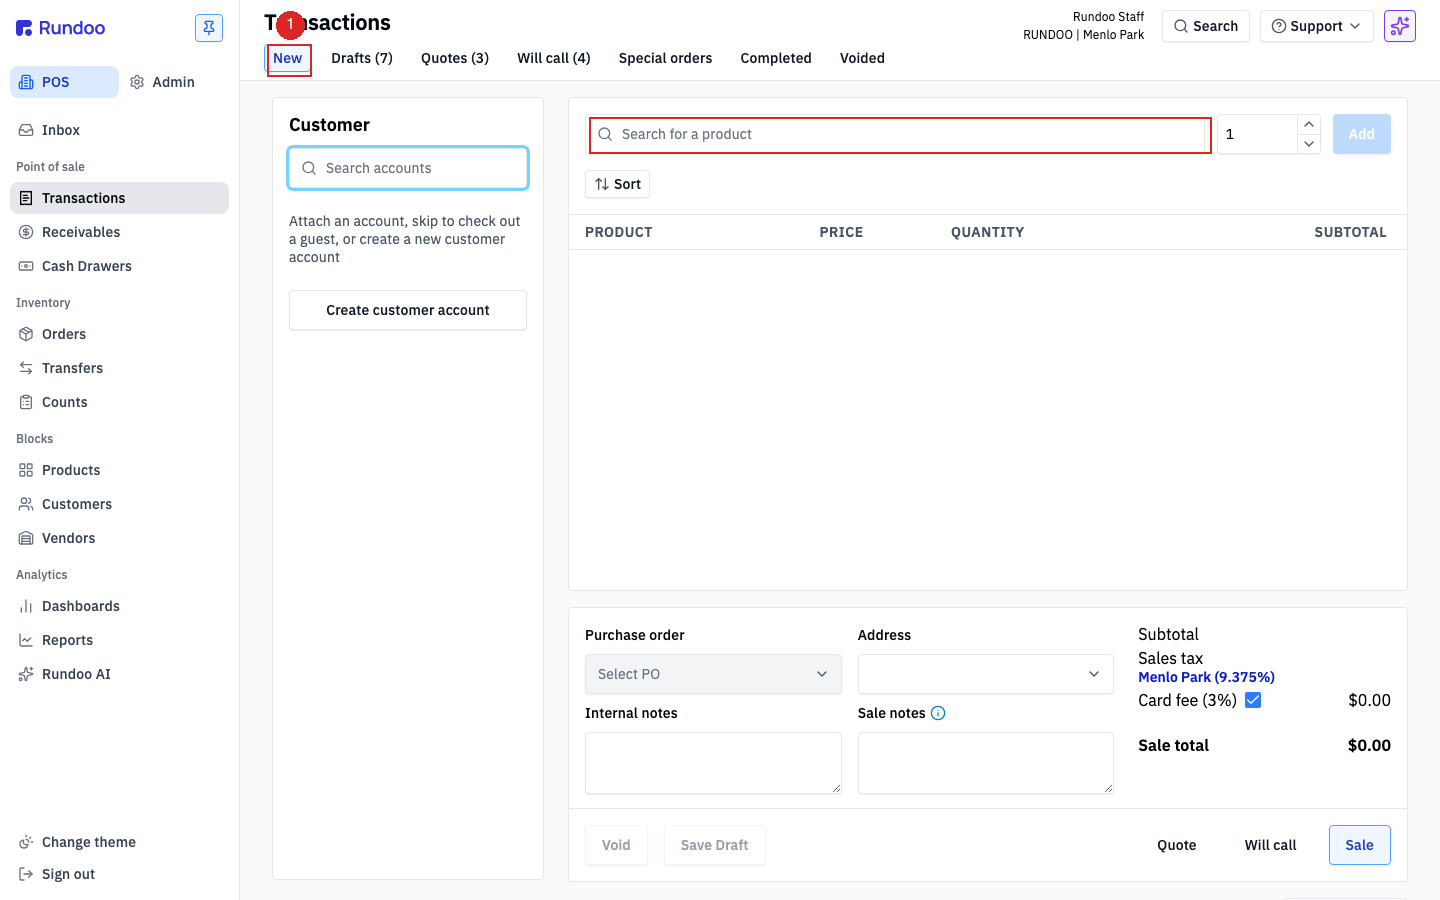
Click Search for a product and start typing a name, SKU, or part number. Rundoo finds it, and clicking the right one drops it into the cart. If you use a barcode scanner, click into the search box first and scan away. Scanning the same item again bumps its quantity up by one instead of adding a second line, so a customer buying ten of something is just ten beeps. You can also set the quantity in the stepper next to the search box and click Add. Each line shows Product, Price, Quantity, and Subtotal, and the totals on the right update as you go.
A plain walk-in cash or card sale does not need a customer at all. If you do want one, click Search accounts in the Customer panel and type a name, phone, or customer ID, or click Create customer account to build a new one without losing the cart. You need a customer attached to charge on account, to apply their custom pricing, or to have the sale show up on a later statement.
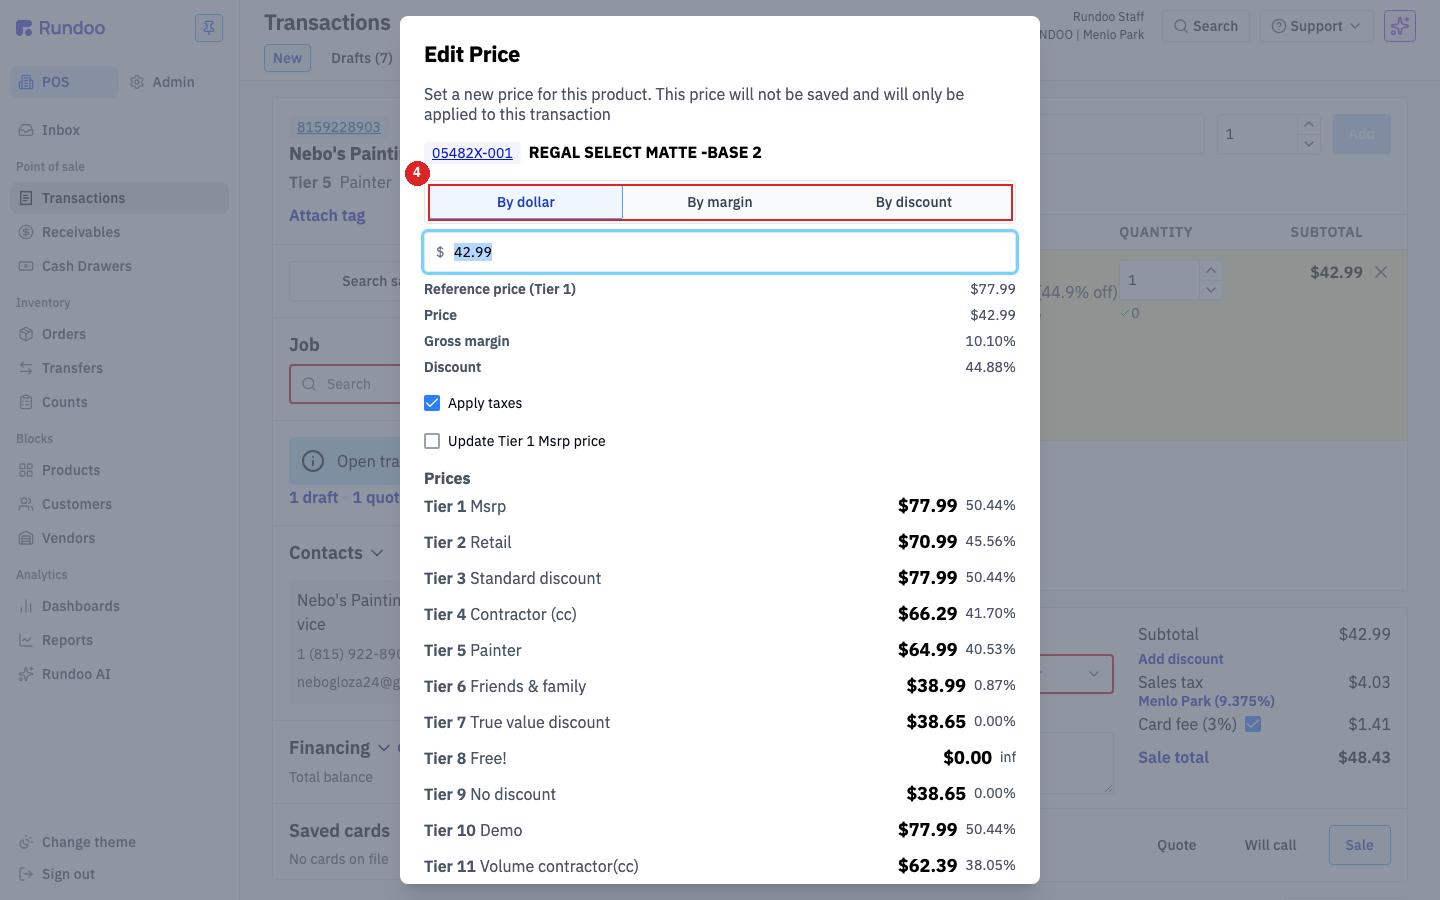
To change a line price for any reason, click Edit price on that line. The Edit Price box opens with three ways to set it: By dollar for a flat new price, By margin to work to a target margin, or By discount to take a percentage off. Every one of your price tiers is listed right there for reference, so you can price with confidence. The change applies to this sale only. Better yet: when you attach a customer who has a set price tier, like a contractor, Rundoo applies their pricing to every item automatically, so most of the time there is nothing to remember.
Once the cart is right and the customer is ready to pay, click the big Sale button in the bottom-right corner. The payment panel slides in with your tender methods listed as buttons. Card is selected by default, and the rest sit below it. Off to the right is the commit button, a blue Charge button whose amount updates live as you enter a payment. That same button finishes every kind of sale.
Card: leave Card selected. Click Choose a reader and hand the connected reader to the customer to tap, insert, or swipe. For a card on file or a phone order, use Enter card manually and type the number, expiration, CVV, and ZIP.
Cash: pick Cash and type the amount the customer handed you. Rundoo does the change math against the sale total for you.
Check: pick Check and enter the check number and amount. Rundoo logs the number with the sale, which is what keeps your drawer reconciling at close-out.
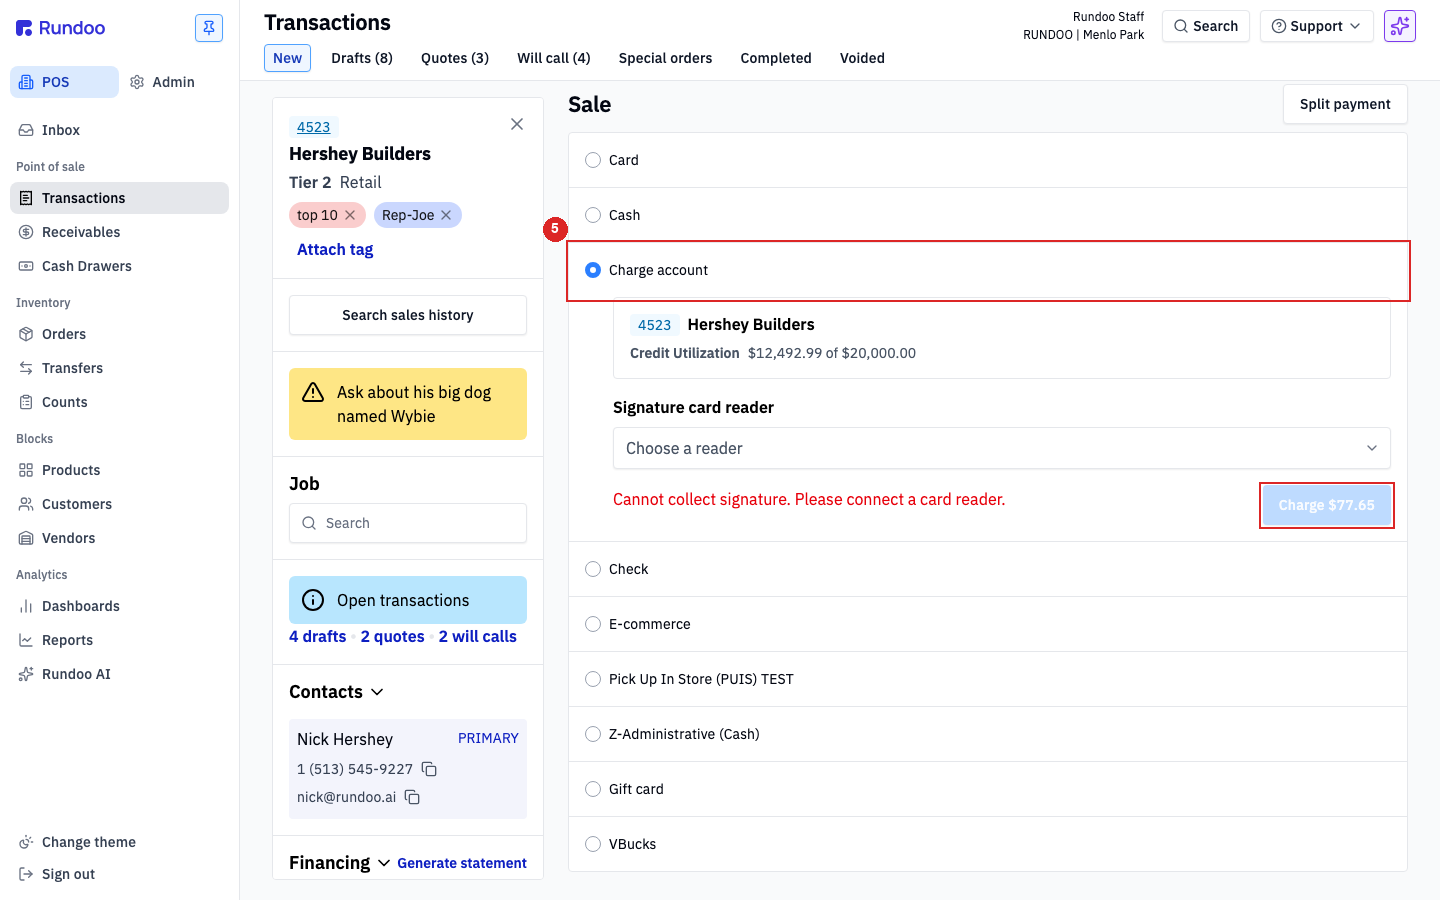
Charge account: for your regulars with a house account, pick Charge account. Instead of taking payment now, the sale posts as an invoice on their balance, and you will even see their Credit Utilization before you commit.
Say this one is cash. The total comes to sixty dollars and two cents, and the customer hands you seventy. Type in 70.00 and Rundoo shows the change you owe: nine seventy-seven. Click the Charge button to complete it, and on a cash sale the drawer pops so you can make change. Rundoo lands you on the finished-sale screen with the change amount right in front of you.
From the completed sale, hand over a receipt however the customer wants it. Click Print to send a receipt to your counter printer, or Email to send a copy to the customer. No customer attached? Rundoo asks for an email address before it sends.
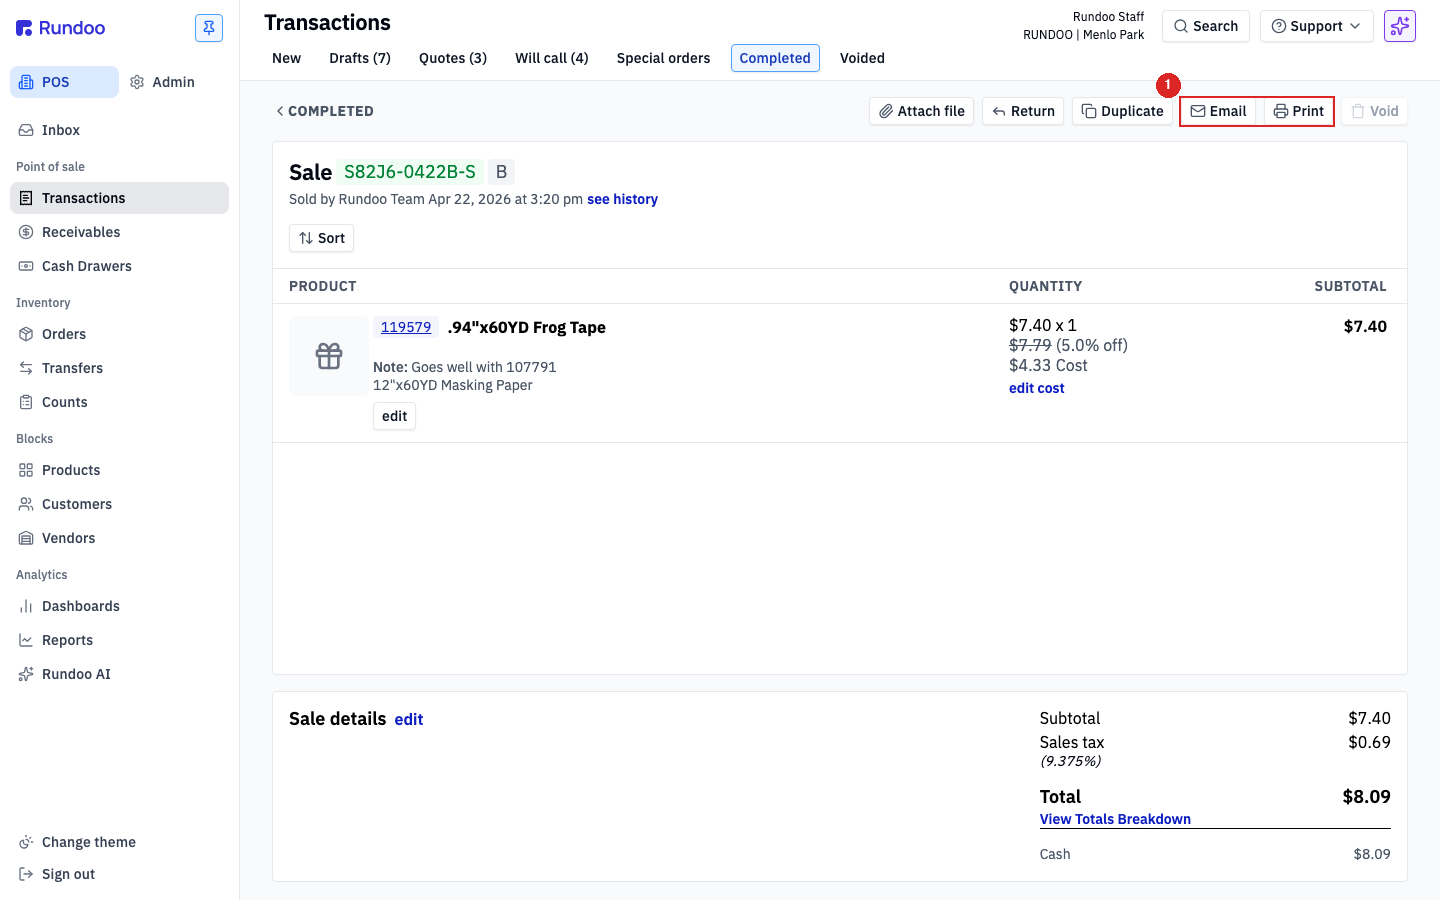
Every sale you ring lands in the Completed top tab. If a customer comes back for a past receipt, open that tab, search by their name, the date, or who rang it up, and open the sale. The same Print and Email buttons are waiting on the detail view.
Card
Tap, insert, swipe, or key in
Selected by default. Choose a reader, or enter it manually for phone orders.
Cash
Enter the amount handed over
Rundoo figures the change and pops the drawer.
Check
Enter the check number
Logged with the sale so the drawer reconciles at close.
Charge account
Put it on their balance
Only shows for a charge customer on the ticket.
Good to know