Start here
Orders → Ordered
Open the PO that matches the shipment.

Getting Started with Rundoo · Purchase Orders
Receive what arrived and log the vendor's invoice.
The delivery truck has pulled up and the boxes from your vendor are stacked on the counter. Getting that stock checked in and onto your shelves is the next step, and in Rundoo it starts in your purchase orders. Receiving does two jobs at once: it puts the new stock into your on-hand count, and it lines the order up to record the bill. Here is the whole routine, start to finish.
In POS mode, click Orders in the left navigation. Across the top you'll see the lifecycle of every order: Ordered, Received, Vouchered, then Paid. A purchase order marches left to right as it goes from "stock is on the truck" to "bill is settled." Everything you're still waiting on sits in Ordered, and that's where a receive begins.
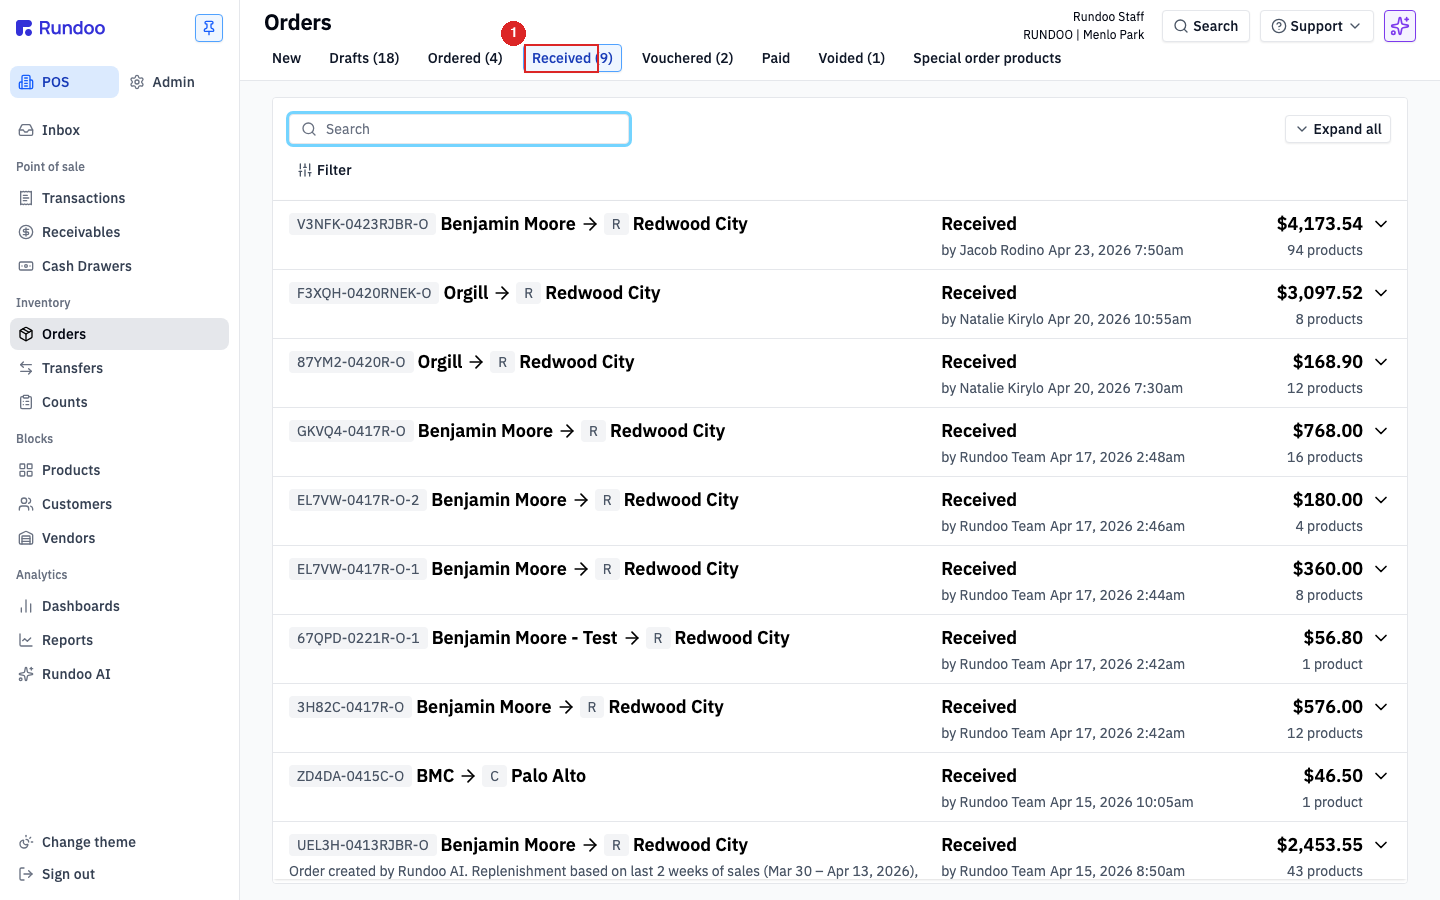
From Orders, click into the Ordered tab. This is the list of everything you're waiting on. Find the purchase order that matches the shipment on your counter, and click to open it.
Opening an ordered PO puts it right into receiving mode. Next to each line you'll see a QUANTITY stepper, already filled in with what you originally ordered. If every box on the truck matches, you don't have to touch a thing. Where a count is off, step the number up or down, and Rundoo shows the difference below the line so you can see at a glance what's short or over. In a hurry? Set quantities to 0 at the top clears every line so you can key in what actually came in.
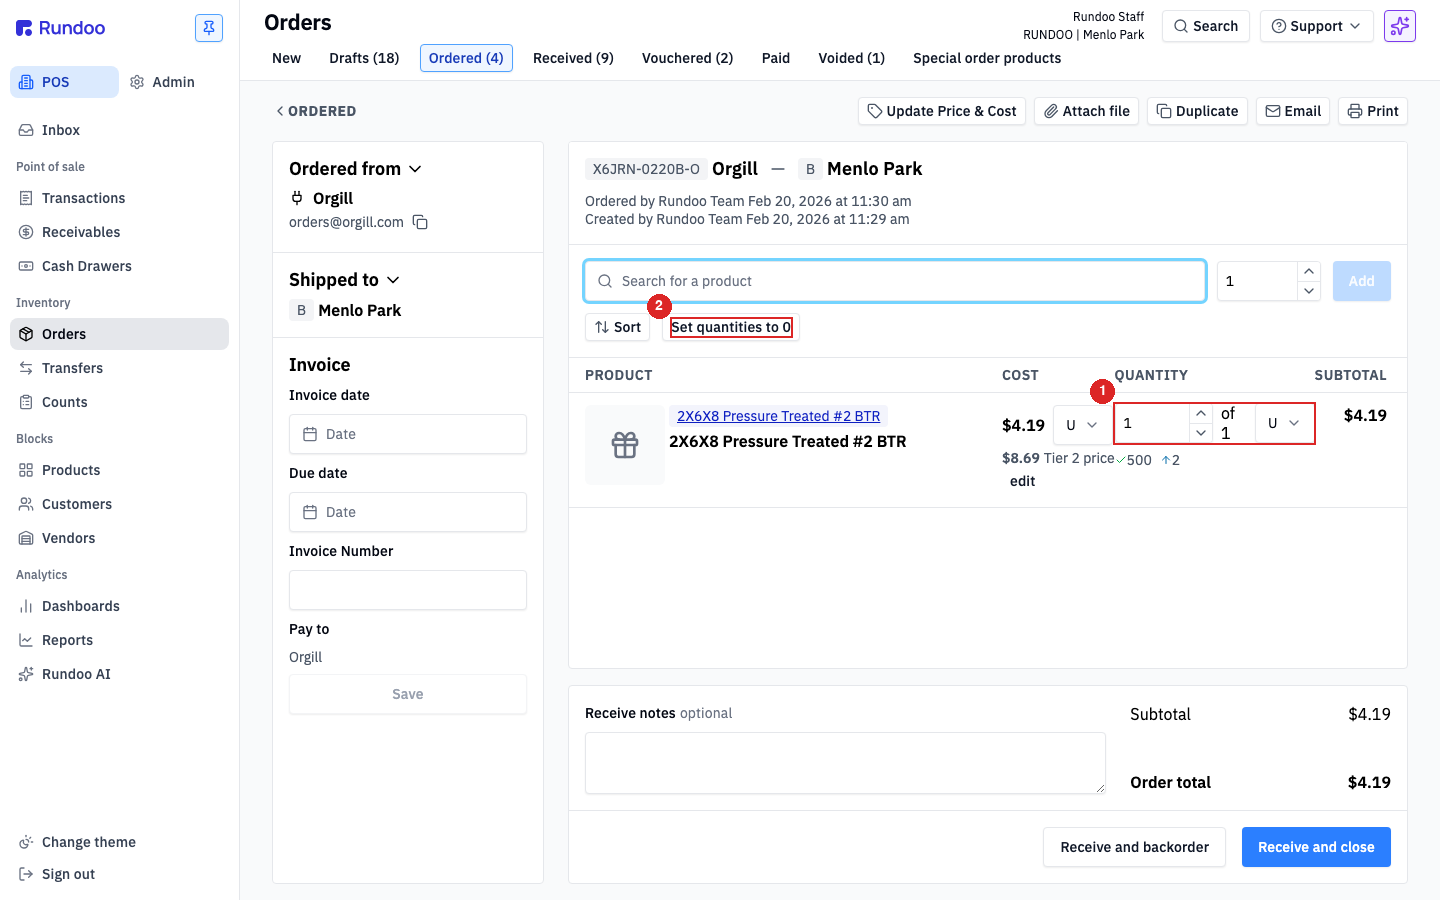
When the whole shipment is in, come down to the bottom right and click Receive and close. That does two things at once: it moves the order into the Received tab, and it updates your on-hand counts right away, so a sale you ring a minute later can pull from that new stock.
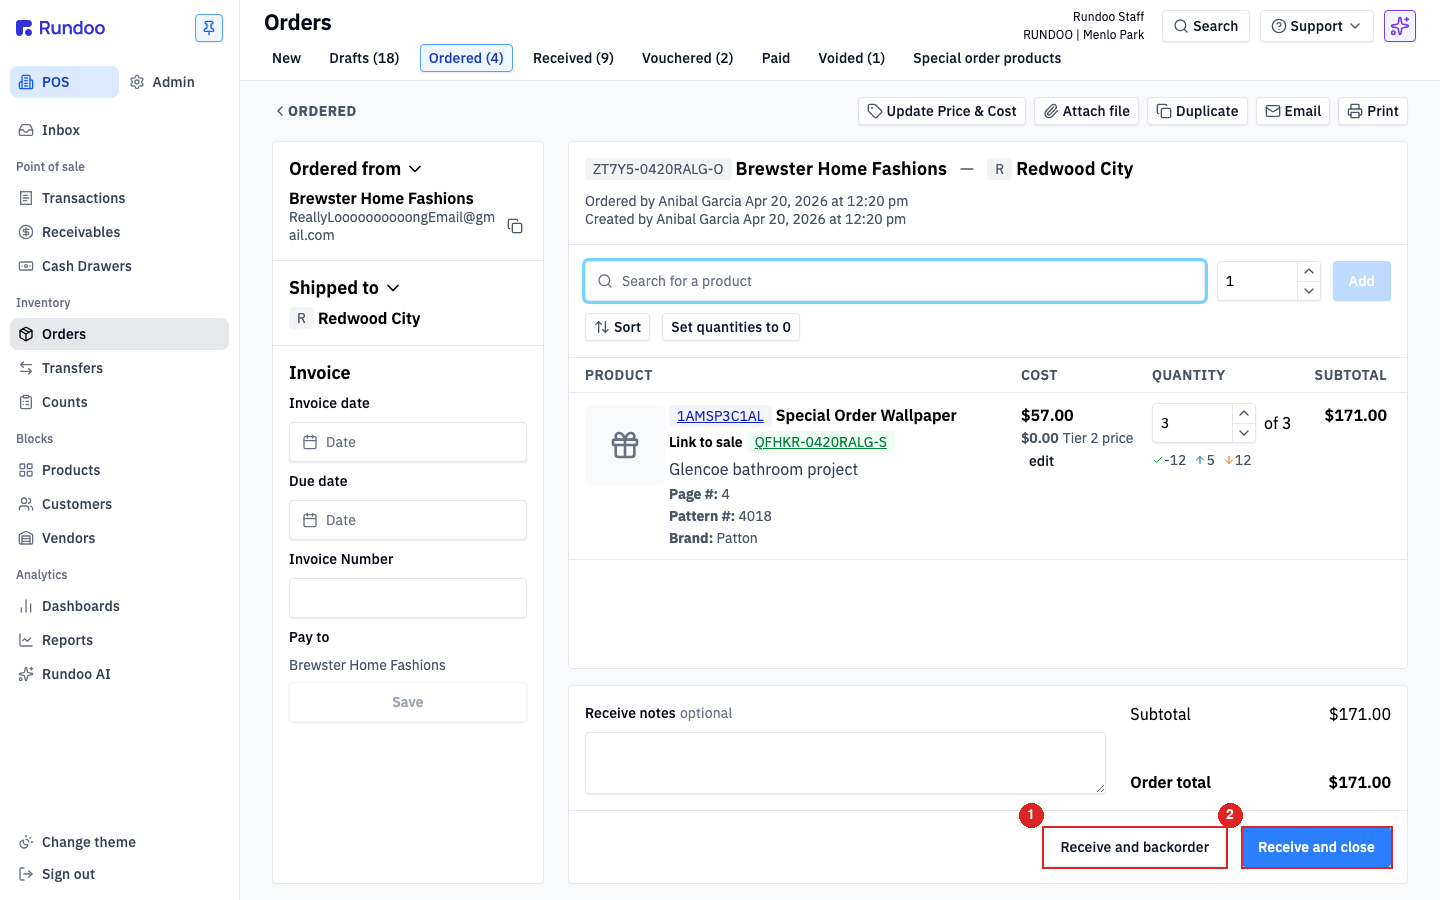
Say you ordered three boxes of deck screws and only two came in. Step that line down to two, and Rundoo shows the one that's still short. Instead of closing, click Receive and backorder. That puts the two boxes into your inventory today and keeps the order open, holding the last box on backorder until it lands on the next truck. The PO stays in Ordered until the rest arrives, then rolls into Received on its own.
With the stock on the shelf, the last thing to do is record the vendor's bill. Open the order from the Received tab, and over on the left you'll find the Invoice panel. Copy four things straight off the paper invoice: the Invoice date, the Due date, the Invoice Number, and Pay to, which already shows your vendor, so most days you leave it alone.
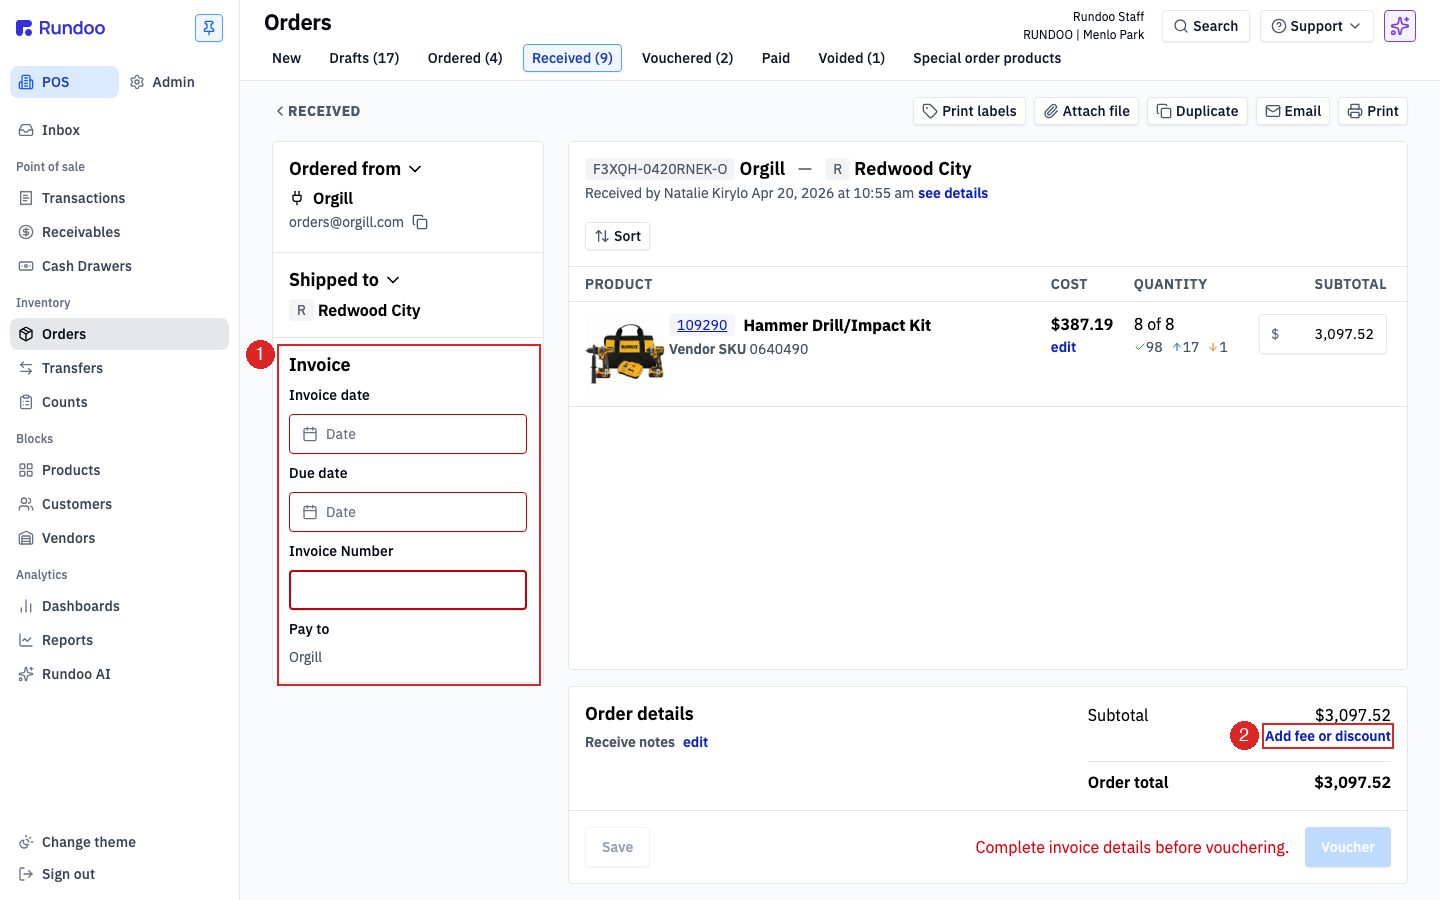
The moment all four fields are in, the Voucher button switches from grey to active. That is Rundoo telling you the bill is ready to pay. You can stop right here; the order is received and the invoice is on record. Actually clicking Voucher to send the bill over to your books is the next video, OK to Pay.
Start here
Orders → Ordered
Open the PO that matches the shipment.
Full delivery
Receive and close
Moves the PO to the Received tab.
Partial delivery
Receive and backorder
Keeps the rest open on the same PO.
Invoice fields
Date, Due, Number, Pay to
All four unlock the Voucher button.
Good to know