Where
Admin → Product → bottom
Custom Label Designer is the last section.

Getting Started with Rundoo · Setup
Build a shelf tag with the fields, sizes, and look you want.
Every store has its own look, right down to the shelf tags. Maybe you want the price bigger and bolder so customers can read it from the aisle, or your store name on every sticker. In Rundoo you build that label exactly how you want it, one time, in the Custom Label Designer. Save it once and it's ready for your whole team to print. This guide covers designing the template. Printing it at the counter is its own short video, "Tags on the Shelf."
Designing a label is an Admin job, not a counter one. Flip to Admin mode, open Product from the left sidebar, and scroll all the way to the bottom, past Unit of Measure and Inventory Settings, to the Custom Label Designer. It's a side-by-side workshop: your settings on the left, a live preview of the label on the right. Anything you change on the left shows up on the right as you go.
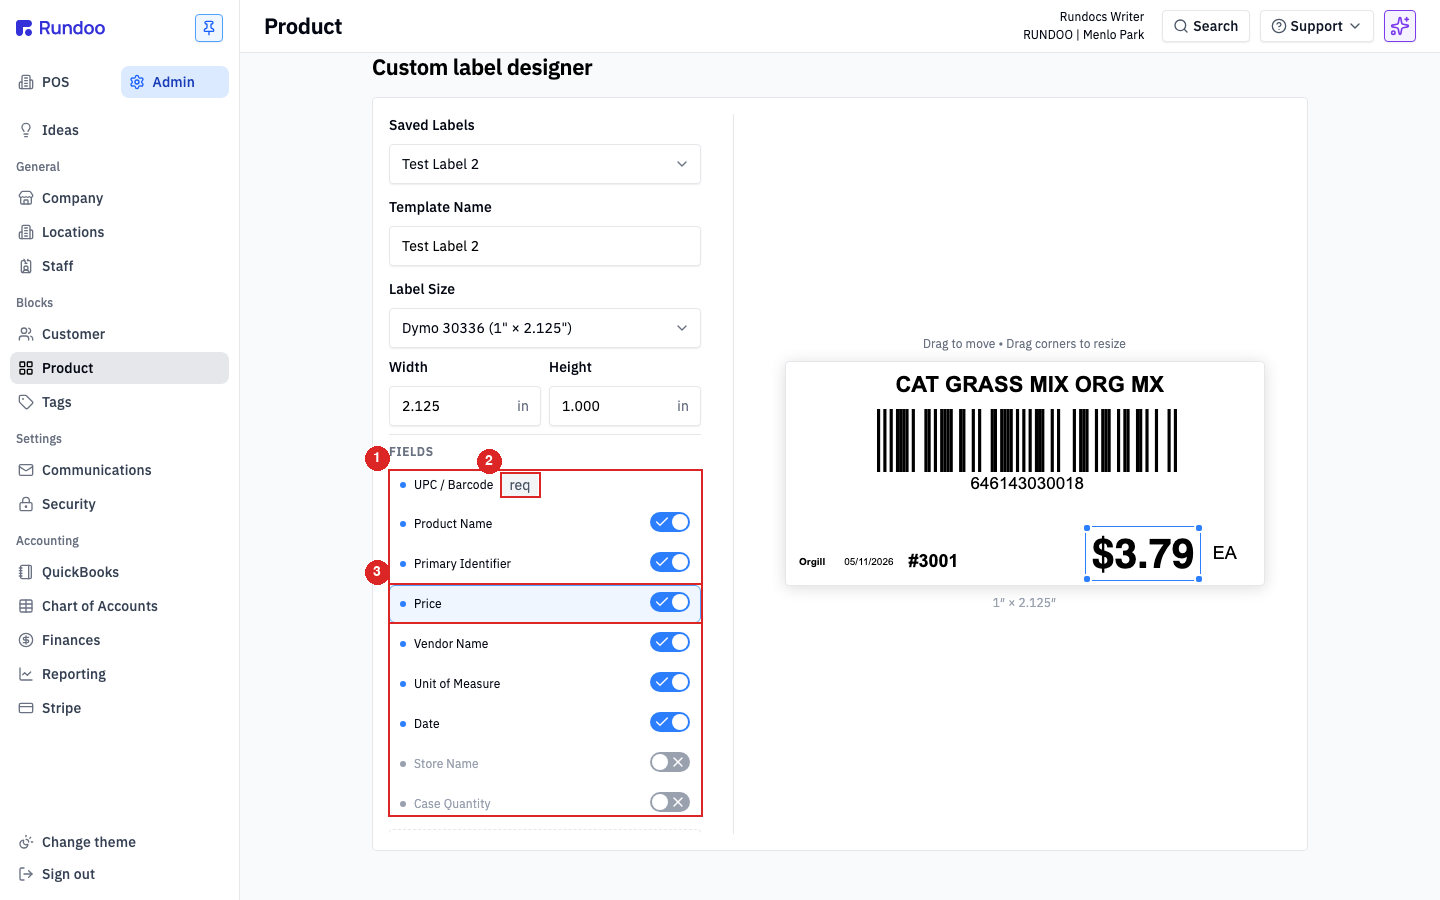
Switch to Admin mode, click Product in the left sidebar, and scroll to the bottom of the page. The Custom Label Designer is the last section. To start fresh, leave the Saved Labels dropdown alone; to tweak one you already made, pick it from that dropdown first.
In Template Name, type a name that reads clearly in a busy dropdown, like "Main Shelf Tag" or "Paint Can Front." That exact name is what every cashier sees when they go to print, so keep it short and plain.
Click Label Size and pick the preset that matches the labels you actually load in the printer. Dymo 30336 (1" × 2.125") is the most common shelf-tag size; the field defaults to Avery 5160 (1" × 2.625"). Rundoo fills in the Width and Height for you, or you can type your own for non-standard stock. Getting this right is what keeps anything from being cut off when you print.
Under FIELDS, each row is a toggle. Flip one on and it appears on the preview; flip it off and it's gone. There are nine to choose from: UPC / Barcode, Product Name, Primary Identifier, Price, Vendor Name, Unit of Measure, Date, Store Name, and Case Quantity. A common shelf tag is Product Name, Price, and Unit of Measure. Notice the UPC / Barcode row carries a "req" pill and stays locked on, so every label can still be scanned.
Click a field, either its row or the field itself on the preview, to select it. A styling panel appears with Size, Bold, $ Symbol (for Price), Font, and a Position block. Want the price to jump off the shelf? Select it, bump the size, and turn on Bold. To move a field, drag it right on the preview; drag a corner to resize it. The tag line above the preview reminds you: drag to move, drag corners to resize.
Use Add Static Field to drop text that's the same on every label, like your store slogan, "Made in USA," or a promo line. Unlike the data fields, static text doesn't change from product to product.
Scroll down and click Save Design. That's it. The moment you save, the template shows up in every cashier's Print label dropdown, company-wide, with no republish step, and it's shared across all your locations. From there, printing it onto a product is covered in "Tags on the Shelf."
Where
Admin → Product → bottom
Custom Label Designer is the last section.
Common size
Dymo 30336 (1" × 2.125")
Default preset is Avery 5160 (1" × 2.625").
Always on
UPC / Barcode
Locked on, so every label scans.
After Save Design
Live for every cashier
No republish. Shared across locations.
Good to know