Where
POS → Orders → New
Orders lands here by default.

Getting Started with Rundoo · Purchase Orders
Pick a vendor, let Rundoo suggest quantities, and save it for later.
You've spent years learning your shelves: what moves, what sits, and what always seems to run dry on a Friday afternoon. A purchase order is just how you tell a vendor to send more. Rundoo handles the paperwork behind it, so you can spend less time with a clipboard and more time behind the counter. This guide walks you through building one PO from a blank screen to a saved draft, ready to send whenever you are.
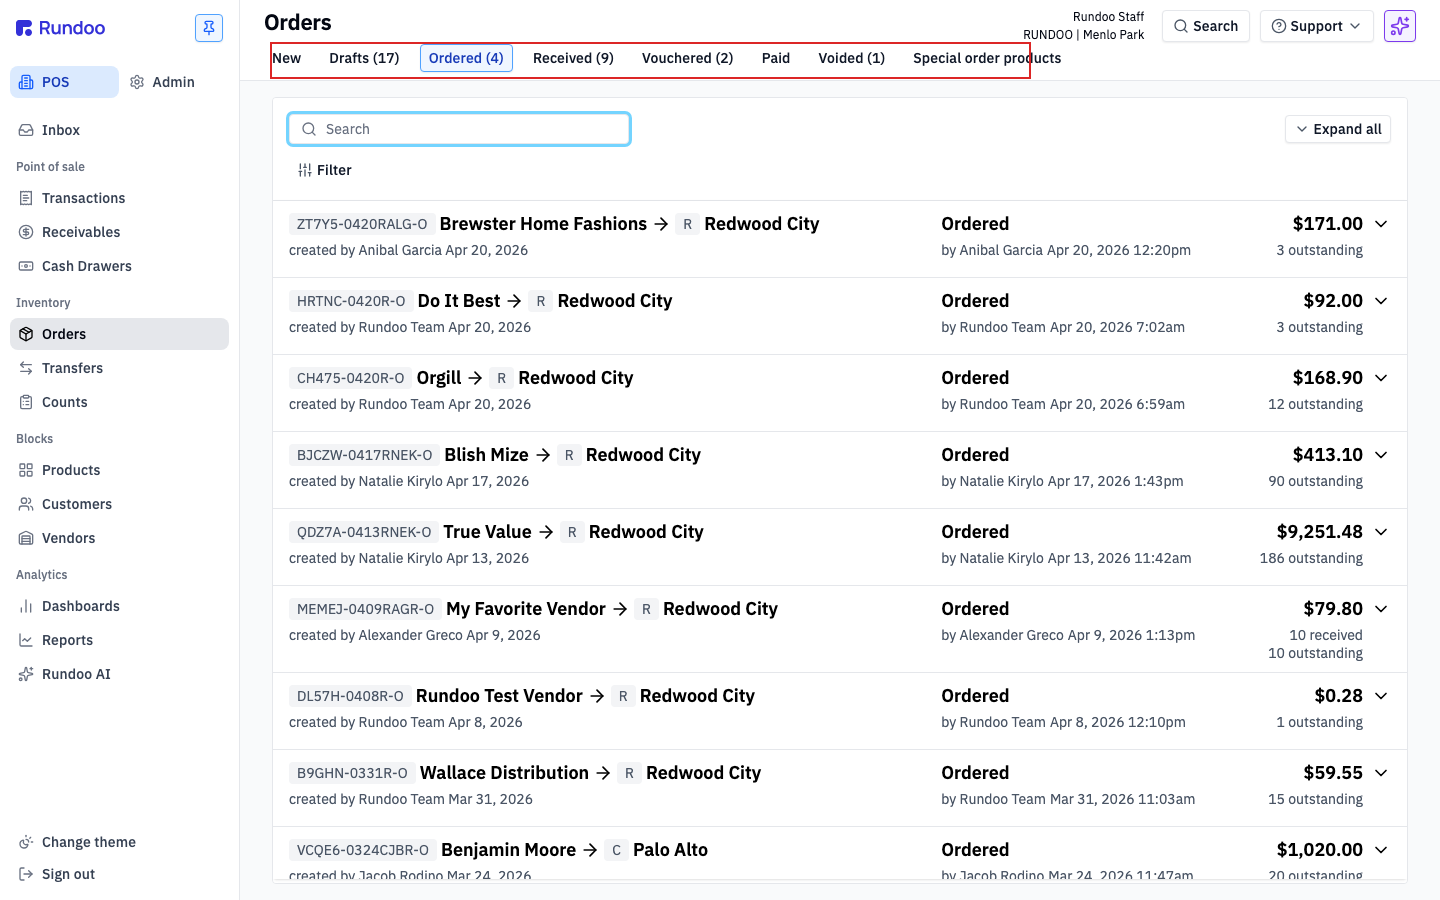
In POS mode, click Orders in the left sidebar. Every purchase order you've ever started lives here. Along the top is a strip of tabs that follows a PO through its whole life, left to right: New, Drafts, Ordered, Received, Vouchered, Paid, and Voided. Each tab carries a live count of how many POs are sitting in that stage. We're starting all the way at the left, in New, to build one from scratch.
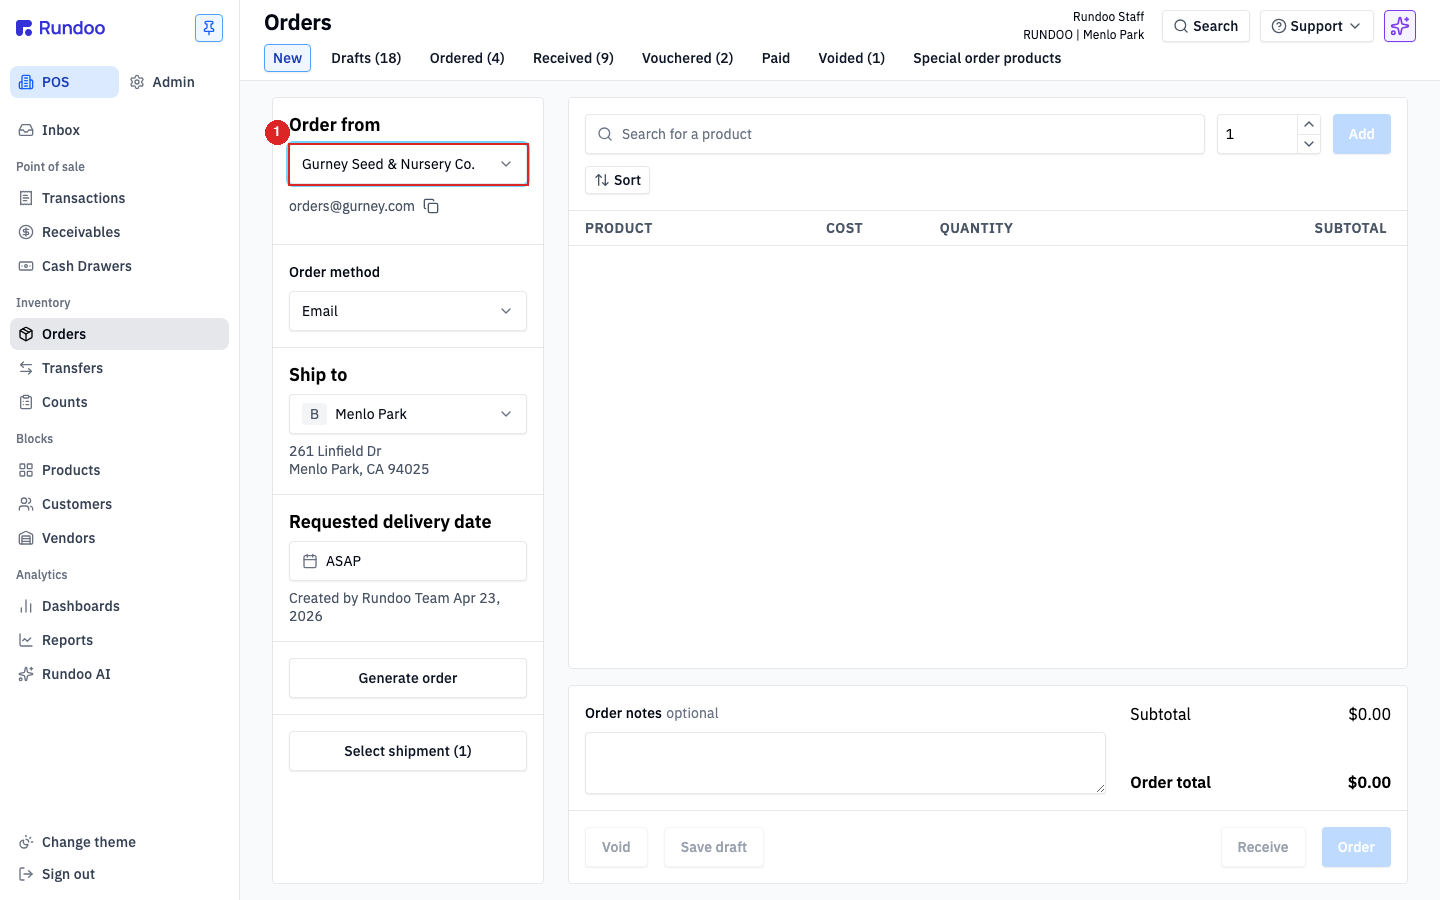
Clicking Orders lands you on the New tab by default. This is the order builder: Order from on the left, a product search across the middle, running totals on the right, and a row of action buttons along the bottom. Most of it looks greyed out right now, and that's on purpose. One choice wakes it up.
First things first: tell Rundoo who you're ordering from. Click Order from, start typing a vendor name, and choose from your list. The moment you pick one, the rest of the form unlocks. The side panel fills in with the Order method (how the PO will reach the vendor later), Ship to (defaults to your current location), and a Requested delivery date (defaults to ASAP). Don't see the vendor you want? They probably haven't been added yet, and you can create them on the Vendors page.
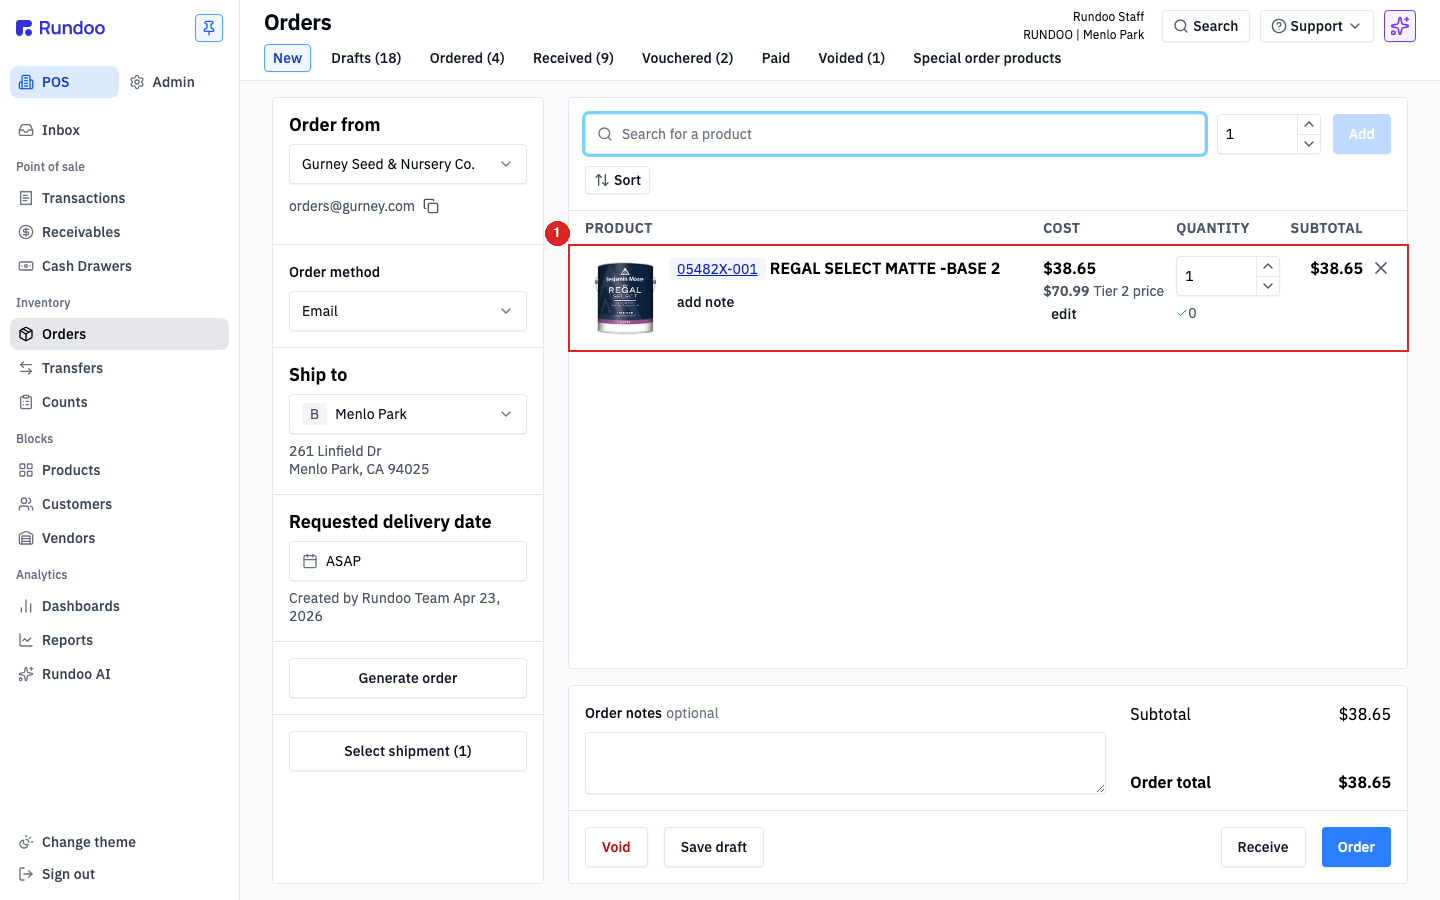
Click into Search for a product and start typing. Rundoo matches on name, SKU, or vendor SKU. Set a count with the stepper and click Add, or drop the line on first and type the number into its QUANTITY cell. Got a scanner at the counter? Scanning a barcode drops the matching product straight onto the cart.
Each line shows COST, QUANTITY, and a running SUBTOTAL. Cost defaults to the product's vendor cost. Click edit under it to override for this order (say a contract price or a one-off deal), and click add note on a line to leave the vendor a note like "substitute OK."
Here's where Rundoo saves you the guesswork. Instead of building the whole list from memory, click Generate order in the side panel. Rundoo looks at what you've been selling and what's on your shelves and works out a full restock for you.
Two methods sit behind that button, and you pick one per vendor. Predictive forecasts from last year's sales for this same stretch of the calendar, so the season is baked in. It's the natural fit where velocity matters. Min/Max is simpler: when a product drops below the minimum you set, Rundoo tops it back up to the maximum.
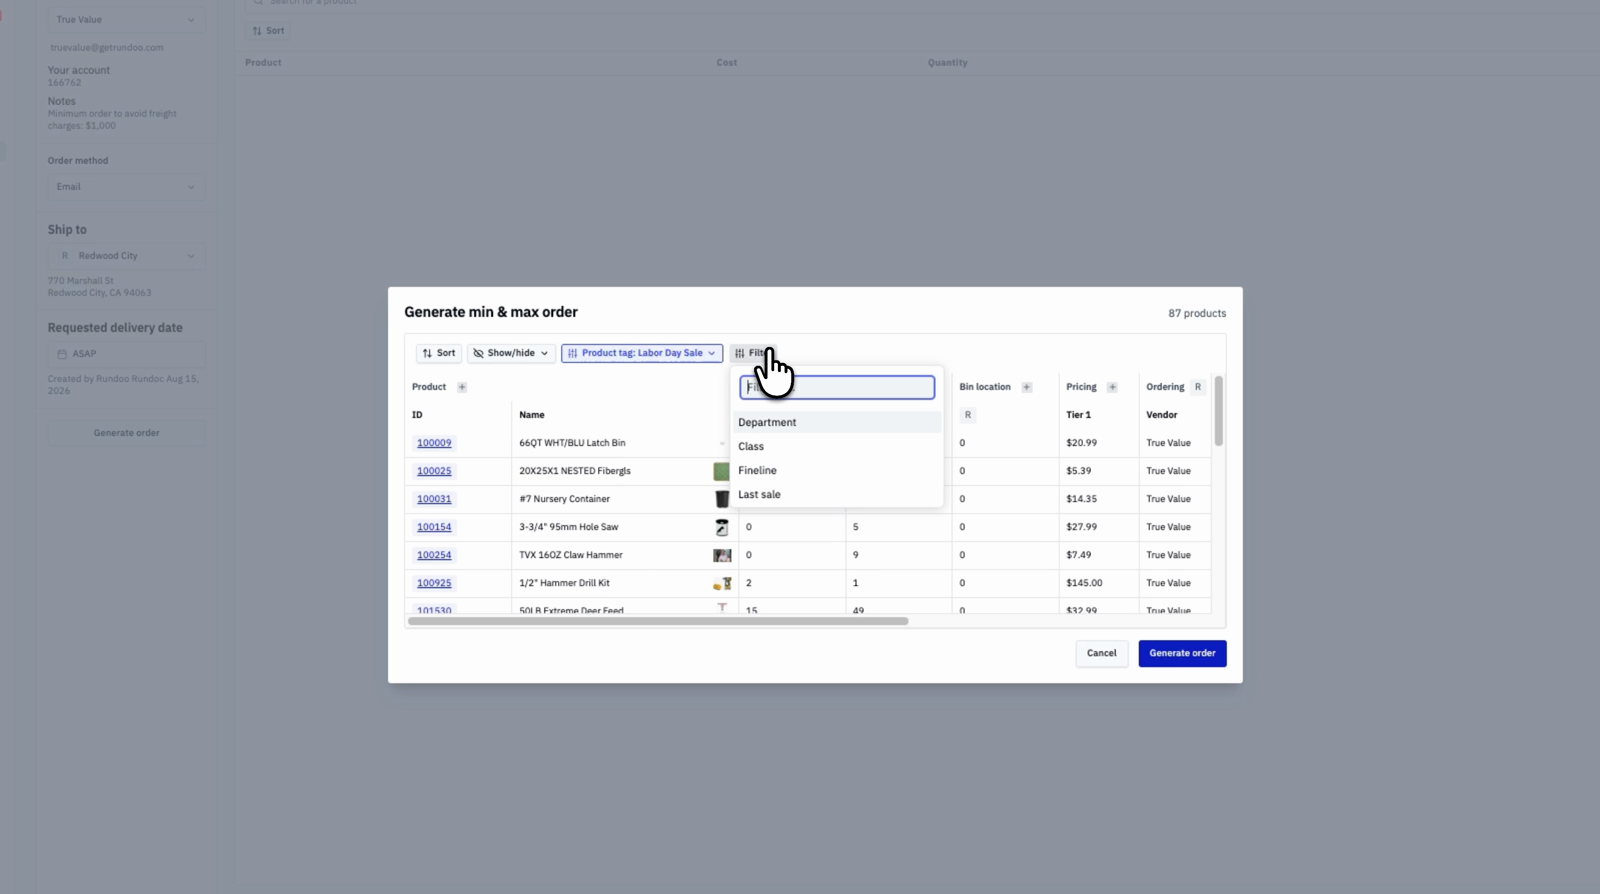
Rundoo doesn't drop the whole restock straight into your cart. First it shows you the suggested products so you can look them over, and for a busy store that list can run long. Filters sit across the top so you can narrow it to just the part of the store you're buying for. Restocking for an upcoming sale, or topping up one aisle? Click Filter and pick a Product tag (say a Labor Day sale), or get as specific as Department, Class, Fineline, or Last sale. Your list shrinks to just those items.
You still hold the reins. Change any quantity, or if an item was tagged by accident, take it right off the order. When it looks right, click Generate order and those lines drop into your cart. Filtering keeps the order accurate and saves you from overstocking off a giant list you'd otherwise have to sift through.
When the order looks right but you're not ready to send it, click Save draft at the bottom right. The PO leaves the builder and lands on the Drafts tab, safe to pick back up whenever you like. That's the whole job for this video. In the next one, From Draft to Ordered, we pick this draft up and send it off to the vendor.

Where
POS → Orders → New
Orders lands here by default.
The one required field
Pick a vendor
The builder stays locked until you do.
Suggested quantities
Generate order
Review first, then filter by tag, department, class, fineline, or last sale.
Save for later
Save draft
Find it again on the Drafts tab.
Good to know