Where they live
Admin → Tags
Create, edit, and delete. See the Linked blocks count.

Getting Started with Rundoo · Setup
Tag any product or customer, then pull up the whole group in one click.
You already know your store better than any software does. You know which products are part of your spring seasonal push, and you know which regulars are your key contractors. A tag is just a digital label you stick on those groups, so instead of scrolling and squinting, you pull the whole group up with a single click. Same idea for products and for customers, and none of it touches your receipts or your books.
Tags are flat labels, no parent and child to fuss over, and you can put as many on a record as you like. A single product can carry a dozen of them. Use tags for the groupings your categories can't express cleanly: aisle numbers, vendor programs, seasonal pushes, contractor affiliations. They live in Admin, under Tags in the left sidebar, where every tag in the company is listed with its Type, color, and a Linked blocks count.
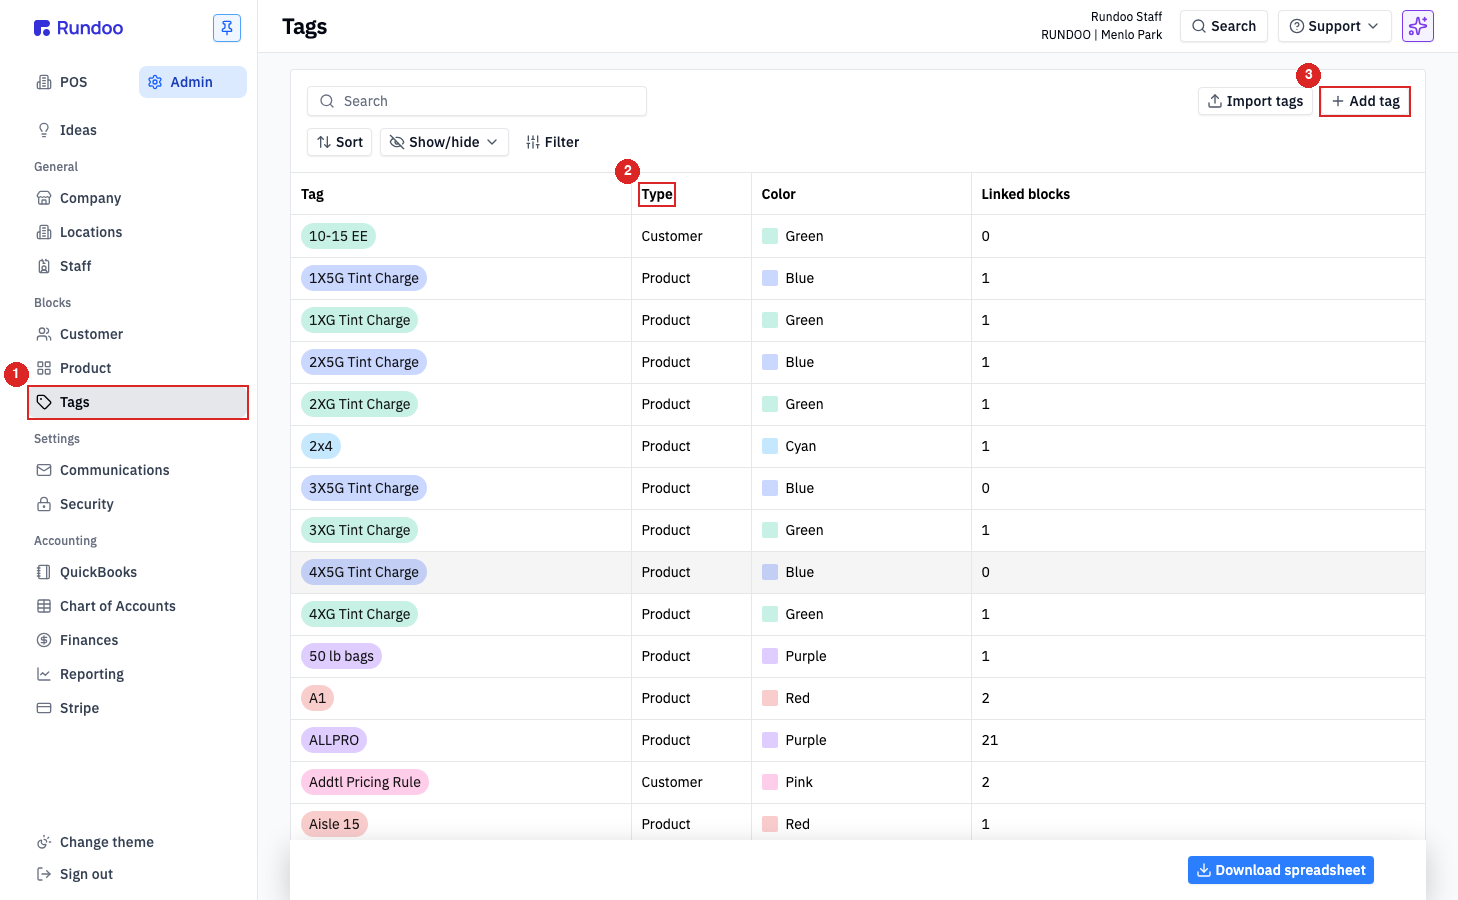
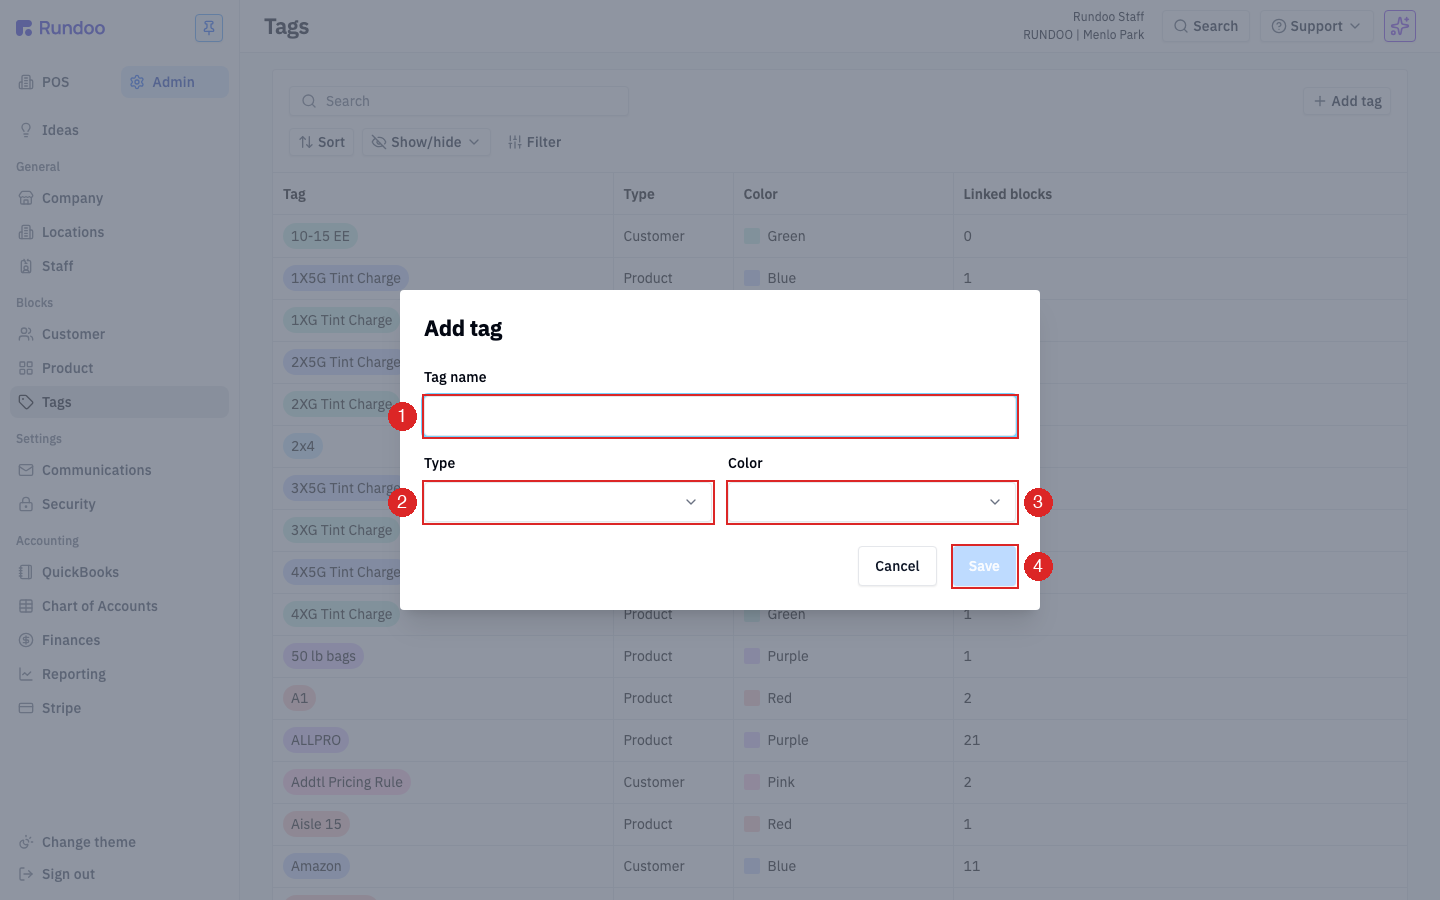
Say you want a group for your contractors. In Admin, open Tags and click Add tag in the top-right. Give it a name like "Contractor". Then pick a Type, either Product or Customer, and a color to make the pill easy to spot. Click Save.
Get the Type right the first time. A tag's Type is locked once you save. A Customer tag can never move to a product, and a Product tag can never move to a customer. If you pick wrong, you have to delete it and start over, so choose before you save.
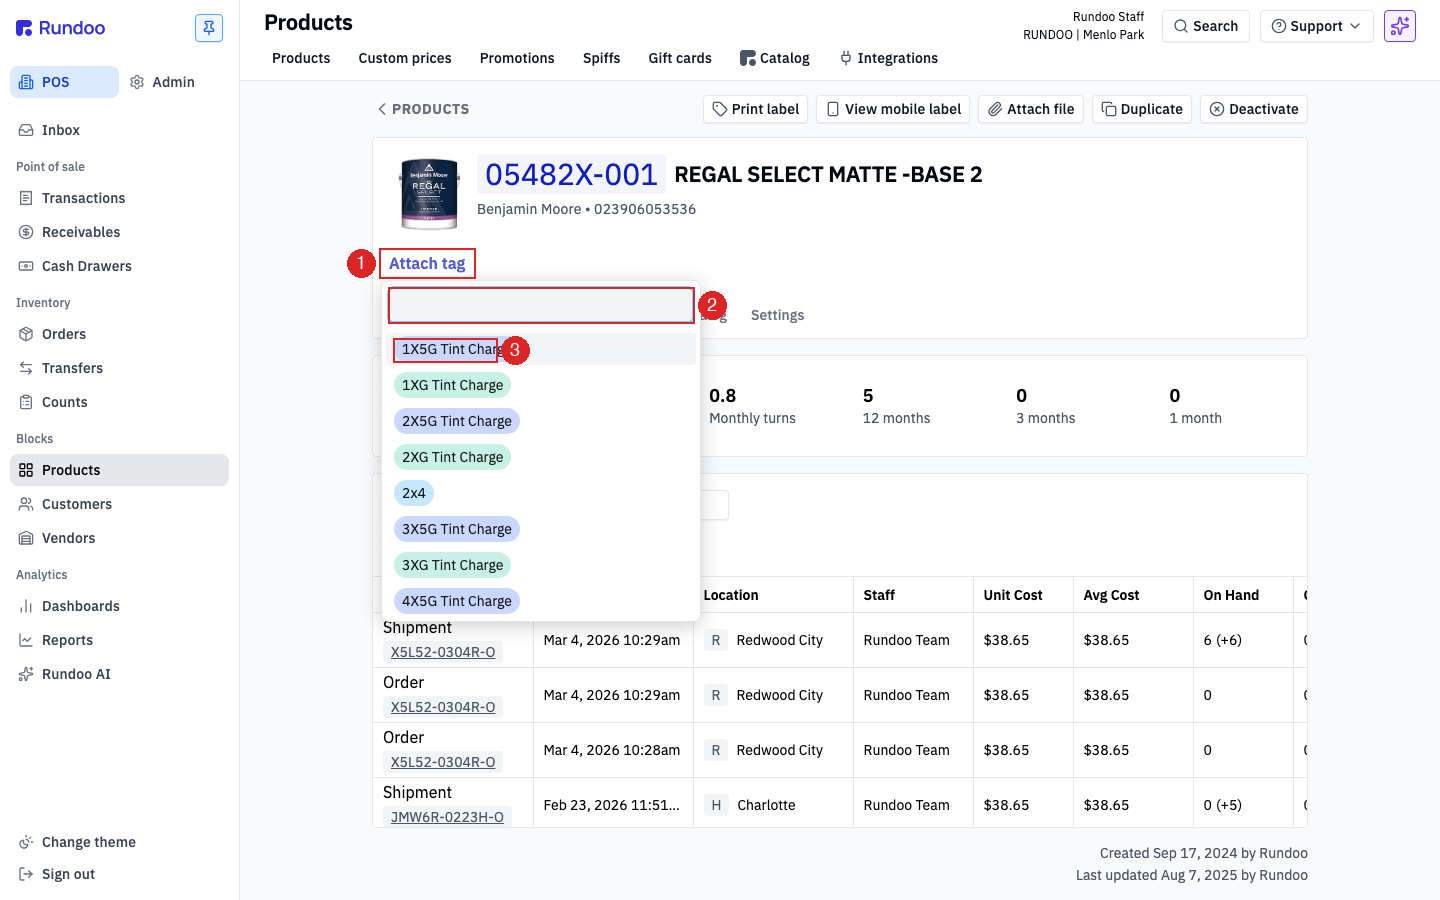
You attach tags from the thing you want to label, not from the Tags screen. Open a customer's detail page in POS → Customers, find the Attach tag link near the top, click it, and pick "Contractor" from the list. The picker only shows tags of the matching type, so you can't accidentally hang a product tag on a customer.
Products work the exact same way. On a product, the Attach tag link sits right under the product image. Click a pill to attach it, and click its little × to take it back off.
Here is where the work pays off. Back on your list, click Filter in the strip above the table and choose Customer tag (or Product tag on the products list). Click the filter pill, pick "Contractor", and the list instantly narrows to just that group. That is the whole promise: label once, find them all in one click.
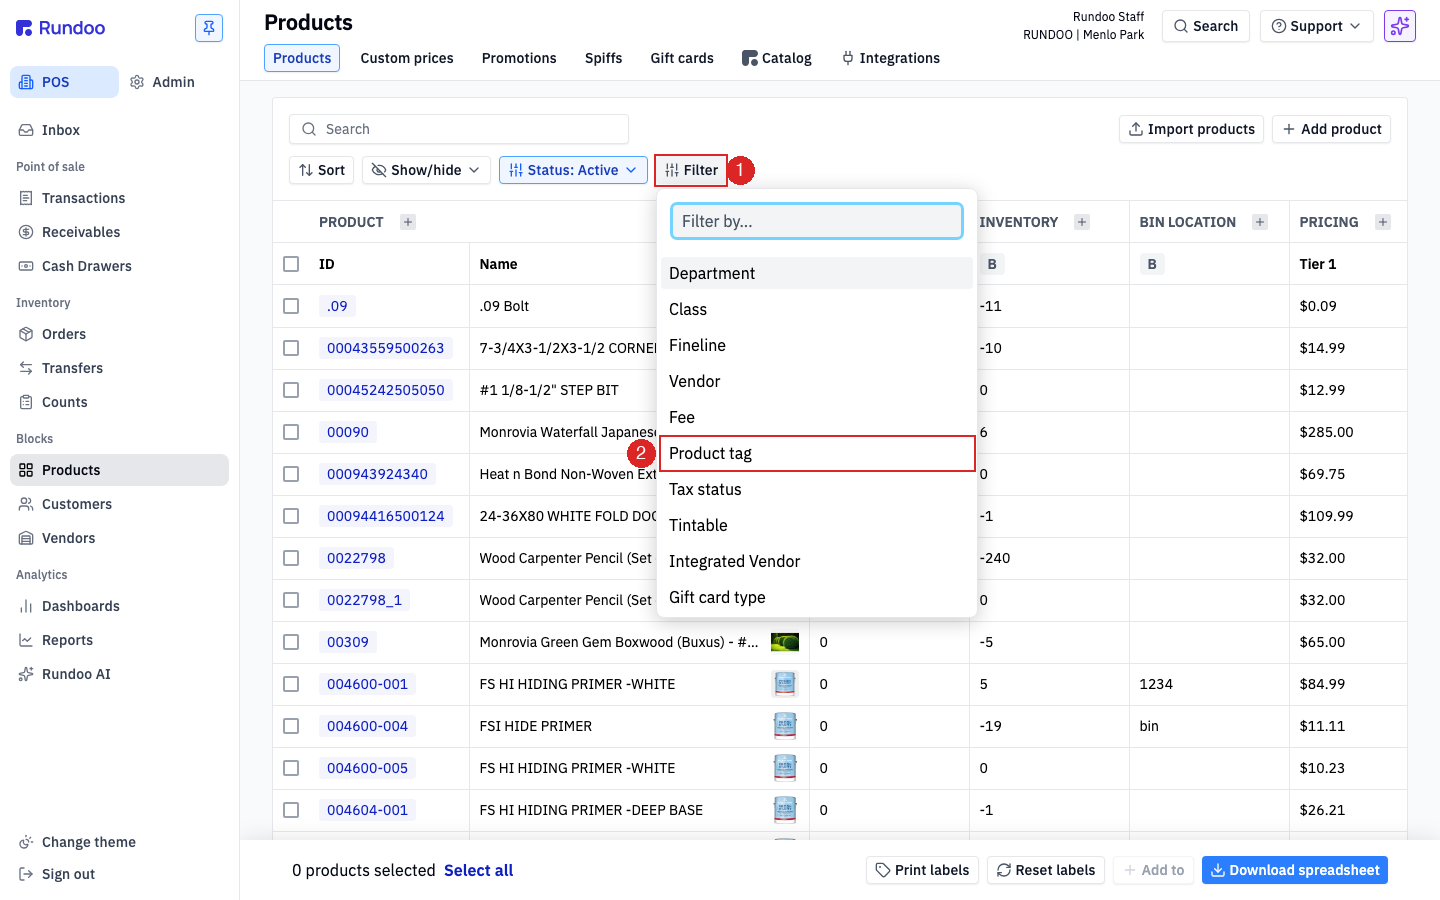
The product side is the identical routine. Create a "Spring" tag with the Type set to Product, attach it to your seasonal items, then filter your product list by Product tag to see them all together. Same three steps, different purpose. And because tags flow into reporting, you can slice sales, margin, or inventory by any tag you've built over in Admin → Reporting.
Back on the Admin → Tags list, the Linked blocks column shows how many records carry each tag, which makes dead tags easy to spot. Click any tag row to open its edit modal and rename it or delete it. One caution worth repeating: deleting a tag is permanent, so be thoughtful before you clear one out.
Where they live
Admin → Tags
Create, edit, and delete. See the Linked blocks count.
Two types
Product or Customer
Picked at creation and locked. Choose before you save.
Attach
Attach tag on the record
Under the product image, or near the top of a customer page.
Find the group
Filter → Product / Customer tag
Also filters reports for sales, margin, and inventory.
Good to know