Where
Customers → open customer → Settings
Scroll past Financing to the Statements section.

Getting Started with Rundoo · Statements
Set each customer's statement format, then mail it, email it, or charge it automatically.
No two charge customers want their bill the same way. One contractor just wants a clean list of what's still open, another wants the full running ledger. One pays by card without you lifting a finger, another wants a paper copy in the mailbox. In Rundoo you set all of that once, per customer, on their Settings tab. After that, every statement run just follows the rules you laid down.
These are per-customer settings, so they live on the customer, not in company settings. From POS mode, click Customers in the left navigation, open a charge-account customer, and click the Settings tab. Scroll down past the Financing section and you'll find Statements. That one panel holds how this customer's bill is paid, delivered, and formatted.
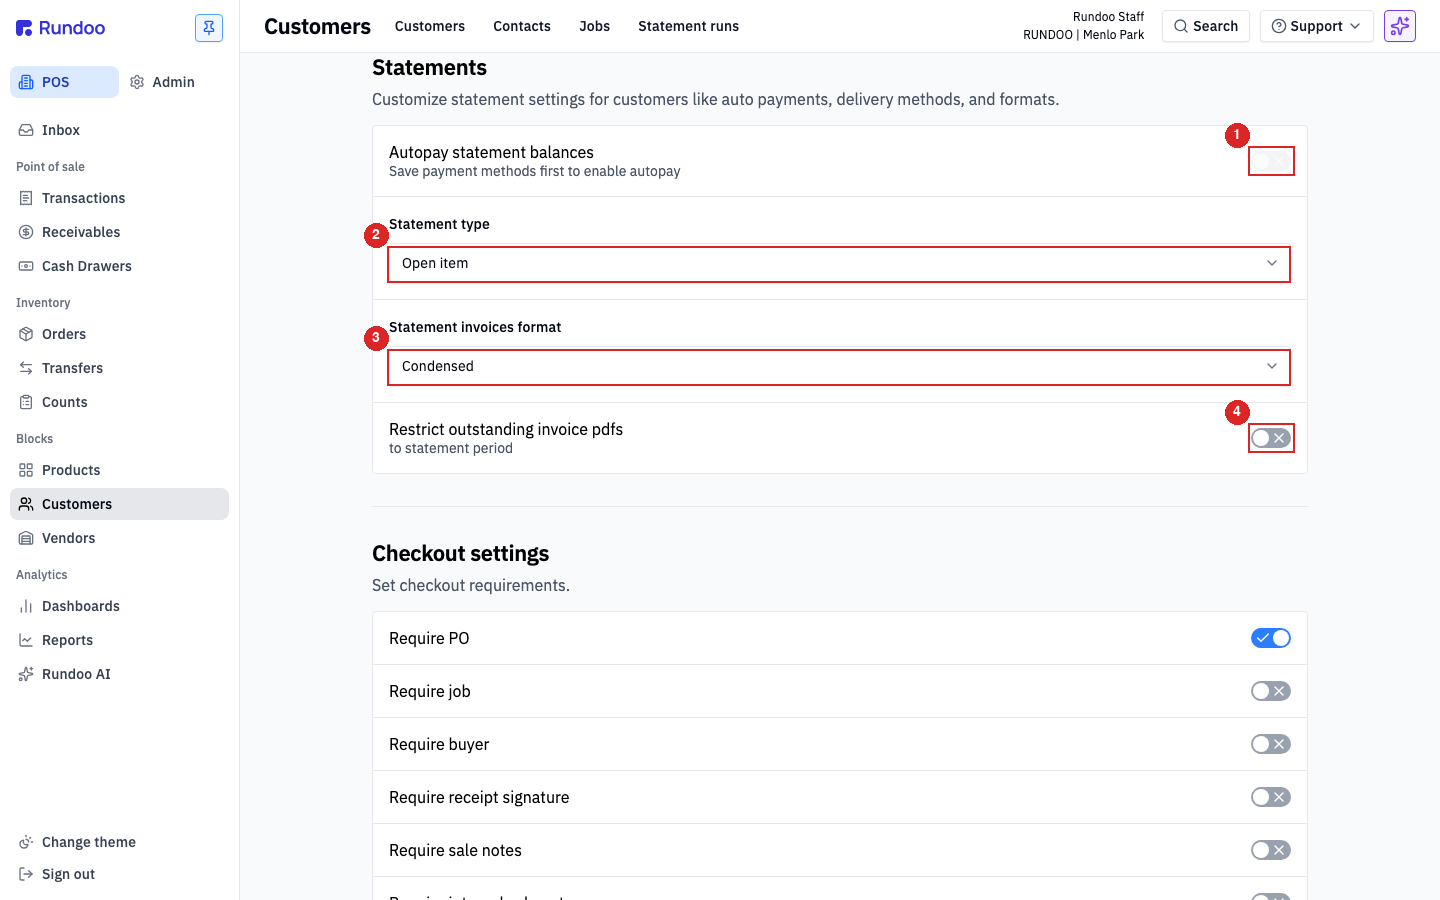
Click Customers, open a contractor or anyone who carries a balance, then click their Settings tab. Scroll down a bit, right past the Financing section, to Statements.
If the customer wants their balance handled hands-off, flip on Autopay statement balances. When a statement runs, Rundoo charges their saved card or bank for the balance. You need a card or bank account saved on the customer first (in the Cards or Bank Accounts sections just above), otherwise the toggle stays greyed out with a reminder to save a payment method.
For a customer who likes paper, turn on Mail statements. Just make sure they have a mailing address saved in the General section of their profile, and Rundoo will pull them into the print pile when you run statements.
Email is set a little differently. It's per contact, not one switch for the whole customer. Scroll up to the Contacts list on the same profile, click the person who should get the bill (usually whoever handles the money), flip on Email statements for them, and Save. Turn it on for as many contacts as you need.
Back in the Statements section, open Statement type. Open item is the default and the most common: it lists just the invoices still open at the end of the period, so the customer sees exactly what they owe. Balance forward shows the full running ledger, a starting balance plus every invoice, payment, and credit in the period. Most stores stick with Open item unless a customer asks for that running history.
Open Statement invoices format to decide whether copies of the invoices ride along with the statement. None sends just the summary page. Full page attaches every invoice on its own sheet. Condensed is the paper-saver, fitting several invoices onto a page. If this customer is on Open item, you can also switch on Restrict outstanding invoice PDFs to statement period so the attached copies stay clipped to the current period.
Where
Customers → open customer → Settings
Scroll past Financing to the Statements section.
Statement type
Open item or Balance forward
Open item shows what's still owed; Balance forward is the full ledger.
Invoices format
None, Condensed, or Full page
Condensed fits several invoices on one page.
Delivery
Autopay, Mail, or Email
Autopay and Mail on Settings; Email is per contact.
Good to know