The lifecycle
Received → Vouchered → Paid
One order, one path, three tabs.

Getting Started with Rundoo · Purchase Orders
Voucher a received order into a bill, then mark it paid.
The truck came in, the stock is on the shelf, and you have keyed in the vendor's invoice details. Now it is time to handle the bill. Vouchering is the handoff from the warehouse side of your shop (what showed up) to the accounting side (what you owe). This guide picks up right where receiving left off, with the Voucher button lit and ready, and walks the order all the way to paid.
Checking in the truck and entering the four invoice fields (invoice date, due date, invoice number, and pay-to vendor) is its own video, "Check In the Truck." Once those are filled in on a received order, the Voucher button at the bottom right turns blue. That is your starting line here.
With the invoice details in, click Voucher. That one click tells Rundoo this is now an official bill that needs to be paid. The order leaves the Received tab and moves over to the Vouchered tab. Nothing about your stock counts changes. You are only recording the paperwork.
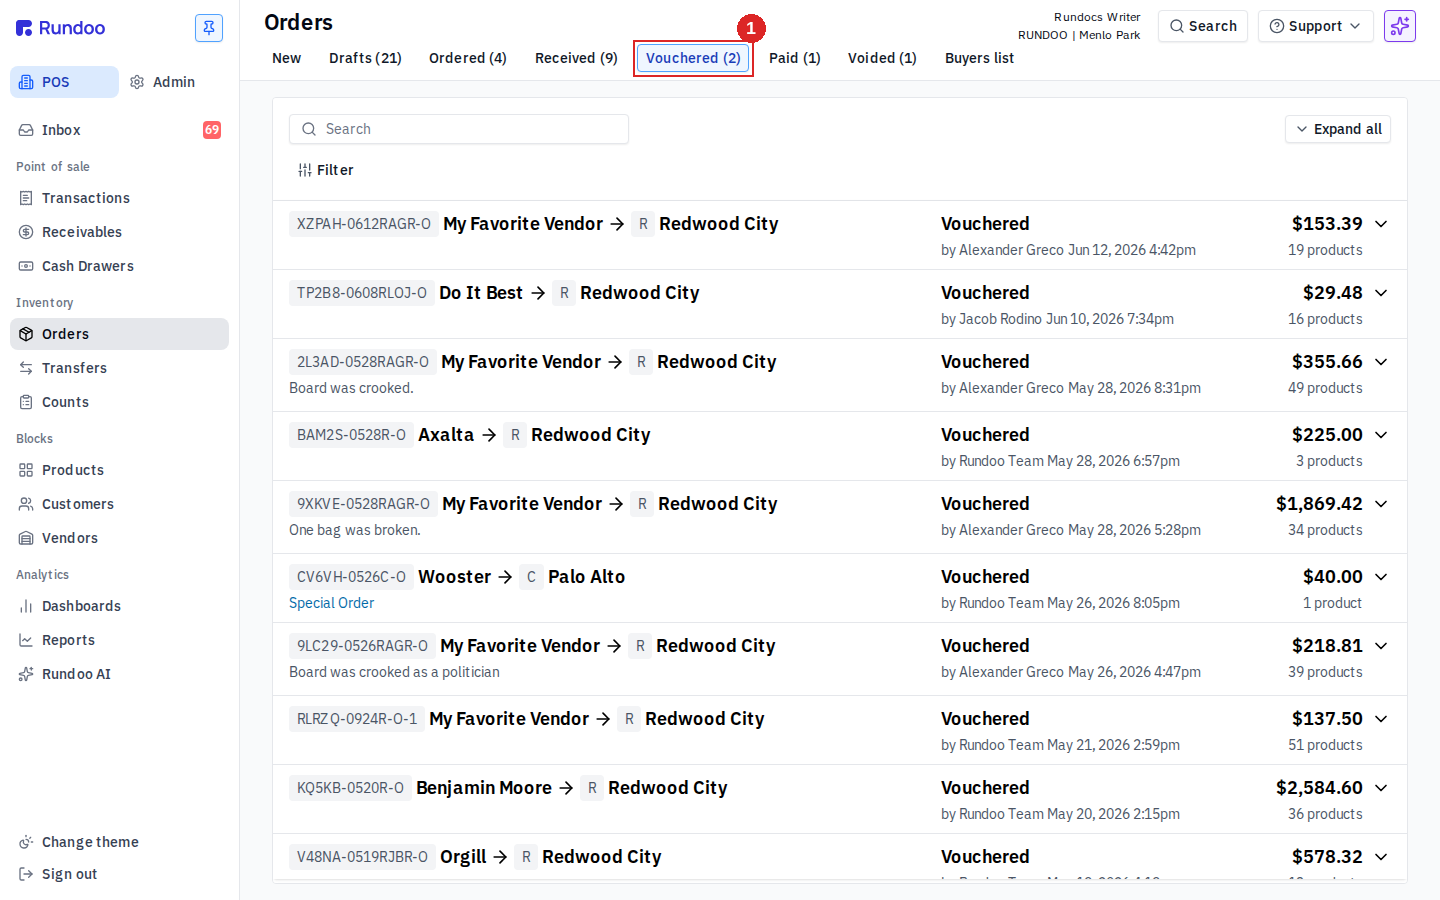
Open POS → Orders → the Vouchered top tab. Every row here is an unpaid bill, so this is the single place to see everything you owe your vendors right now. There is no separate accounts-payable list anywhere else in Rundoo. Each row shows the order number and vendor, the location it was received to, who vouchered it and when, a Vouchered status pill, and the invoice total on the far right. The tab label carries a live count, like Vouchered (2), so you can tell at a glance how many bills are in flight. Use Filter to narrow to one vendor when you are cutting a batch of checks.
If you use the QuickBooks integration, vouchering is the step that sends the bill over. It is not instant. A purchase order you voucher today shows up in QuickBooks the next morning, as a purchase-journal entry that debits Inventory and credits Accounts Payable. So do not worry if you do not see it right away. That is expected. If a PO has been vouchered for more than a day and still is not there, check the sync status under Admin → QuickBooks.
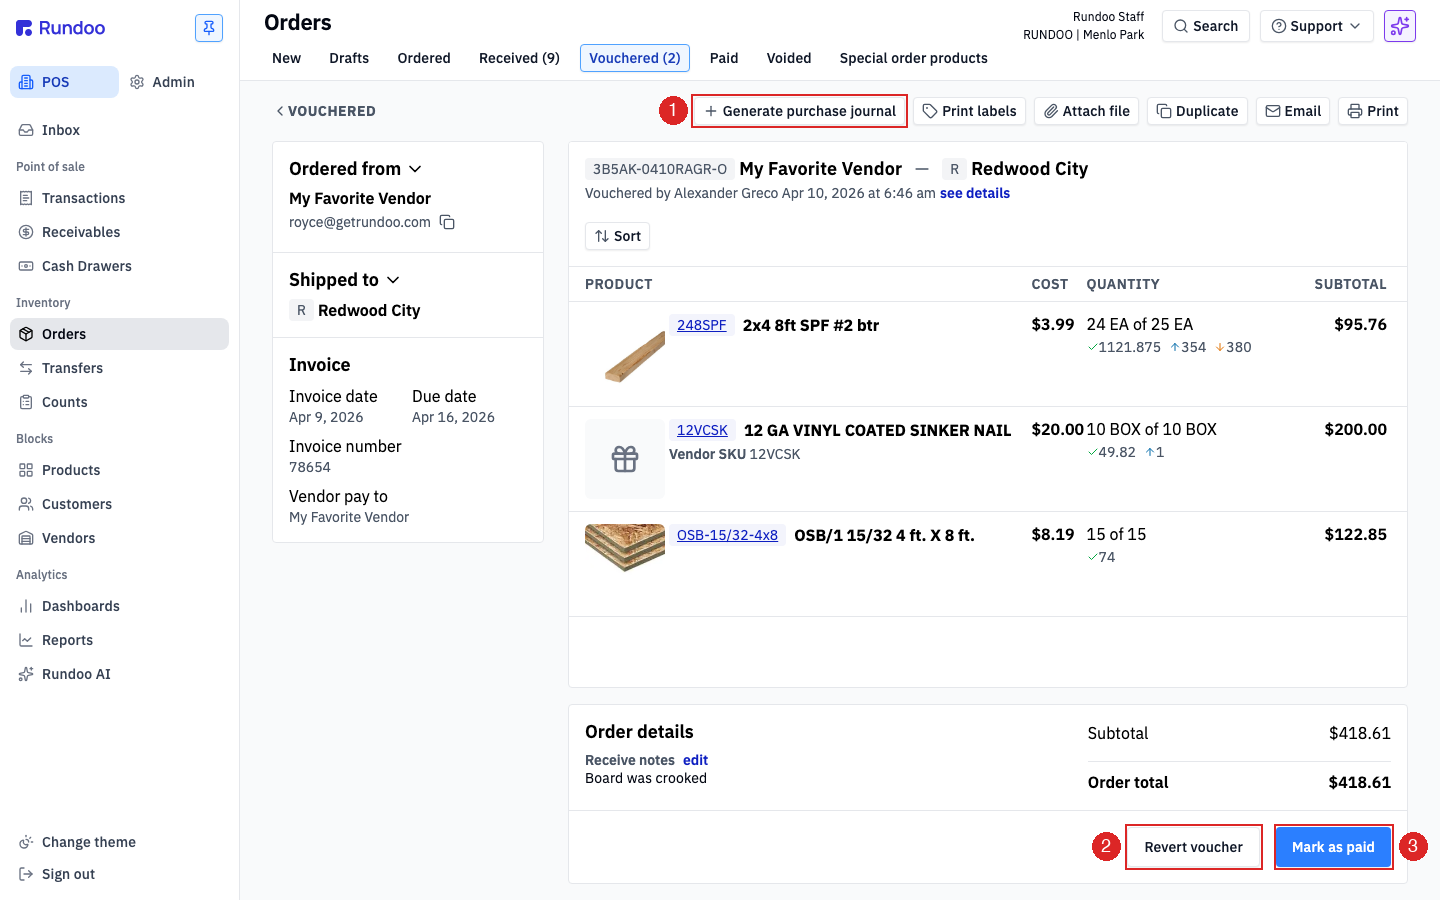
Say you catch a wrong invoice number after vouchering. No problem. Click the order to open it from the Vouchered tab. The invoice panel on the left is now read-only, and the buttons at the bottom right have changed to Revert voucher and Mark as paid. Click Revert voucher and the order drops right back to Received with the invoice details unlocked so you can fix them. It reverses the journal entry cleanly and does not touch your stock counts at all. Fix the detail, then click Voucher again. Reverting only works while the bill is unpaid, and since you are in your practice store, go ahead and try it without worrying about your real books.
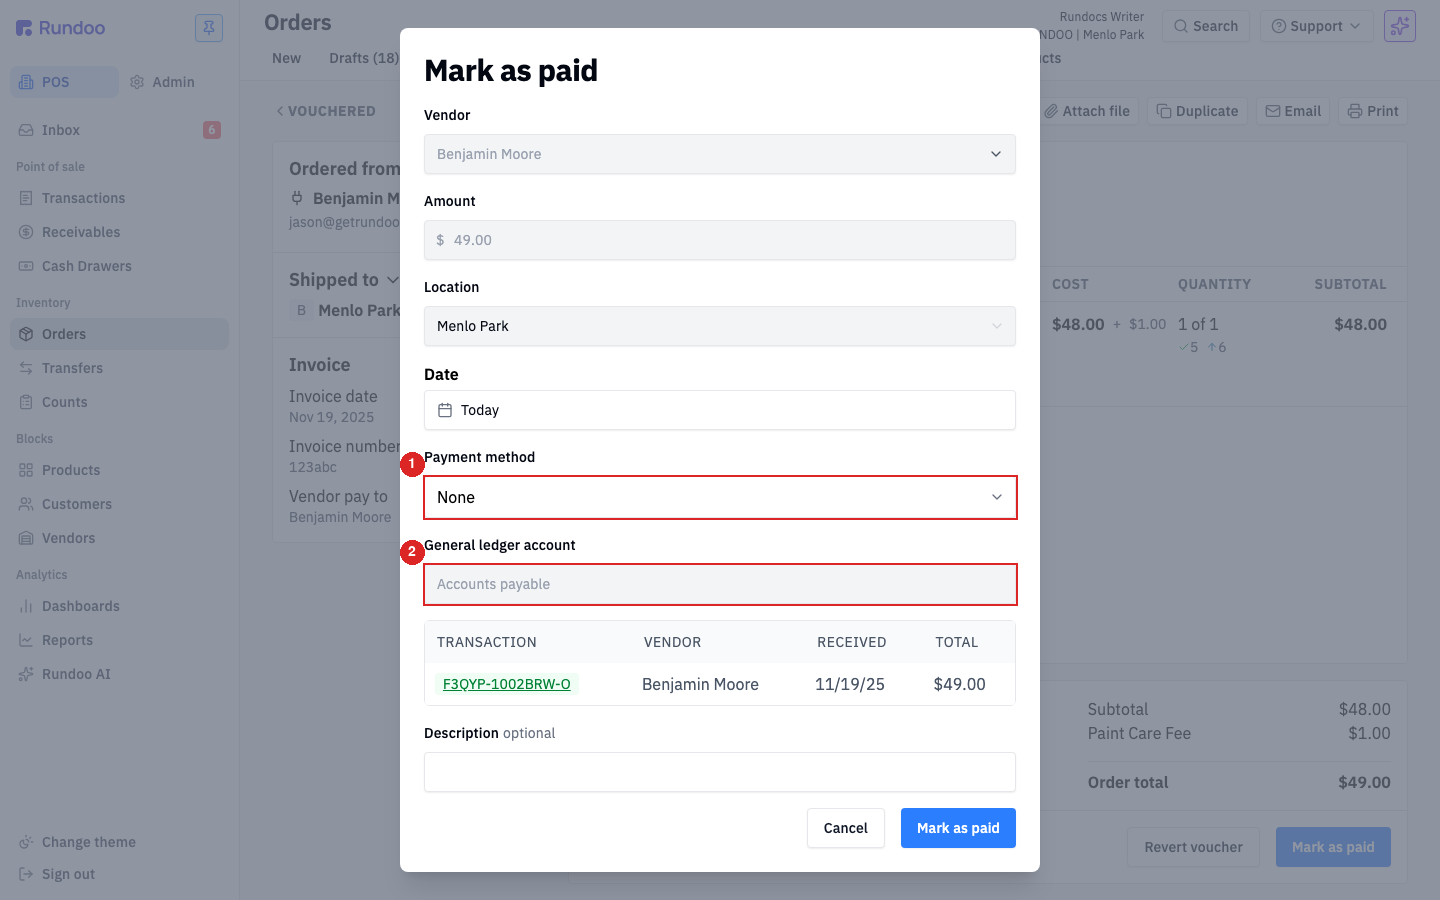
Once you have cut the check or sent the payment, open the order and click Mark as paid. A window opens with the vendor, amount, and location already filled in, the date set to today, and the general ledger account set to Accounts payable. The one decision that matters is Payment method: pick how the money actually moved (Card, Cash, Check, or Bank transfer). Choosing Check reveals a print check link if you use pre-printed check stock. Add a check or confirmation number in Description if you like, then click Mark as paid at the bottom.
Marking it paid is the only way an order leaves the Vouchered tab. In the same click it moves to the Paid tab (the sibling tab immediately to the right), your accounts-payable balance drops by the payment amount, and Rundoo posts a second journal entry: debit Accounts Payable, credit whatever you paid from. That settles the bill and closes the loop.
The lifecycle
Received → Vouchered → Paid
One order, one path, three tabs.
Where AP lives
POS → Orders → Vouchered
Every unpaid bill, in one list.
Fix a mistake
Revert voucher
Works only while the bill is unpaid.
QuickBooks
Syncs overnight
Voucher today, see it in QBO tomorrow.
Good to know