Create
POS → Customers → Add customer
Phone and Name required. Set the Pricing tier.

Getting Started with Rundoo · Setup
Add a customer and set them up to charge on their tab.
You know your best customers by name. So when a regular you trust, say a local contractor, asks if they can start putting their materials on a tab, you want to set that up right the first time. Opening a house account in Rundoo is two moves: create the customer, then give them a finance term. This is the fuller setup, with pricing, a charge term, and a credit limit. If you just need a quick counter add for a walk-in, the "Adding a Customer" video has you covered.
Every new customer starts as retail (they pay at the counter every time). What turns them into a charge account is one field: their Finance term. Leave it on Cash and they stay retail. Switch it to a statement-based term like Net 30 Statement and Rundoo treats them as a charge account, which is what makes the Charge account button appear at checkout. Keep that in your back pocket and the rest of this is just filling in the blanks.
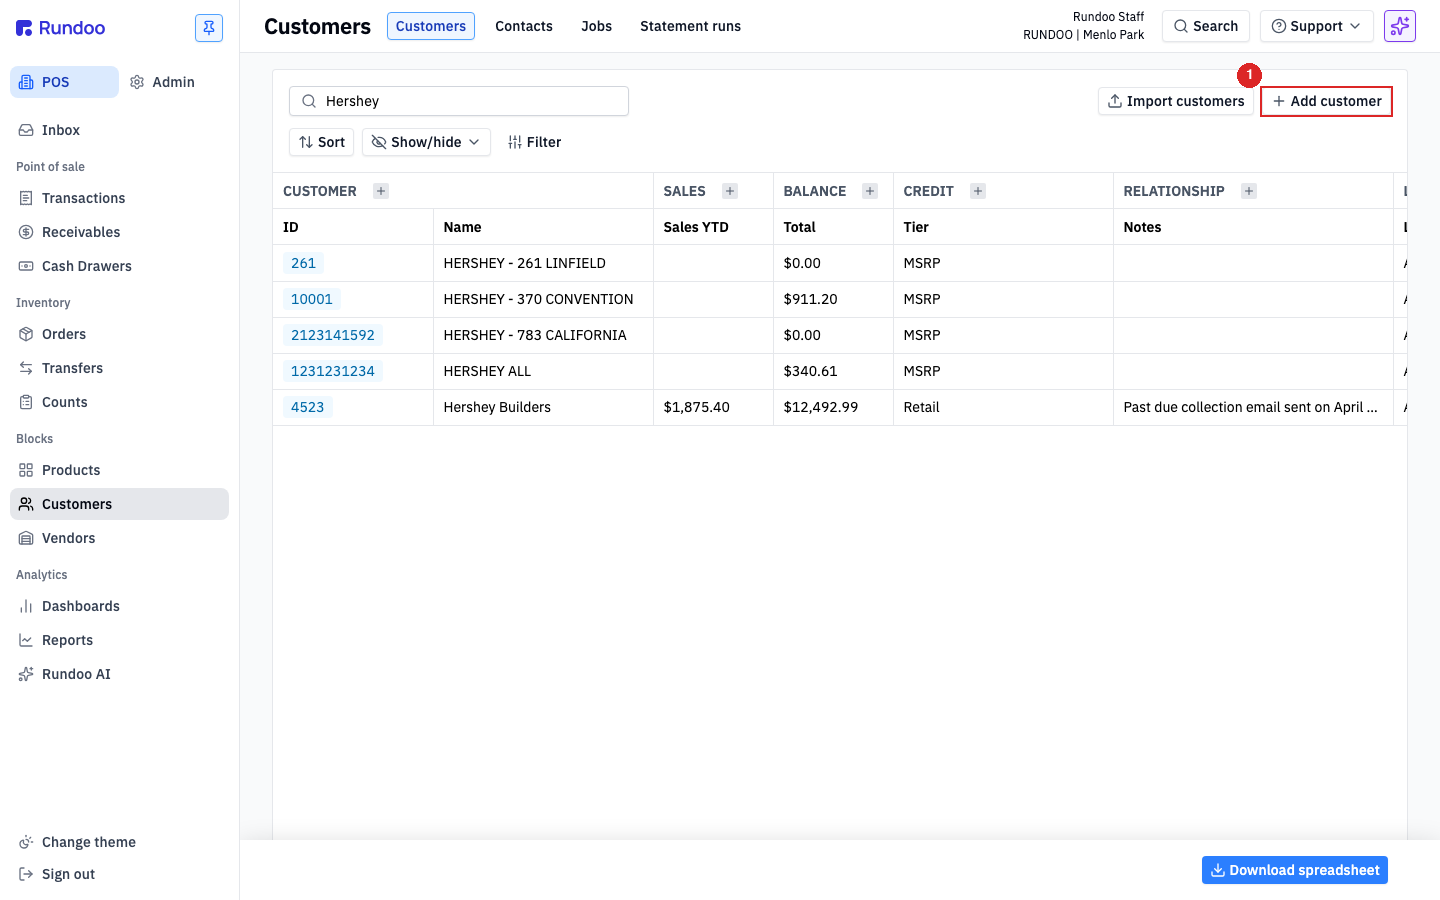
In the left sidebar, make sure you're in POS, then click Customers. This is your whole customer book. Up in the top-right, click Add customer to open the new-customer form.
Only two fields are required, Phone and Name, so you can move fast. Type the phone number and the business name (for example, Riverside Contracting). Email and address are optional and can wait.
The one field worth a second look is Pricing tier. It defaults to your standard retail tier, so if this is a contractor who's earned better pricing, pick the right tier now and they'll see the correct prices from their very first sale.
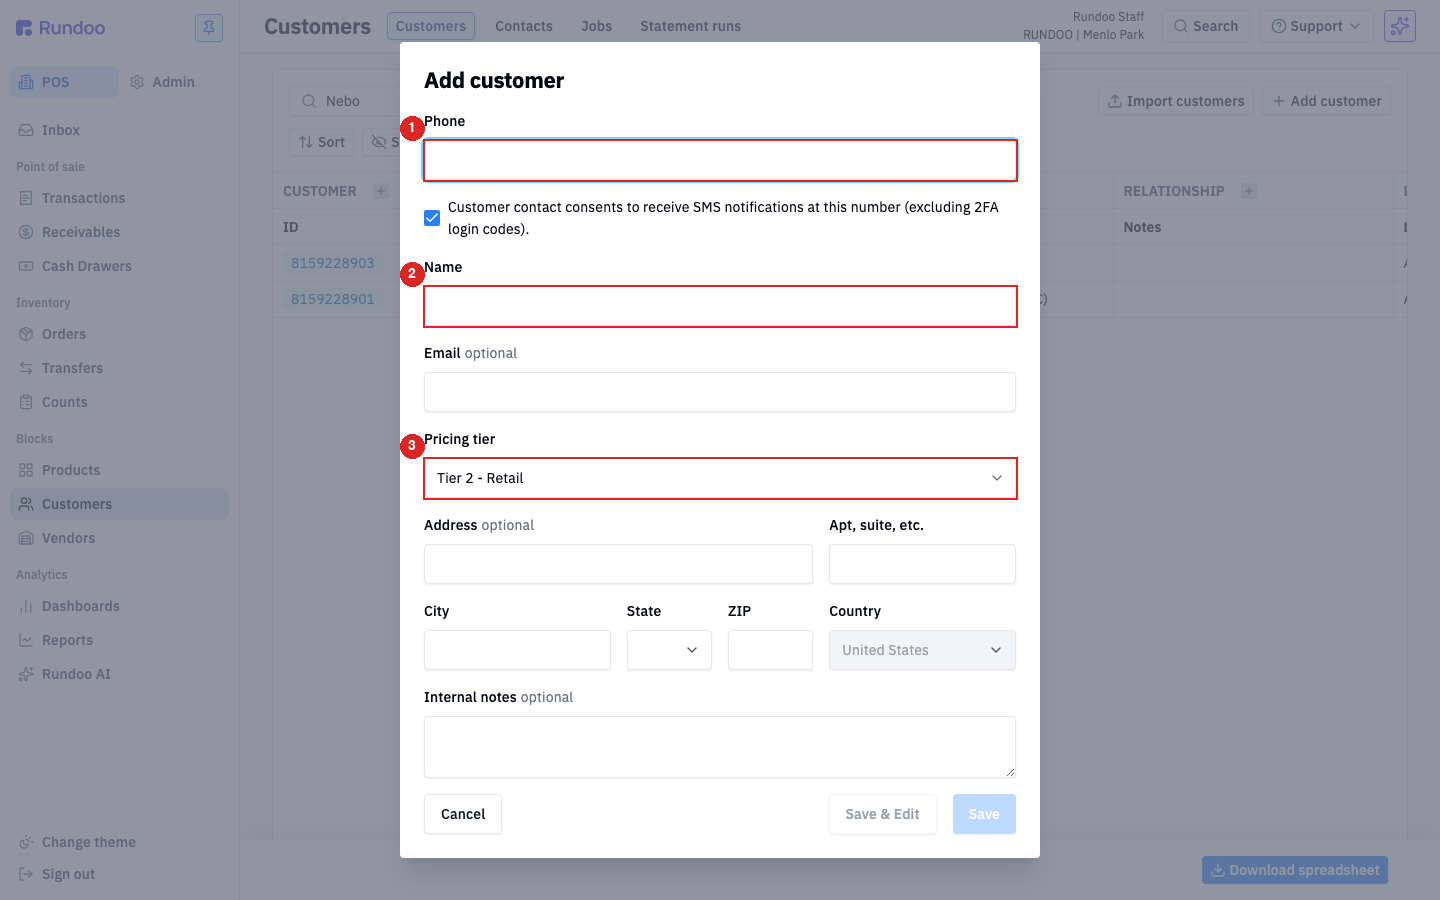
You get three save buttons. Save just creates the record and closes the window, which is perfect for a plain walk-in. Save & New reopens a blank form, handy when you're adding several people in a row. For a house account, use Save & Edit. It creates the record and drops you right onto their full profile, which is exactly where the charge-account settings live.
This is the important one. On the customer's profile, click the Settings tab and scroll to the Financing section. Open the Finance term dropdown (it reads Cash by default) and pick a statement-based term such as Net 30 Statement. That single change makes them a charge account. There's no other switch to flip, and it saves on its own.
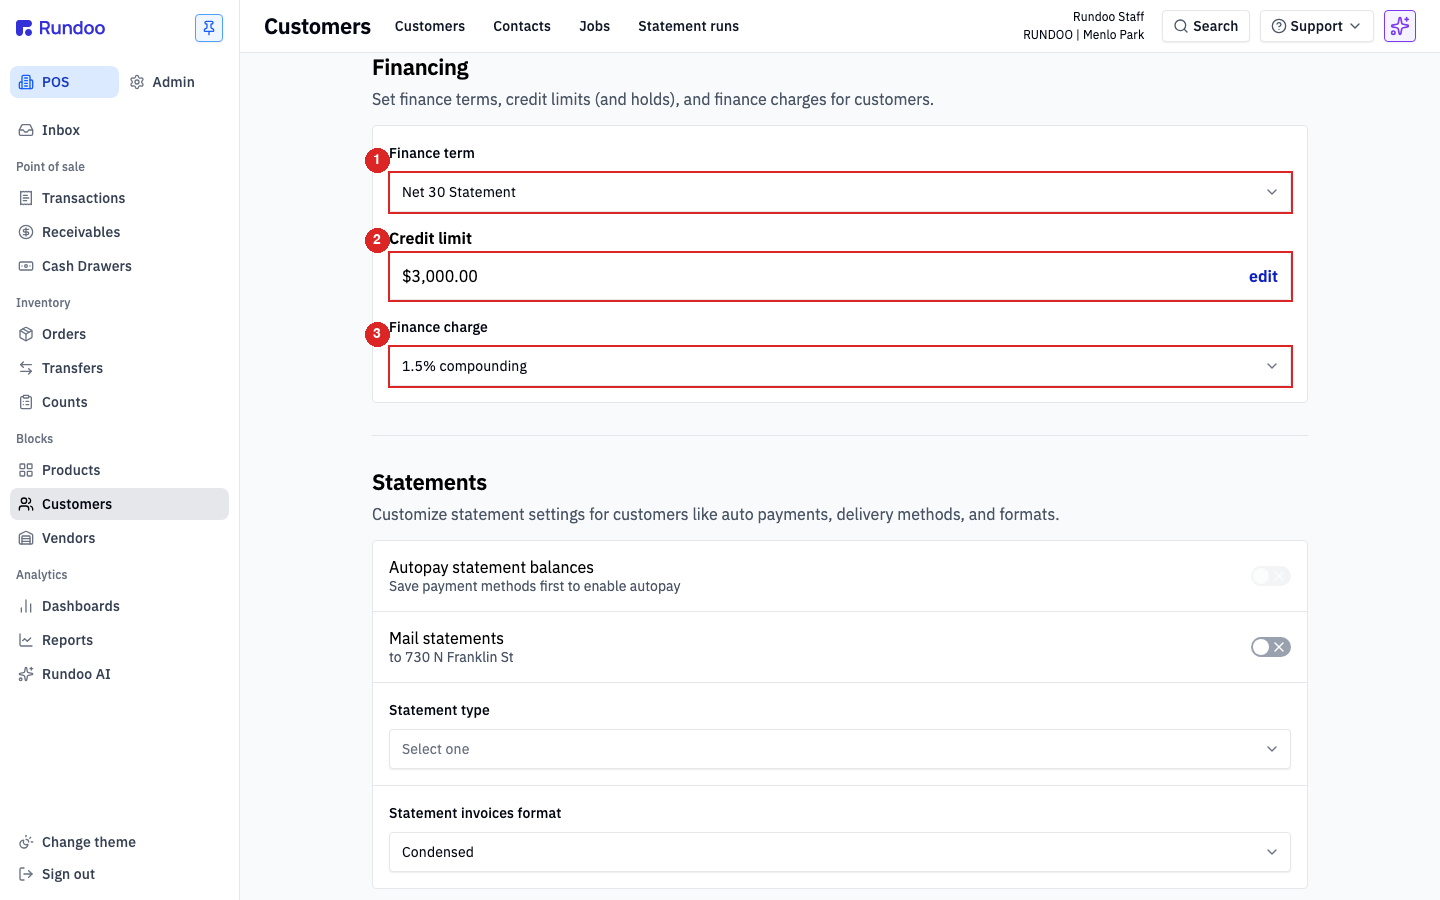
In the same Financing section, click edit next to Credit limit and enter the amount you and the customer agreed on, then save. This caps how much they can owe at once. If a sale would push their balance past the limit, Rundoo blocks the Charge account tender at checkout until they pay some down, so you find out at the counter, not at month-end.
One field down is Finance charge, the interest applied to overdue balances (a common setting is 1.5% compounding monthly). If you don't charge interest, just leave it on Select one. That's it. Your customer is in the system, priced right, and ready to charge.
Create
POS → Customers → Add customer
Phone and Name required. Set the Pricing tier.
The charge switch
Finance term
A Statement term makes them a charge account. Cash keeps them retail.
Credit limit
Settings → Financing → edit
Caps the unpaid balance. Blocks Charge account when exceeded.
Best save button
Save & Edit
Takes you straight to the profile to set the finance term.
Good to know