New
Start a fresh sale
Your default when someone steps up to ring out.

Getting Started with Rundoo · Transactions
A quick tour of Transactions, your new counter.
You already know how to ring up a sale. So this first tour isn't about the how, it's about the where. In Rundoo, every sale you make starts in one place called Transactions. Once you know where it lives and how the screen is laid out, day one at the counter feels a lot less like a new system and a lot more like your old counter with better tools.
At the very top of the left sidebar you'll see two buttons, POS and Admin. Think of them as two sides of the same store. POS is your day-to-day register, where you ring up sales. Admin is the back office, where an owner or manager sets things up. For selling, you'll live in POS. Switching sides only swaps the sidebar; the header up top and the location you're signed into stay right where they are.
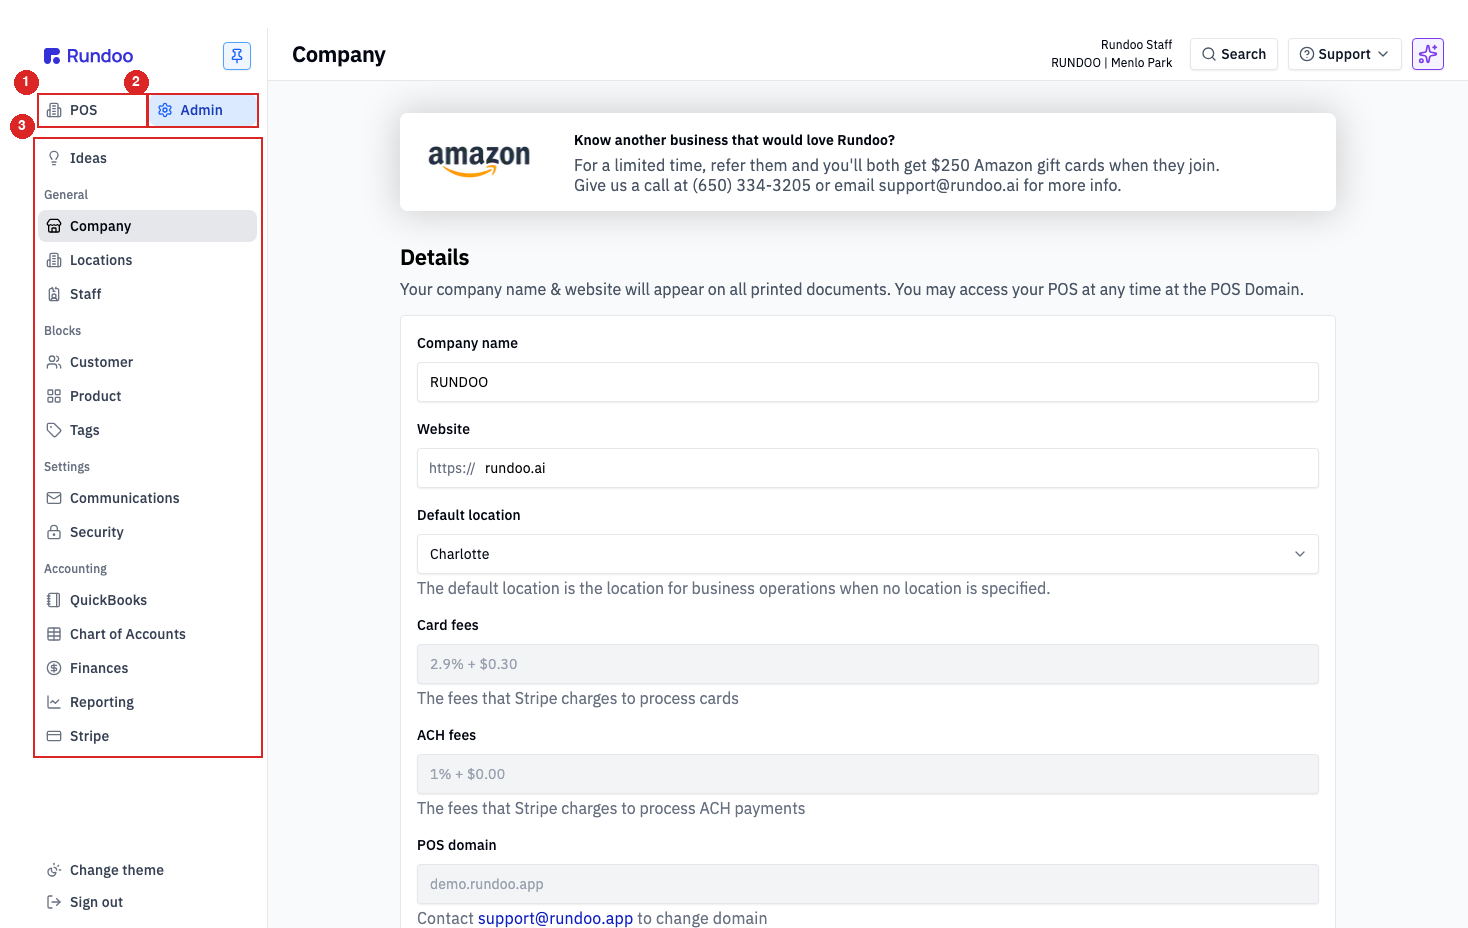
On the POS side, look down the left sidebar to the Point of sale group and click Transactions. This is your counter. Every sale you make, whether you finish it now or set it aside, lives on this screen.
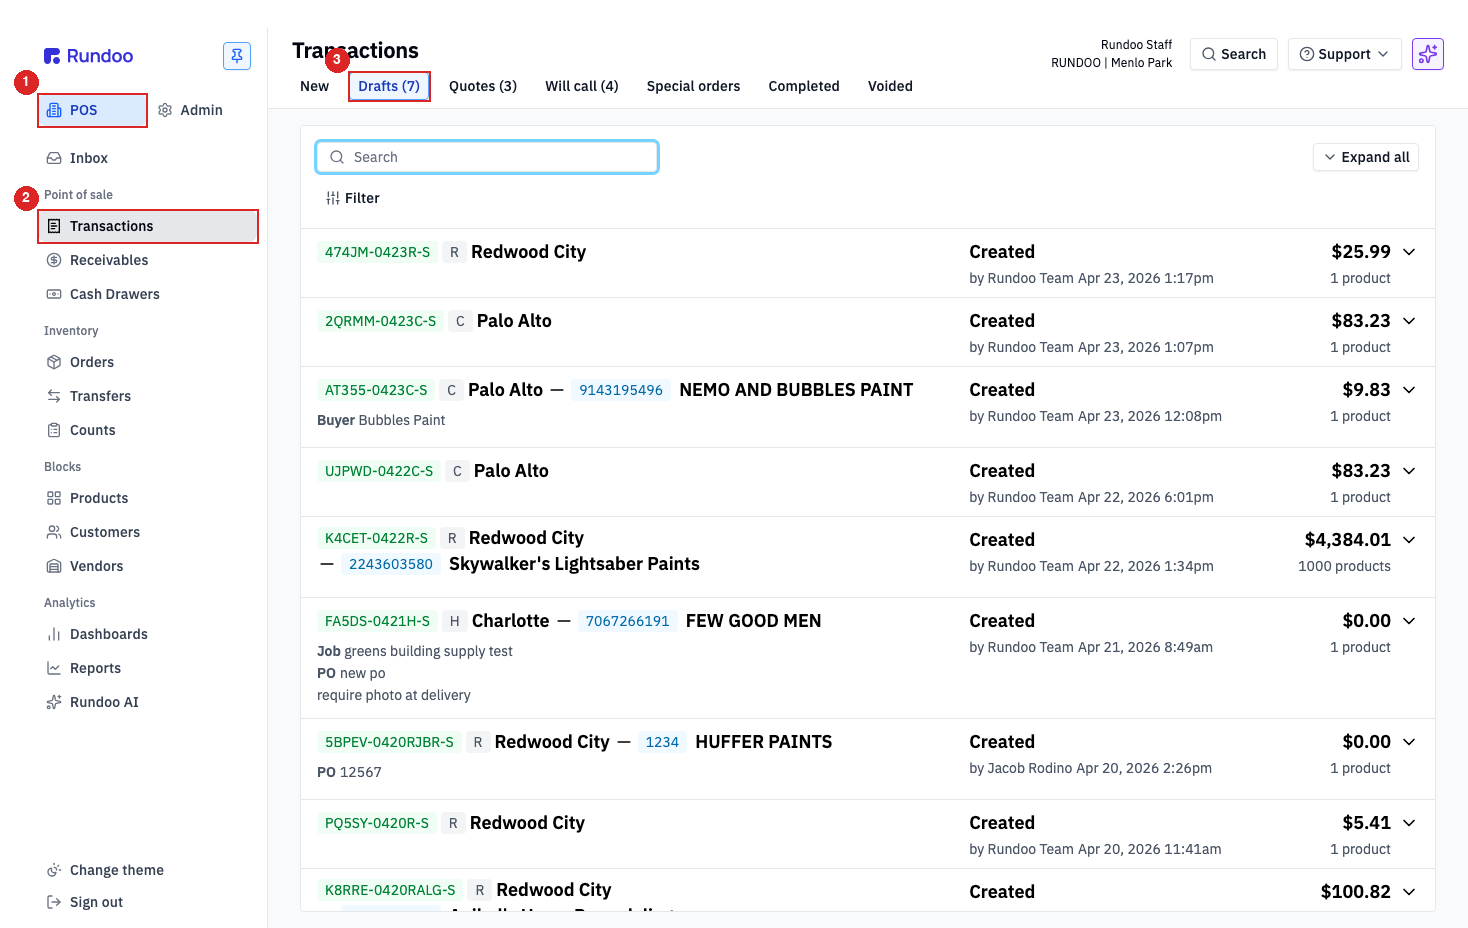
Along the top of the screen is a row of tabs, one lane for each state a sale can be in. New is where you start a fresh sale. Drafts are sales you saved to come back to. Quotes are your priced estimates. Will call is orders set aside for pickup. A little further along you'll find Special orders, Completed, and Voided. You'll get to those when they matter, so for now just know it all lives right here.
Some tabs show a count, like Drafts (7) or Will call (4). That's just a live tally of what's sitting in that lane right now, and it moves as your store works through the day. It isn't part of the tab's name.
Start a New sale and the screen splits in half. The left side is the customer, who you're selling to. The right side is the transaction itself, the cart, what's on the ticket, and the total. Customer on the left, sale on the right. That split doesn't change from screen to screen, so once it clicks, everything in Rundoo starts to feel familiar.
You can now find the Transactions screen, name the tabs, and read the two-panel layout. That's everything this tour set out to do. In the next video we'll start on the left side and get the right customer onto the sale.
New
Start a fresh sale
Your default when someone steps up to ring out.
Drafts
Saved to finish later
Park a sale and come right back to it.
Quotes
Priced estimates
Give a price now, turn it into a sale later.
Will call
Set aside for pickup
Orders held and waiting to go out the door.
Good to know