Statement message
Admin → Locations
Prints at the top of every statement. One per location.

Getting Started with Rundoo · Statements
Set your statement message, payment terms, and finance charges before the first run.
Getting ready for your first monthly statement run in a new system is a real milestone. When those statements go out, you want the dates, the charges, and the message on the page to be exactly right the first time. Before you generate a single statement, there are a handful of settings to get in place. Dial these in once and the whole run goes out clean and professional, month after month.
Everything here lives in Admin mode. At the top of the left sidebar you'll see two tabs, POS and Admin. Clicking Admin swaps the sidebar over to your setup screens. Three of the four steps below sit under Customer and Communications in that Admin sidebar, and the first one is under Locations. None of this touches how an individual customer's statement is formatted or delivered, that's a separate setup you do per customer later.
Switch from POS to Admin at the top of the left sidebar, then open Locations and click into your store. Find the Statement message field and type a short note. It prints at the top of every statement for that location.
For your first few runs, something like "We recently switched to a new point of sale, reach out if you have any questions" goes a long way. The message stays on your statements until you change or remove it, and you can set a different one for each location. Click Save.
This is how Rundoo knows when a charge customer's balance is due. Still in Admin, open Customer and scroll to Finance terms, just below Pricing tiers. Click + Add finance term.
The setting that matters most is Reference date, which tells Rundoo when to start the clock. For monthly statements, pick Statement. Name it something clear like "Net 30 Statement" so a cashier knows exactly what it is, and set Net due days to 30. That means the balance is due 30 days after the statement goes out.
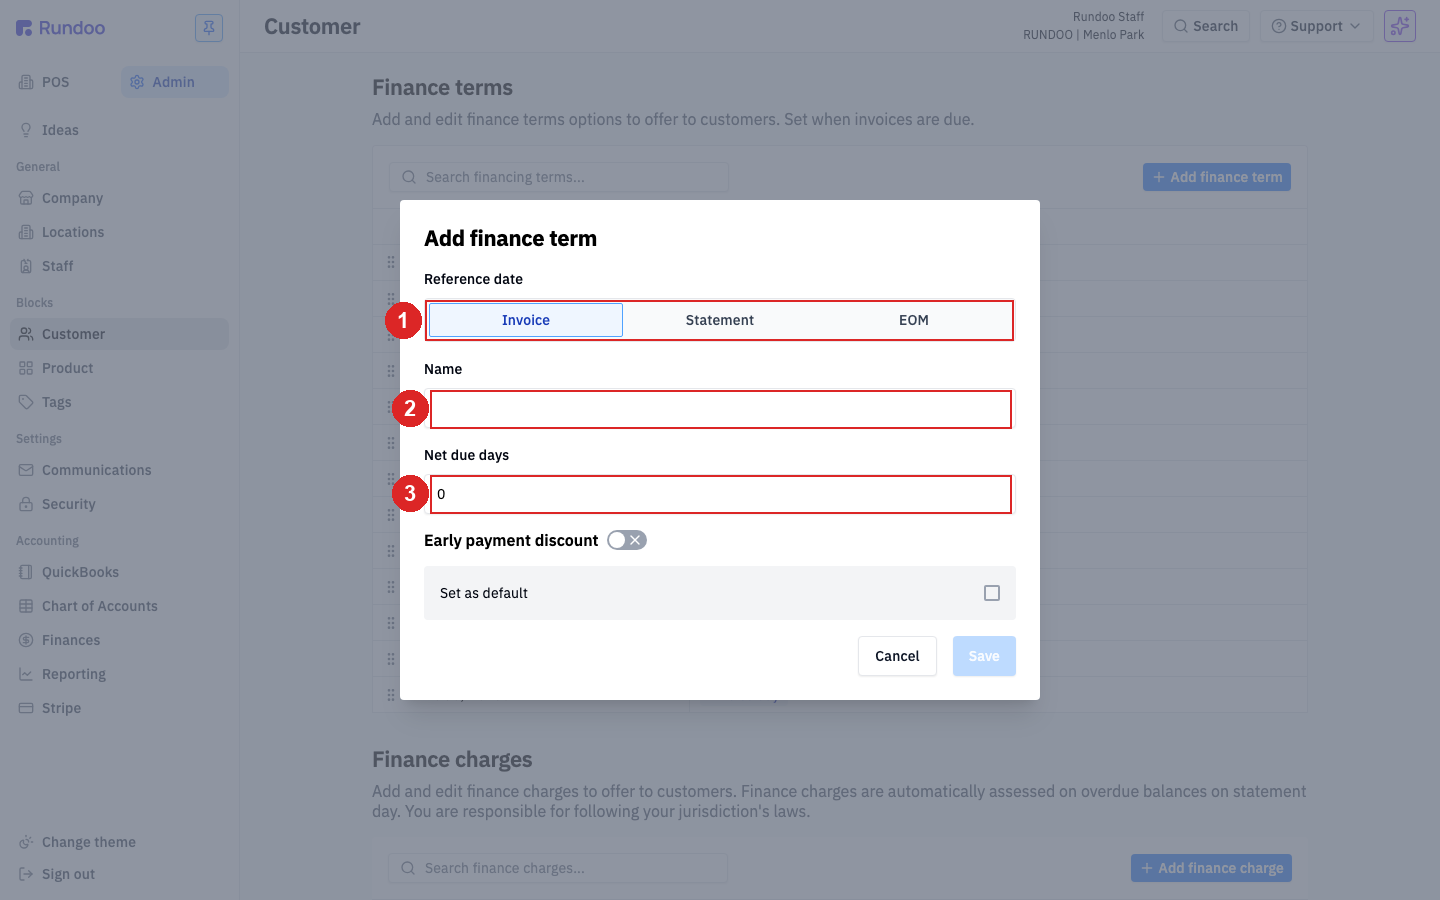
If you offer an early-pay deal, toggle on Early payment discount and two fields appear. Set the percent and the number of days to qualify, for example 2 percent off if they pay within 10 days. Click Save.
You can create as many terms as you need and assign them to customers one at a time. It's worth marking one as the default so new customers land on it automatically. Click the Cash term's row to open Edit finance term, check Set as default, and click Save. Making Cash the default means a brand-new customer isn't accidentally set up as a charge account. Only one term can be default at a time, so checking it here clears it from wherever it was before.
Finance charges are the interest Rundoo adds to a charge customer's overdue balance, your late-fee policy for statements that don't get paid on time. Right below Finance terms, find Finance charges and click Add finance charge.
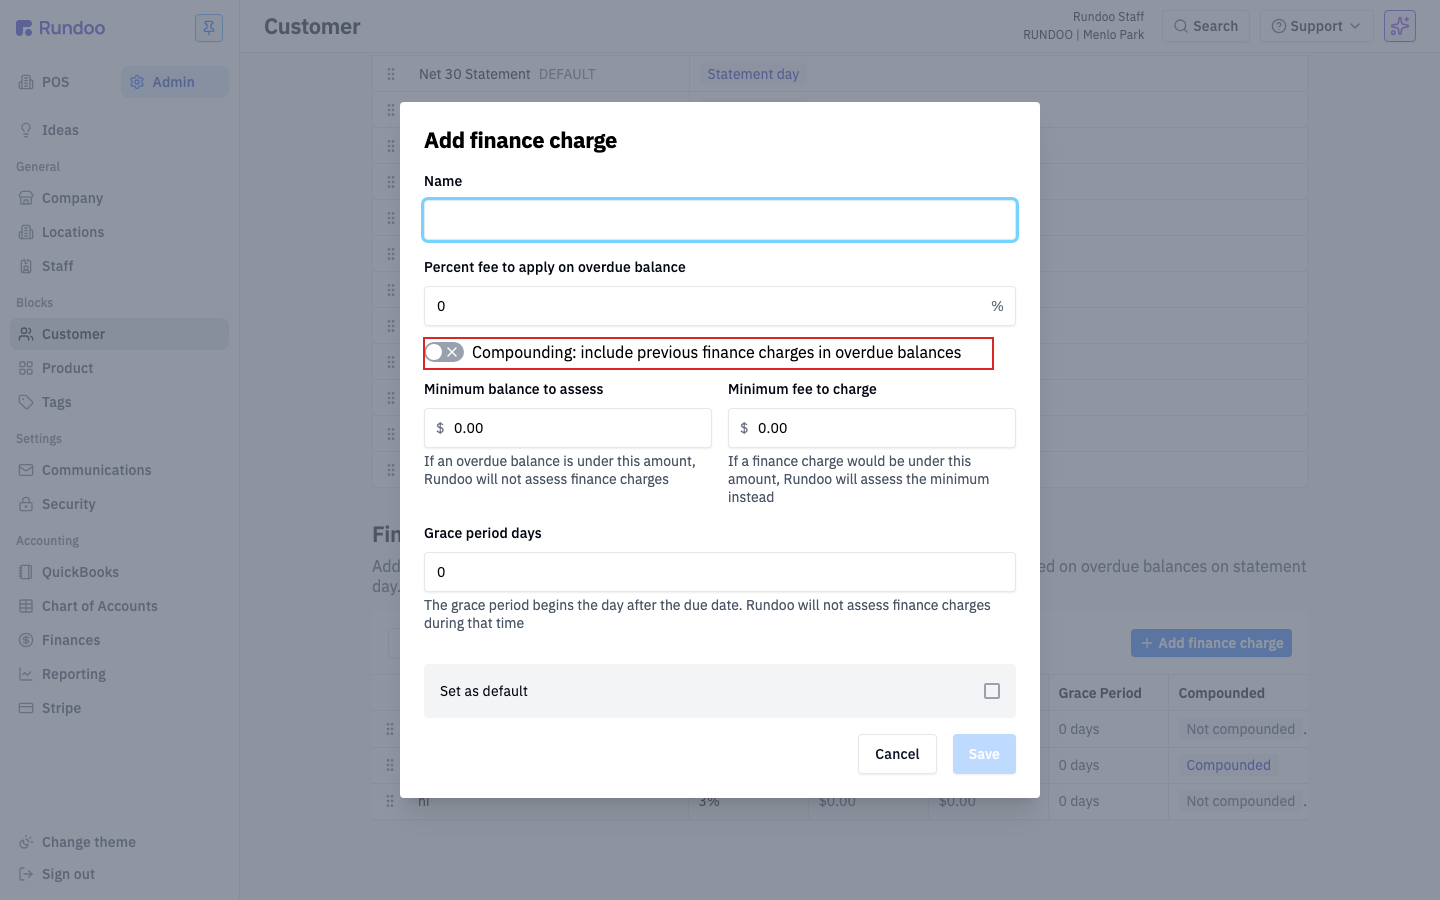
Give it a name like "1.5% compounding" and set the Percent fee to apply on overdue balance. Choose whether it compounds, set a Minimum balance to assess so you don't chase four dollars, a Minimum fee to charge so the bookkeeping is worth it, and a Grace period days that gives customers a short runway after the due date. Click Save.
Here's the part to remember. When you run your statements, Rundoo assesses this charge automatically for any customer who has it assigned and an overdue balance. It does the math for you, there's no separate button to press. So only assign a finance charge to the customers who are meant to have one.
Finally, a few settings that apply to all of your statements at once. Open Communications in the Admin sidebar and scroll to the Statements section. These are your company-wide defaults, so changing one affects every customer's statement going forward.
Set your Statement day, the day of the month the automatic run fires (it defaults to the 20th), or pick End of month. Choose an Envelope type so the address lines up in a window envelope. Then there are two switches: one to apply a customer's credit balance before autopay charges their card, and one to format statements for double-sided printing.
Statement message
Admin → Locations
Prints at the top of every statement. One per location.
Finance terms
Admin → Customer
Reference date = Statement makes it a charge account.
Finance charges
Admin → Customer
Interest on overdue balances. Assessed on the run.
Company-wide defaults
Admin → Communications
Statement day, envelope, credits, double-sided.
Good to know