Contacts
Who gets what paperwork
Per-contact receipt and statement delivery.

Getting Started with Rundoo · Setup
Tune a customer's contacts, checkout rules, and tax so every sale rings right.
Every store has those key accounts with their own set of rules. Maybe a contractor needs their invoices sent straight to accounting, always requires a purchase order at the counter, and rings up tax-exempt. In Rundoo you set all of that up one time, on the customer's Settings tab, and it stays right every single time they come in. No sticky note on the register, no reminding the new cashier.
Open POS and click Customers in the left menu. Find the account you need and click their name to open their detail page. Across the middle you'll see a row of tabs: Transactions, Balance, Jobs, Relationship, Custom Prices, and Settings. Everything in this guide lives on that Settings tab.
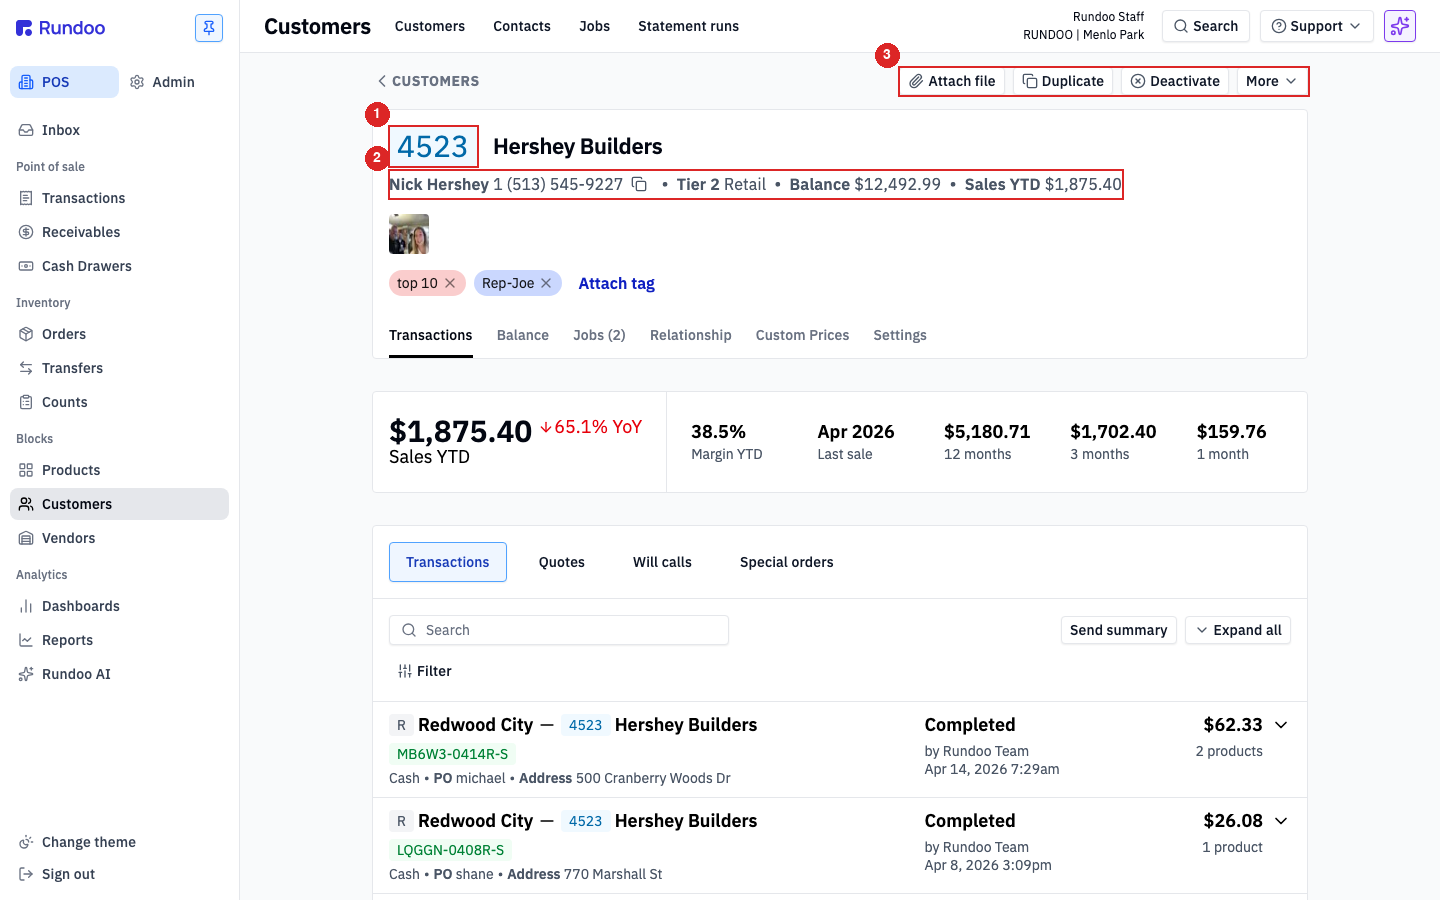
One habit to build before you touch anything: each section on the Settings tab has its own Cancel and Save buttons. Saving one section does not commit changes anywhere else on the page. So edit one part, save it, then move on to the next.
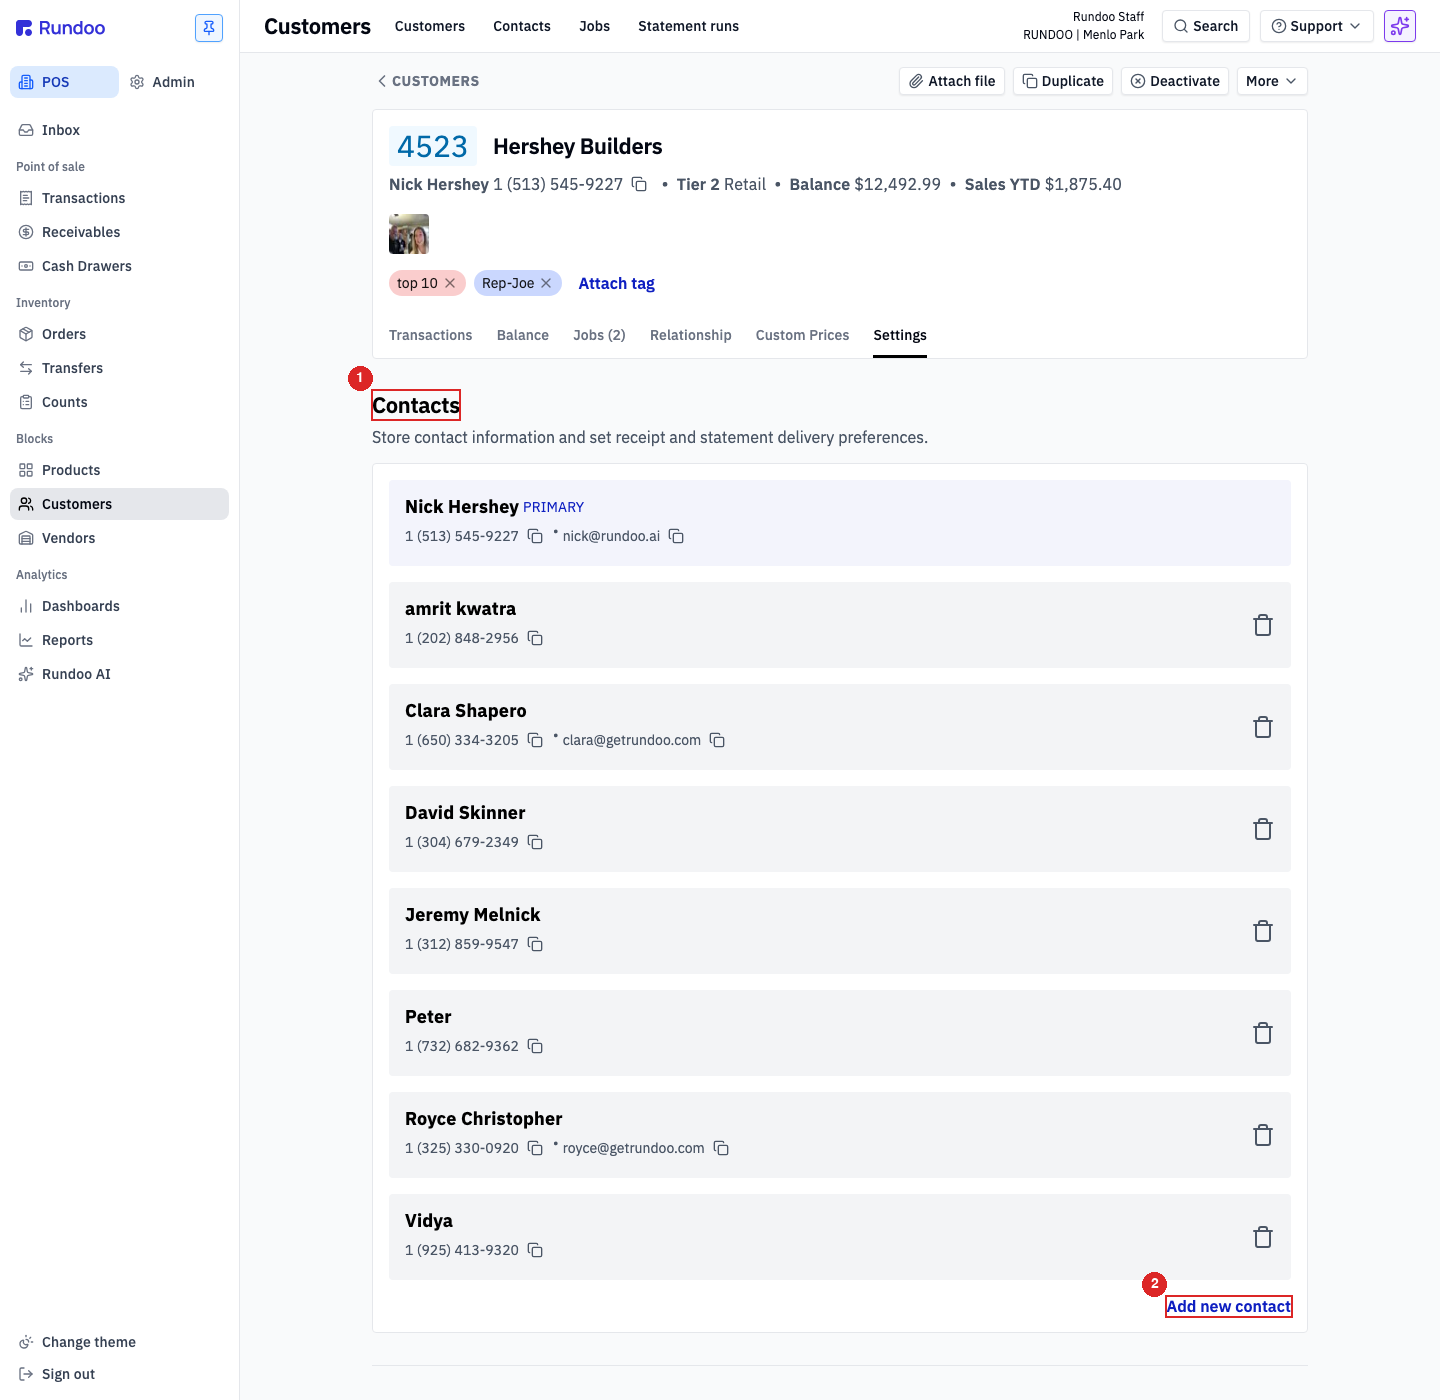
Scroll to Contacts. This is where you decide who gets what paperwork. The business is the customer, and the people who buy or handle the books under it are the contacts. Click Add new contact to add the accounting person, then set their receipt and statement delivery preferences. Turn on email statements for the person who handles the books, and the crew lead can still get the day-to-day receipts. Click Save in the Contacts section when you're done.
Below Contacts, the Cards and Bank account sections let you store a card or ACH details for faster checkouts. Then in Pricing tier, put the account on the tier that gives them the right prices (for a contractor, that is usually a tier above plain retail). Save whichever section you changed.
In the Notes section there's a Sale reminders field. Whatever you type there pops up right on the transaction screen every time this customer is added to a sale. It's the place for a note like "confirm PO with accounting before charging on account." It does not block the sale, it just flags the cashier. Type your reminder and click Save.
Scroll to Checkout settings. These toggles block the cart from completing until the matching field is filled. For a contractor whose accounting team needs a PO on every invoice, turn on Require PO. Once it's on, Rundoo turns that field red at the counter and won't let the cashier finish the sale until a PO number is entered. Other options here include Require job, Require buyer, and Require receipt signature. Flip the ones this account needs and click Save.
Scroll to Tax exemptions. Here's the detail that trips people up: typing a number into the Exempt: Sales tax number field is for record-keeping only. It prints on invoices where required, but it does not change how tax calculates on the cart. To actually remove the tax, turn on Use custom tax rate and pick your store's zero-percent rate (for example, a rate named "Tax exempt" set to 0.0%) from the dropdown. Click Save, and from then on every sale for this customer rings up tax-free.
Before you can pick a zero-percent rate
If you don't see a "Tax exempt" rate in that dropdown yet, it hasn't been created. Custom tax rates are defined once in Admin → Locations → Custom tax rates. Add a 0.0% rate there first, then come back to the customer's Tax exemptions section and pin them to it.
Contacts
Who gets what paperwork
Per-contact receipt and statement delivery.
Payment & pricing
Card / ACH on file, Pricing tier
Faster checkout and the right prices.
Checkout settings
Require PO, Job, Buyer, Signature
Blocks the sale until the field is filled.
Tax exemptions
Use custom tax rate
The 0.0% rate is what actually exempts.
Good to know