Single label
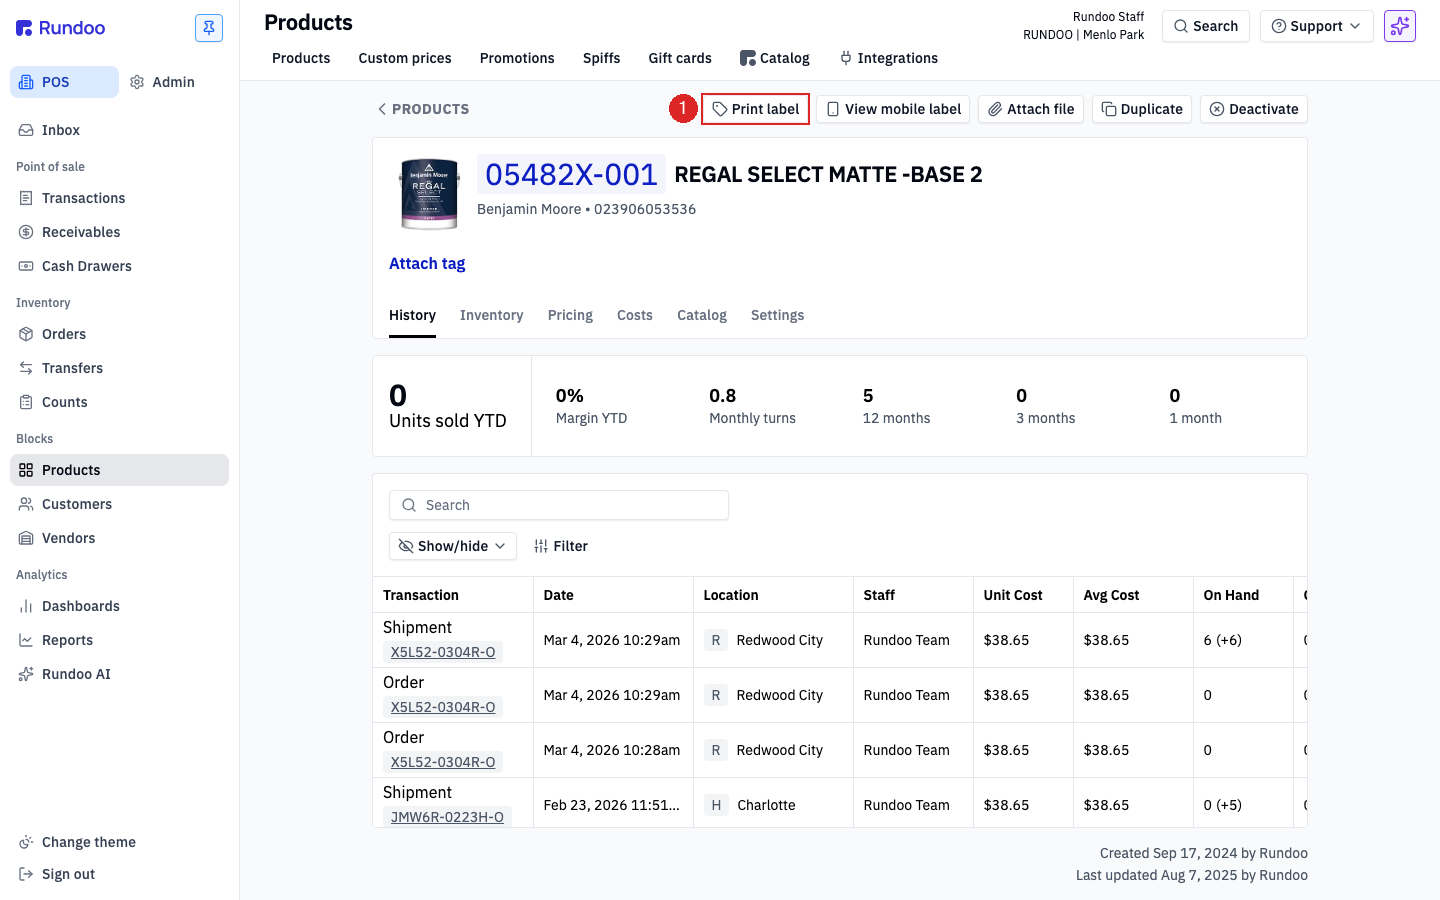
Products → open item → Print label
Top-right of the product page.

Getting Started with Rundoo · Setup
Print price labels and bin tags, one or a whole batch.
The price on the shelf should always match the price at the register. When new stock hits the floor, or a vendor bumps their pricing, you need fresh tags out fast. In Rundoo you print price labels and bin tags right from the Products screen you already know. A bin tag and a price label are the same thing, just the name your floor crew uses for the shelf sticker. You can run off one at a time, or a whole batch when a shipment lands.
There are two spots to print, both in POS mode under Products. A single label comes off a product's own page. A batch comes off the Products list, once you have checked the rows you want. Both open the very same little print window, so once you learn one, you know both.
In POS, open Products in the left sidebar, find your item, and open it. Up in the top-right corner of the product page, click Print label. This is your go-to when a customer smudged a tag, a new SKU just landed, or you moved a display and need a tag for the new slot.
A small Print label window opens with three fields. Label template is the design and size you want, and the dropdown lists every template you have saved, each showing its name and size like Test Label 2 (1" x 2.125"). Rotation turns the print in 90 degree steps for rolls that feed sideways (leave it at 0° unless a tag comes out sideways). Copies is how many of that one label to print. When it looks right, click Print and the printer starts within a second or two.
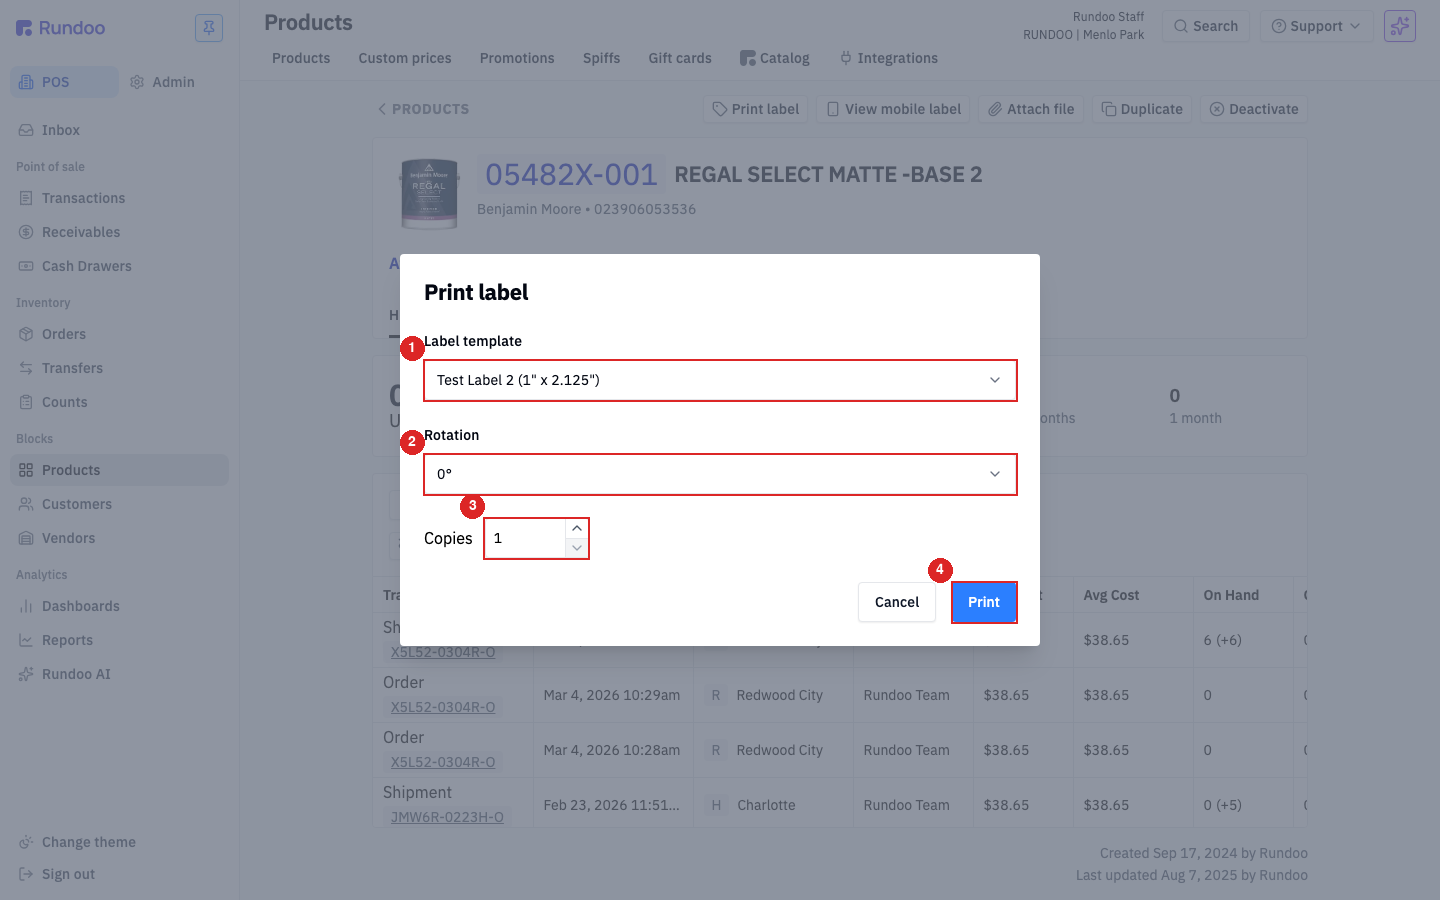
Good to know: the price on the tag is always your main retail price (your Tier 1 price), never a painter tier or a custom customer price. The barcode is always on, and your cost never prints, so a shelf tag is always safe to hand a customer.
When a pallet of new stock arrives, you are not printing those one by one. Back on the main Products list, use the Search bar or Filter to narrow to what you need, such as a whole department. Then check the box at the left of each row you want. A blue bar appears at the bottom showing how many are selected.
Refreshing a whole section? Filter first, then use Select all to grab the entire filtered list at once instead of clicking row by row.
On that bottom bar, click Print labels. You get the same window as before, except now Copies means how many of each selected product to print. Set it to 1 for one tag each, click Print, and Rundoo sends the whole batch to your printer in one job.
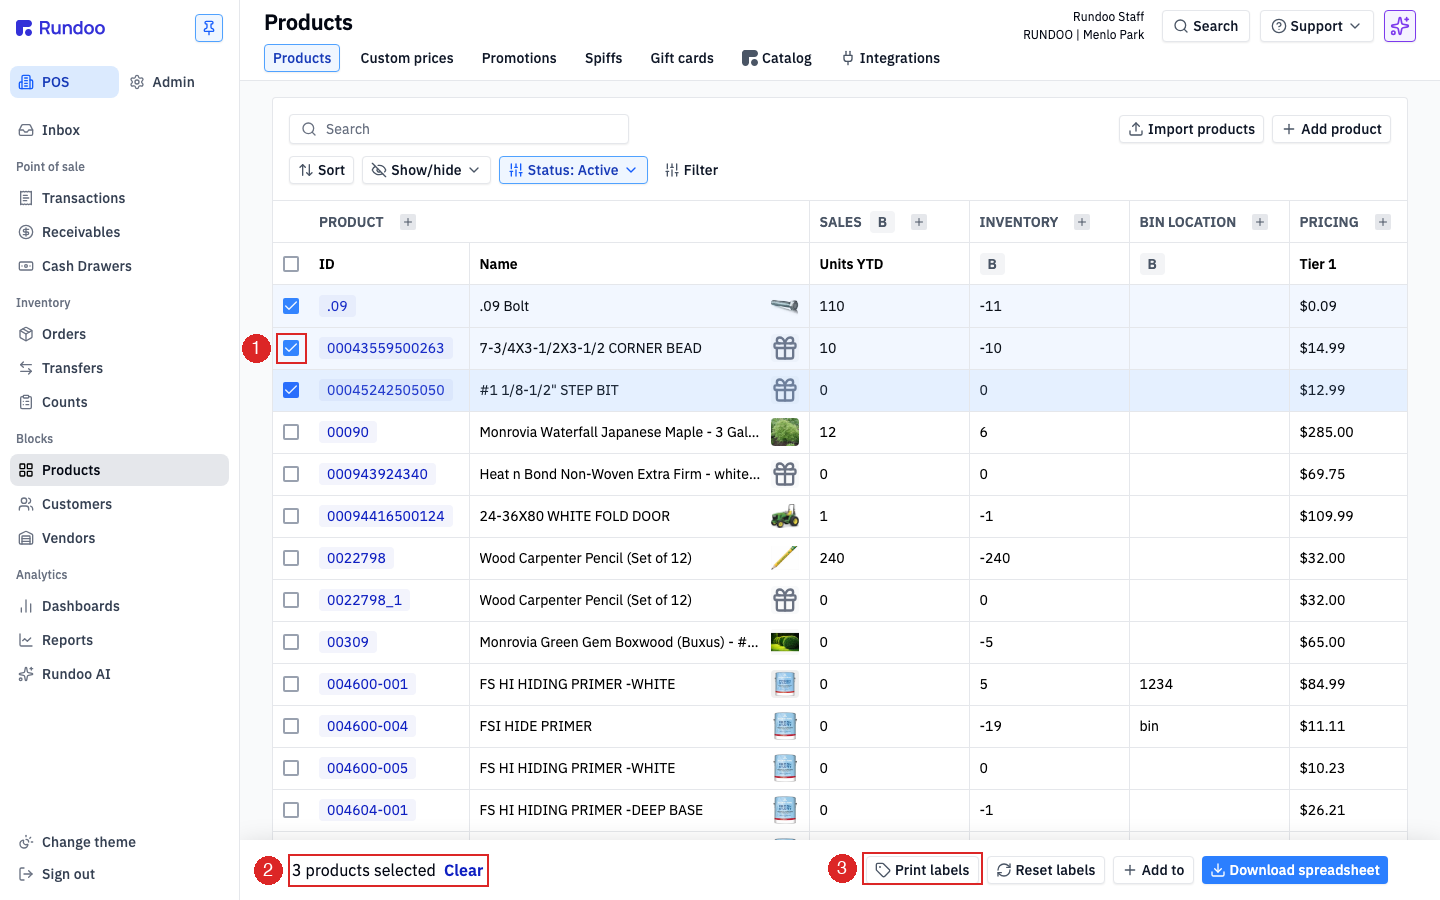
This is the everyday job. After you update costs or reset a tier, you want fresh tags for everything that moved. On the Products list, use Filter (or sort by a recently-edited column) to pull up the items whose prices changed. That gives you a clean list.
From there it is the same simple step: Select all, click Print labels, pick your shelf-tag template, and Print. Now the shelf matches the register, store-wide.
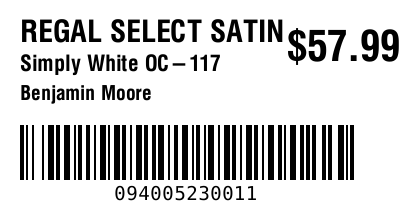
Here is a typical shelf tag: product name, tint or vendor info, a barcode, and the price on the right. The exact fields, sizes, and layout come from whichever template you picked in the print window.
Single label
Products → open item → Print label
Top-right of the product page.
Batch
Products → check rows → Print labels
On the blue bar at the bottom.
Price shown
Tier 1 retail only
Never a painter or custom price.
Always on the tag
Barcode
Locked on. Cost never prints.
Good to know