Company
Admin → Company
Details, cost method, tender, Rundoo AI. Save per section.

Getting Started with Rundoo · Admin Setup
Set up your company, your locations, and your staff, once.
Most of your time in Rundoo is spent at the counter, on the Point of Sale side where the daily work happens. But behind that counter there is a quieter room: the settings for your company, your locations, and your team. This is the Admin side of Rundoo, and the good news is you set most of it once and then get back to running your store. Not everyone on your team sees this room either, so you decide who gets the keys.
At the top of the left sidebar you'll see two tabs, POS and Admin. Click Admin and the whole sidebar swaps over. Under the General group you'll find the three settings that make up your foundation: Company, Locations, and Staff. We'll walk them in that order.
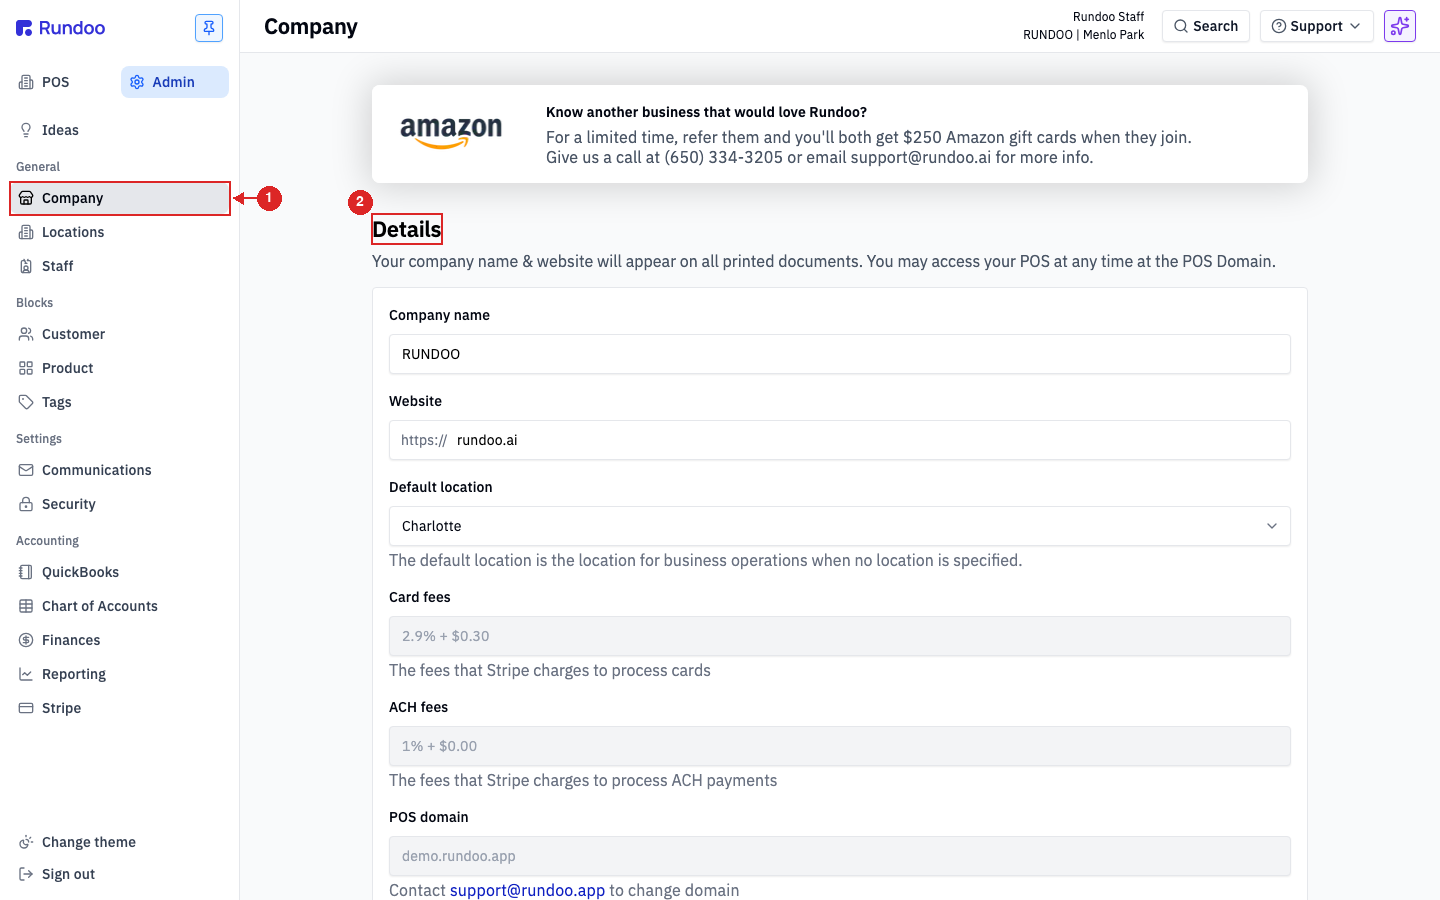
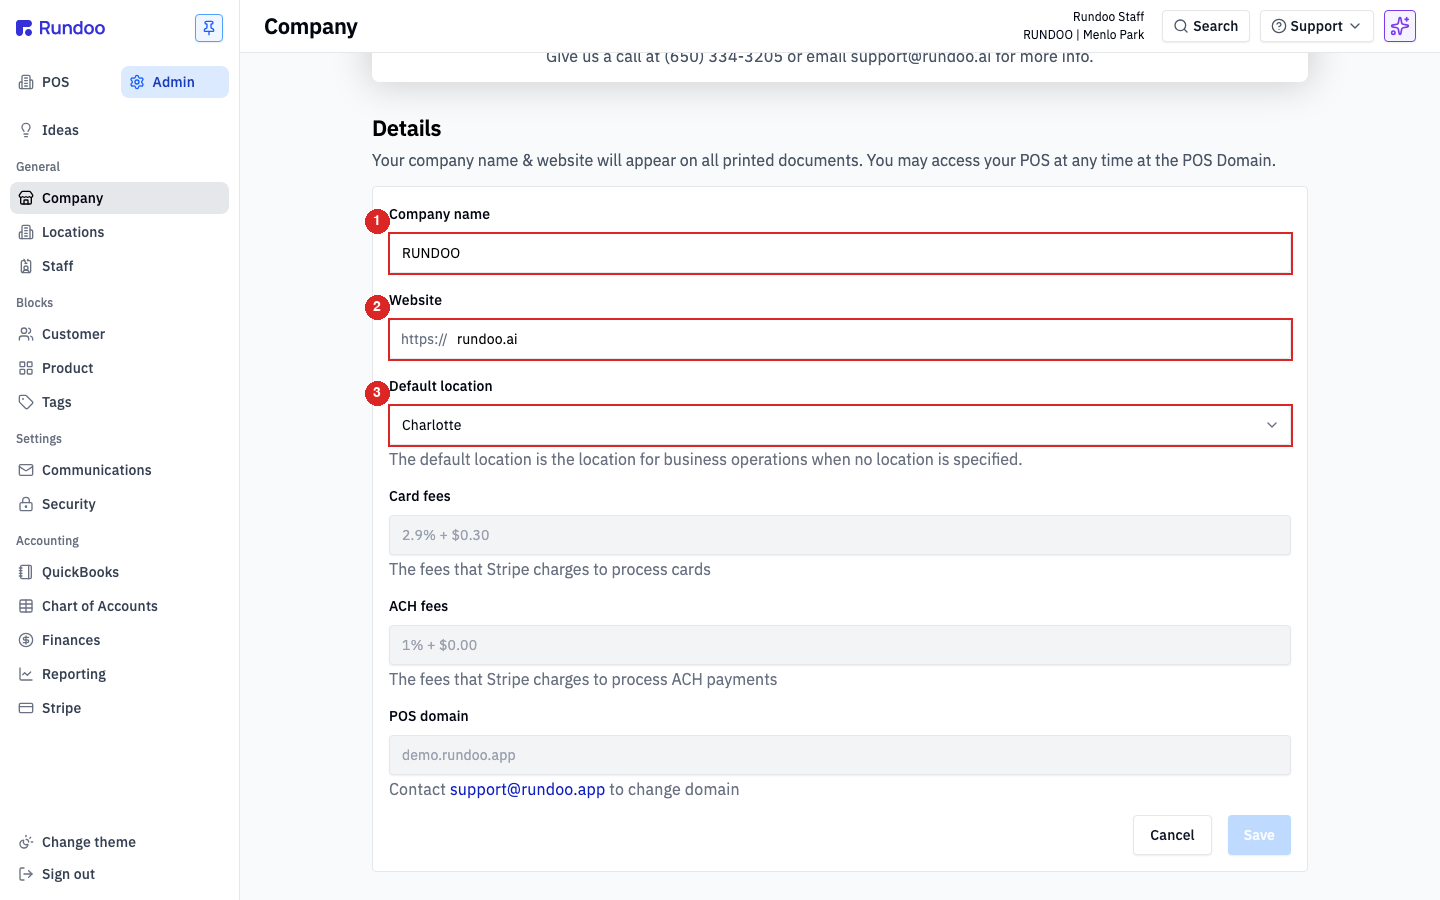
Click Company. The Details section at the top holds the big-picture basics that print on every receipt, invoice, and statement: your company name, your website, and your Default location, which is the store Rundoo falls back to when a transaction isn't tied to a specific one (think accounting exports and receivables).
A few fields here are greyed out on purpose. Your Card fees, ACH fees, and POS domain are set for you and aren't editable on this page. Each section on the Company tab saves on its own, so make an edit and hit Save in that section's footer to commit it.
Keep scrolling the Company tab. Under Cost management you choose how Rundoo shows your margins on reports, Average cost or Standard cost. This is a reporting preference only. It does not change your books, which are always based on the real cost from the vendor receipt.
Farther down, Tender methods are the ways your customers pay. If you need a custom one, like a type for your e-commerce orders, your Rundoo guide sets that up for you. And in the Rundoo AI section you can steer your daily summary text, for example adding a note to flag any items under 15% margin, so it shows up in the summary you receive.
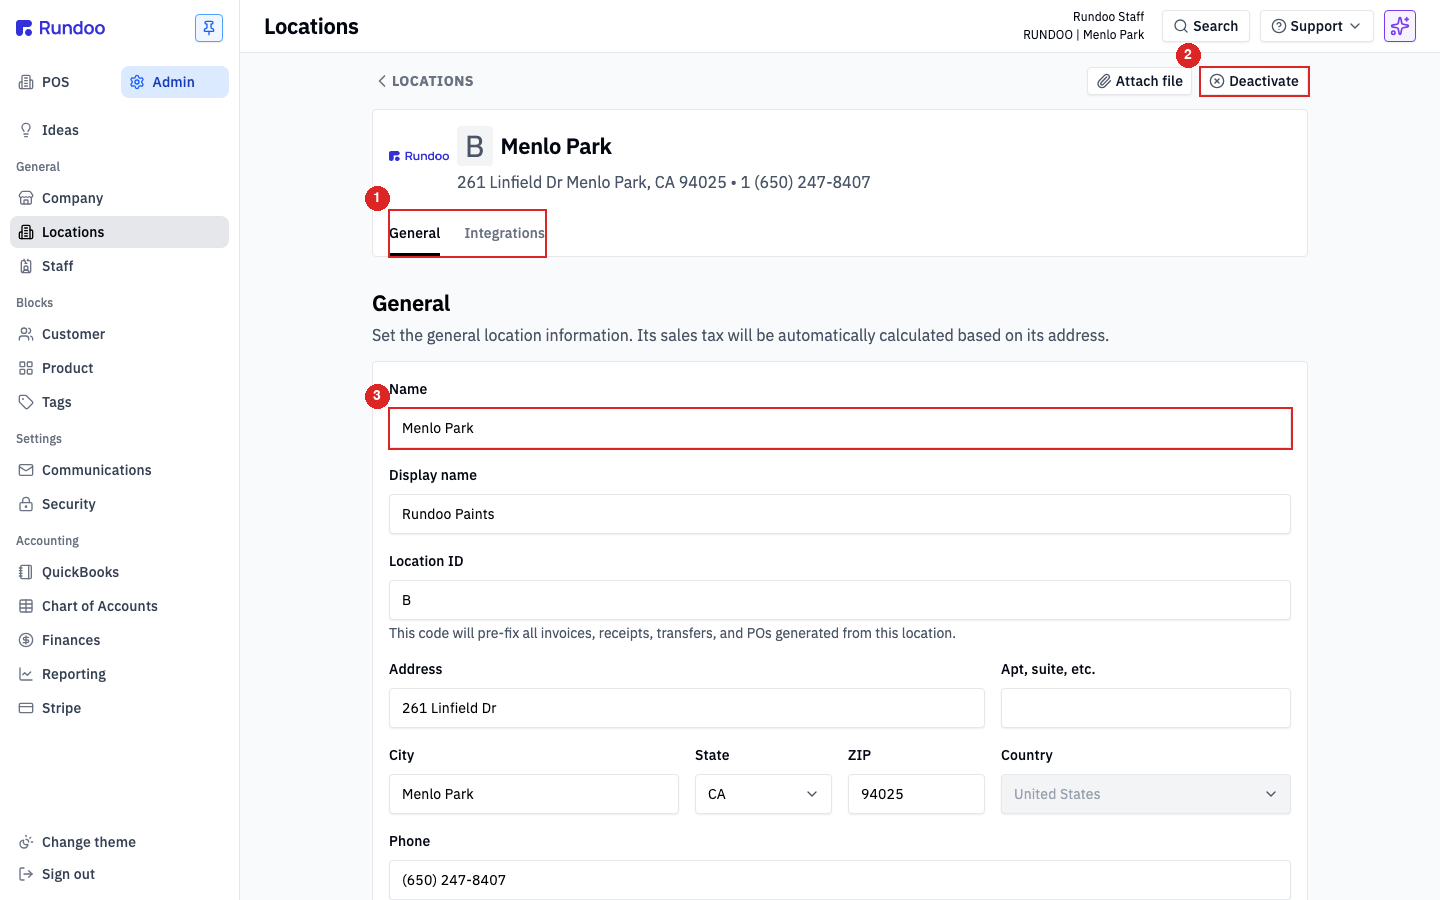
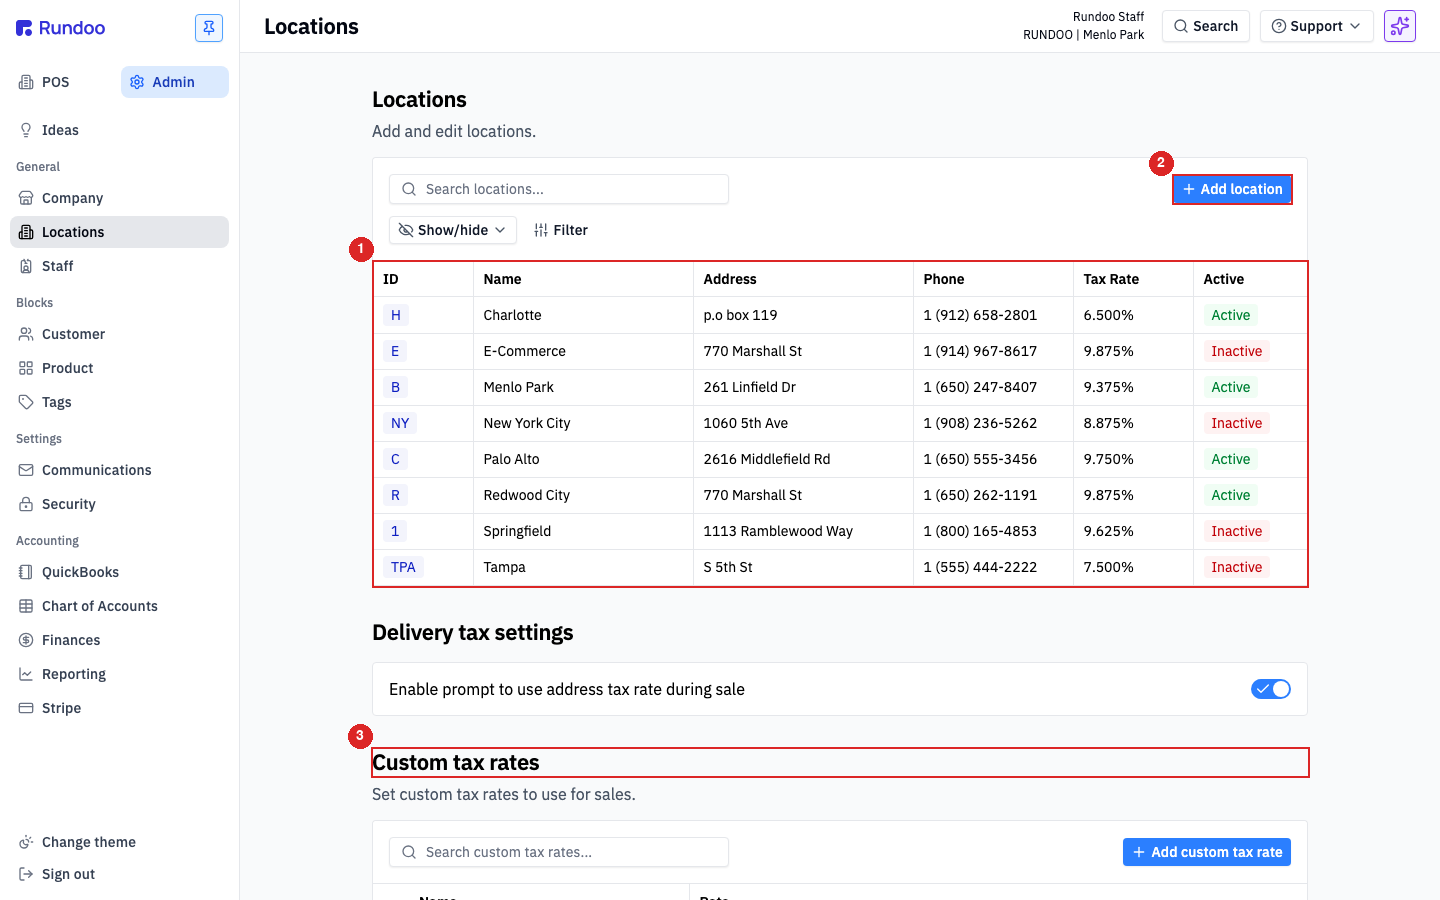
Click Locations. Every store you run is listed here with its ID, name, address, phone, and tax rate. Click any row to open it. You land on the General tab, where the Display name is what customers see on receipts, and the Location ID is the short code that prefixes every invoice, receipt, transfer, and PO from that store. That code keeps your books straight.
This is also where you upload the store's logo (logos are set per location, not company-wide), set the Inbound email where customer replies land, and set the starting Cash float for the drawer. Heads up on the CC on all email communications box: check it and this address gets a copy of every invoice and statement you send, which adds up fast. Leave it unchecked and you'll only get the replies that matter.
One nice thing about this page: your changes save automatically as you move from field to field. There's no Save button to hunt for.
Back on the main Locations screen, scroll past the table. Flip on Enable prompt to use address tax rate during sale and, whenever a delivery goes to an address with a different rate, Rundoo will ask your cashier at checkout whether to use the destination's rate instead of the store's. Handy when you're delivering to a job site in the next county.
Below that, Custom tax rates are named rates you set up here first, like a tax-exempt or resale rate, so your team can pick them at the counter when they ring up a sale.
You'll also spot an Add location button on this screen. Standing up a brand-new store isn't something you do yourself, because each location is tied to your Rundoo agreement. Click Add location and Rundoo just shows a short note to email support@rundoo.ai, and we'll get the new store added for you.
Click Staff. This is where you add team members and decide what each one can do. To bring someone on, click Add new staff member and fill in their first name, last name, email, and Staff ID, the short username they type to sign in at the counter. Keep the Staff ID short and memorable, because they'll type it every shift.
Click a staff member to open their profile. Three tabs run across the top: Permissions, General, and Notifications. Permissions is the important one. The very first Admin checkbox is the master key: if it's unchecked, that person can't reach the Admin side of Rundoo at all. Below it, the permissions are grouped so you can hand out exactly the access each role needs and nothing more.
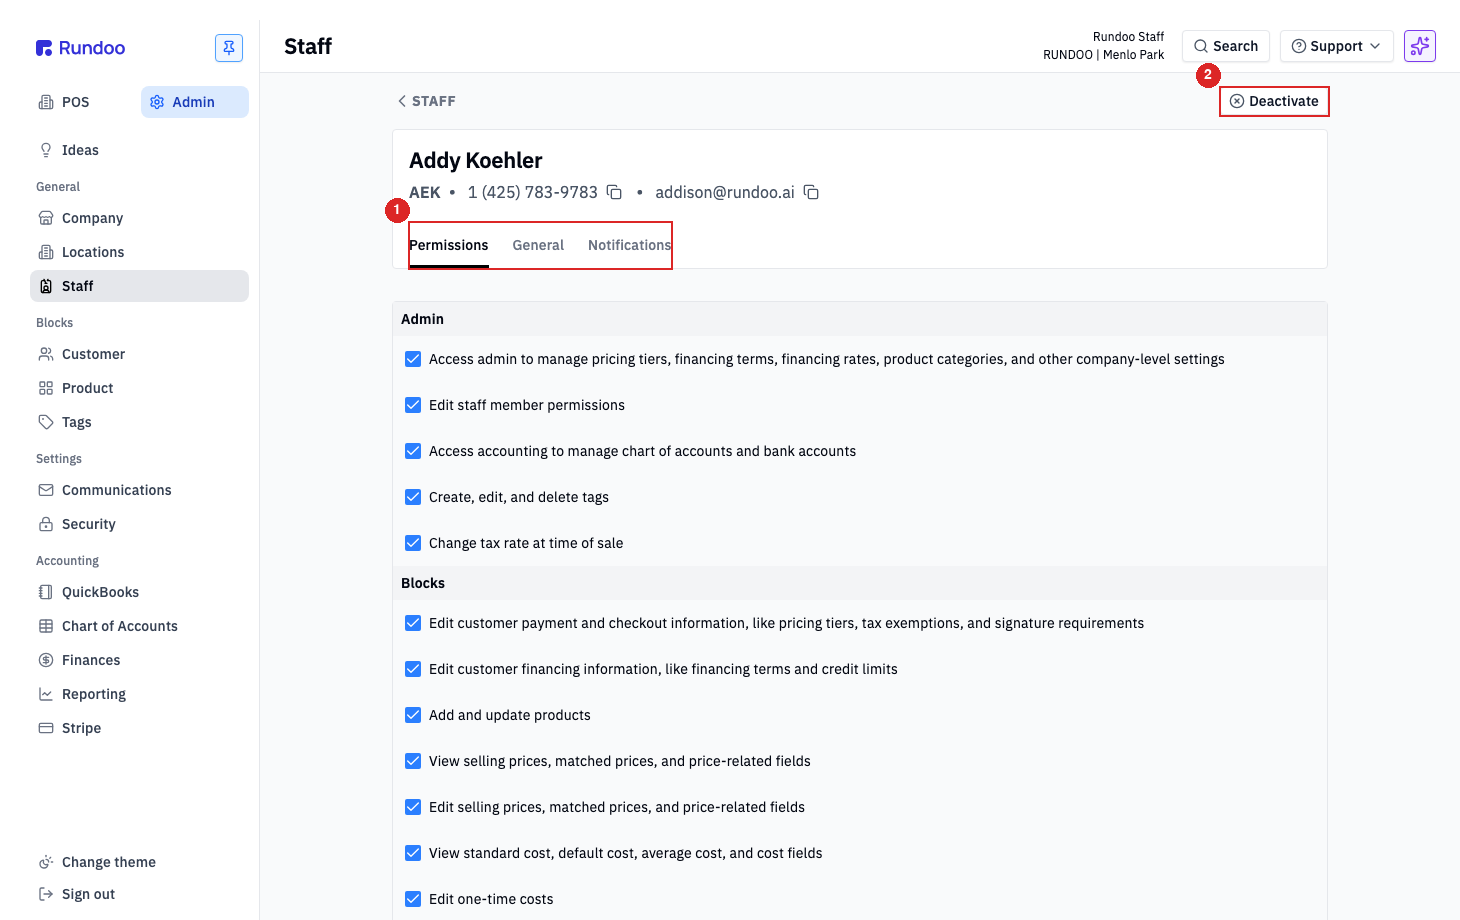
The General tab holds contact info and the email and text consent boxes. The Notifications tab lets you decide, per person, which updates they get and how, in the app Inbox, by Email, or by SMS. Three things all have to line up for a message to arrive: the channel is checked here, the matching consent box is on, and there's an email or cell phone saved. If billing emails ever pile up, someone can quiet them right here on their own Notifications tab.
Company
Admin → Company
Details, cost method, tender, Rundoo AI. Save per section.
Locations
Admin → Locations
Per-store details, logo, cash float. Delivery + custom tax below the table.
Staff
Admin → Staff
Add people, set permissions, tune notifications.
The master key
Permissions → Admin
Uncheck it and that person can't see the back office.
Good to know