Where
POS → Customers → Relationship
Rep and interaction log live on the profile.

Getting Started with Rundoo · Setup
Assign a rep, keep notes, and set a customer's own price.
You've got those key accounts, your best contractors and your biggest buyers, who you want to take special care of. That's about a relationship, not just ringing up a sale. Rundoo keeps all of it on the customer's own profile: who owns the account, the notes your team leaves along the way, and the special price they've earned. Set it once and it takes care of itself at the counter.
Open POS, click Customers in the left sidebar, pull up the account, and click the Relationship tab on their profile. This one tab holds two things: who the account's Sales representative is, and a running log of every interaction your team has had with them.
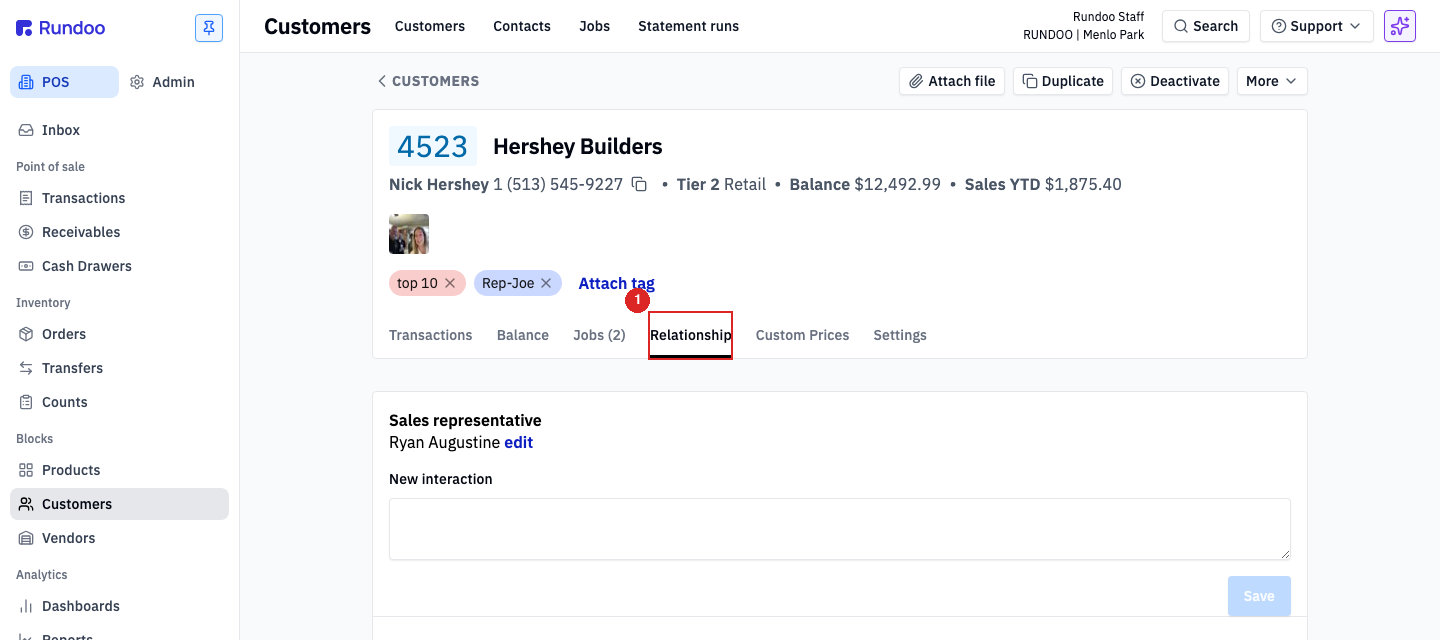
From POS, go to Customers, search for the account, and open their profile. Click the Relationship tab. If nobody's assigned yet, the Sales representative line reads None.
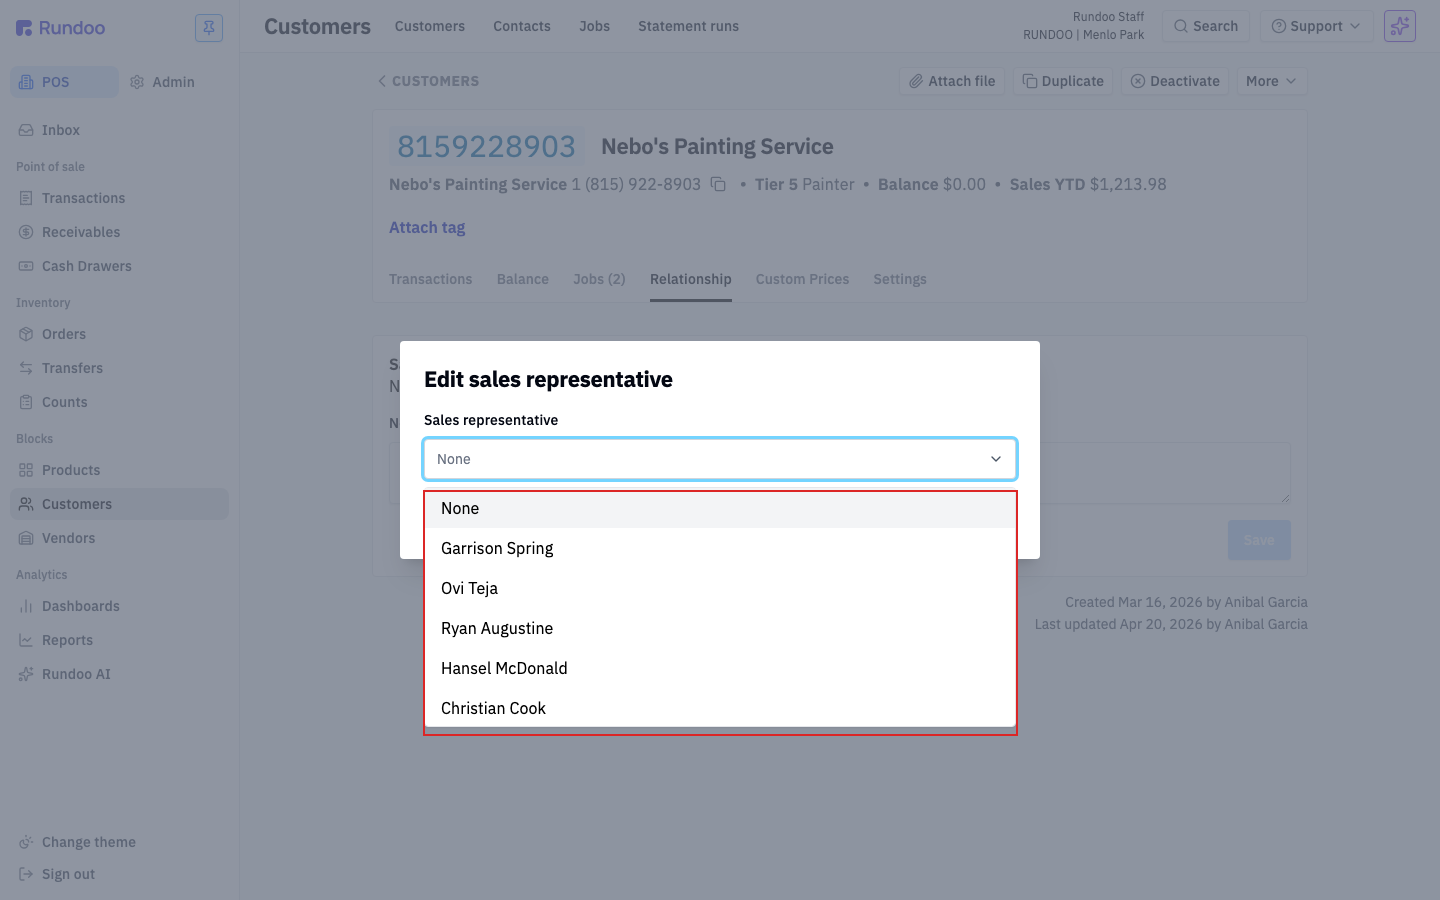
Under Sales representative, click edit. In the Edit sales representative box, open the dropdown, pick the staff member who owns this account, and click Save. A green Representative saved note flashes at the bottom. That's it, this account is now theirs.
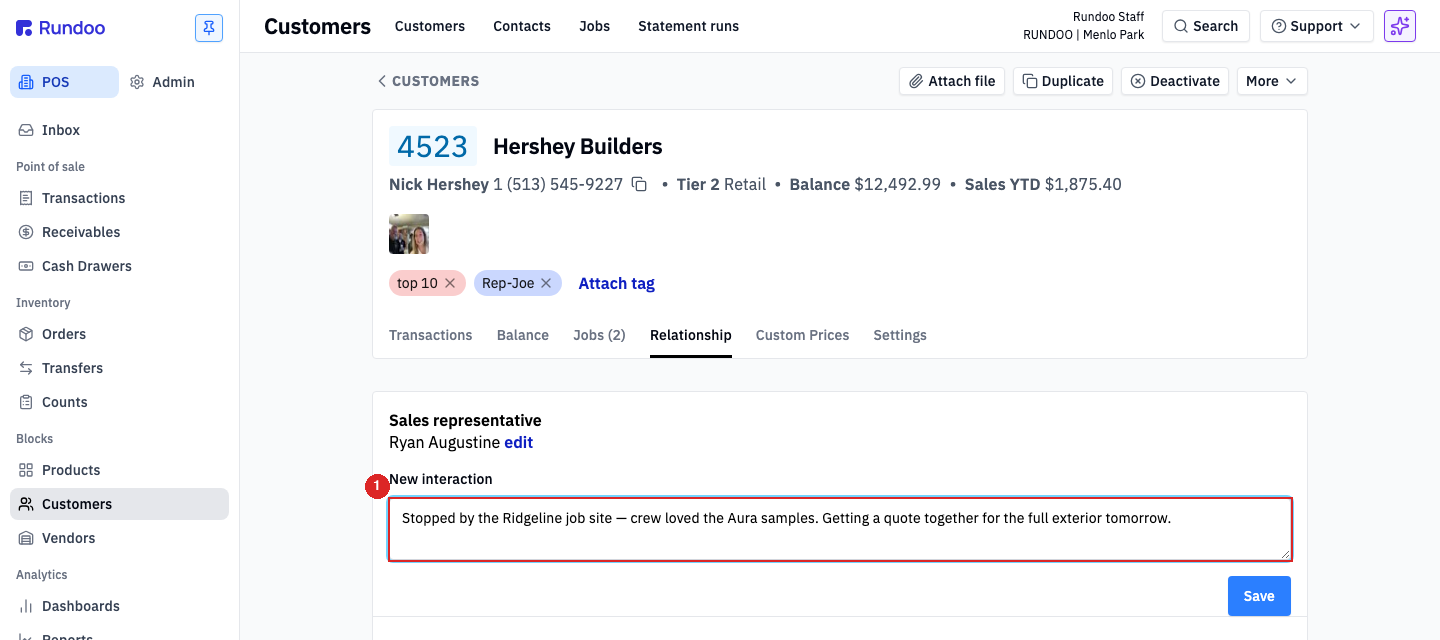
Right below the rep is a New interaction box. Type what happened, a visit, a call, a text, a voicemail, then click Save. Keep it short and specific: "Left VM about the exterior quote, following up Thursday" beats "talked to them." Each note is stamped with the date and the name of whoever wrote it, and it sits on the record for the whole team to see. No more sticky notes.
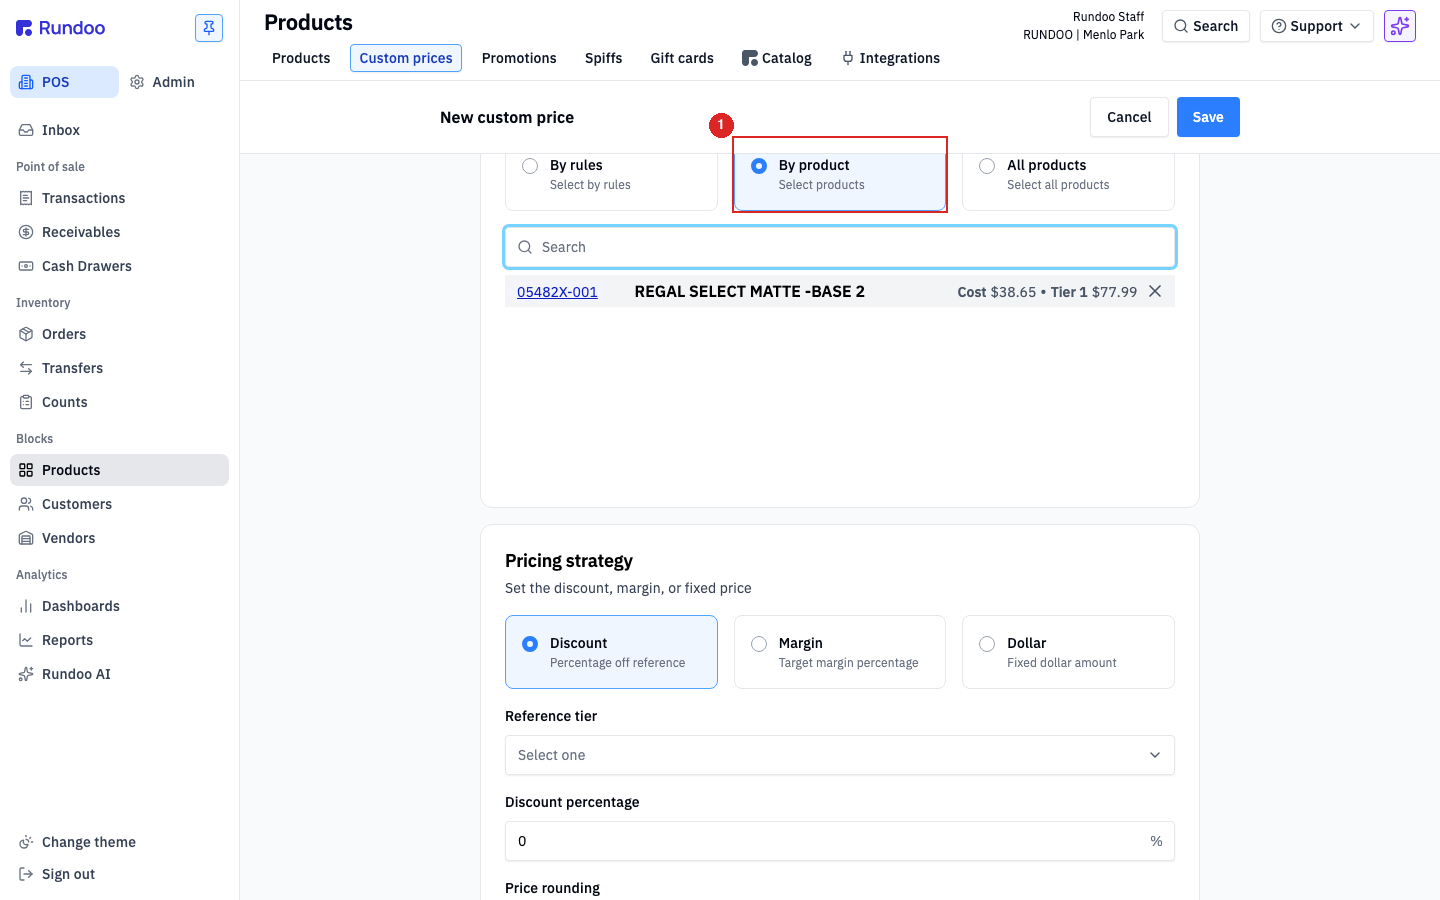
Now the special price. Go to Products in the left sidebar and click the Custom prices tab, then + Add custom price in the top-right. On the New custom price form, fill it top to bottom: under Assign to pick the customer; under Products choose By product and add the item; under Pricing strategy choose how the price is set. Dollar is a flat price, Discount is a percentage off a reference tier, and Margin targets a gross margin. Set your schedule and location (it defaults to today, no expiration, all locations), then click Save.
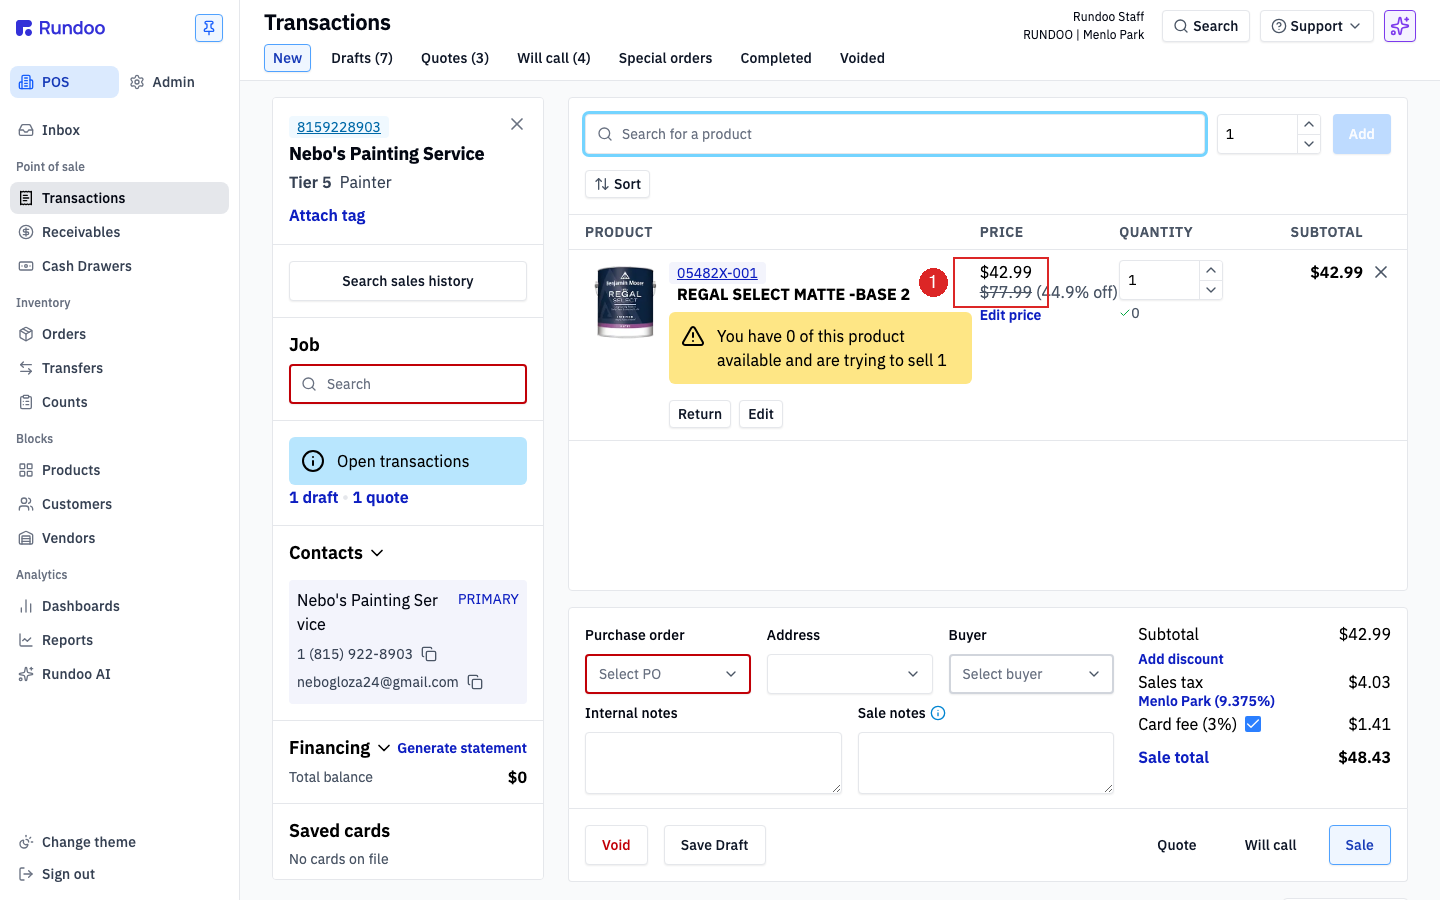
Here's the payoff. Next time that customer is on a sale, add them, add the product, and Rundoo does the rest. The line rings at the custom price automatically, with the customer's tier price crossed out beneath it and the savings called out. No override to remember, no math at the register. In the example below the paint rings at $42.99 instead of the $77.99 tier price, a 44.9% saving, and the cashier didn't touch a thing.
Where
POS → Customers → Relationship
Rep and interaction log live on the profile.
Assign a rep
Sales representative → edit
One rep per account. Powers sales-by-rep reports.
Custom price
Products → Custom prices → + Add
Dollar, Discount off a tier, or Margin.
At POS
Rings automatically
Tier price crossed out, savings shown.
Good to know