Open
Customers → Jobs tab
In POS mode. Or a customer's Jobs sub-tab.

Getting Started with Rundoo · Setup
Keep a contractor's projects separate on one account.
You know the situation. One of your best contractors, say Riverside Contracting, walks in with three projects running at once, and they want the purchases for each one kept separate on their account. You could juggle purchase orders for that, but Rundoo gives you a sharper tool: jobs. A job is just a named project you tag sales to, so a contractor's spend groups and reports per project while everything still rolls up under their one account.
In POS mode, open Customers in the left sidebar, then switch to the Jobs top tab. That is the flat, cross-customer list: every job in every customer's account, with its customer, job ID, name, status, and balance. Handy for scanning by project name across your whole book. Each customer also has their own Jobs sub-tab on their detail page, for when you already know the customer and just want to see their projects.
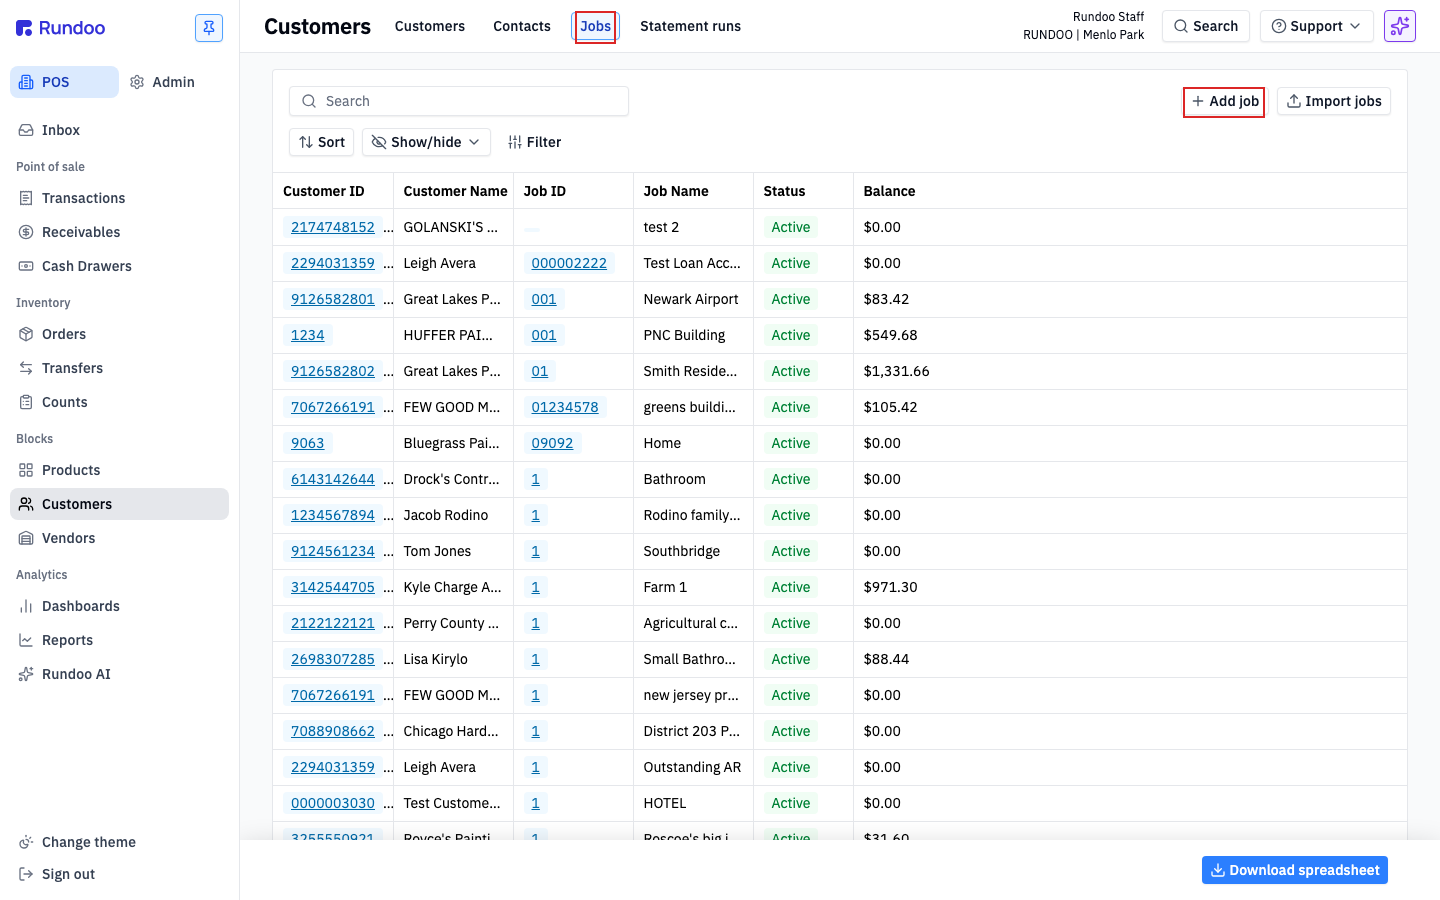
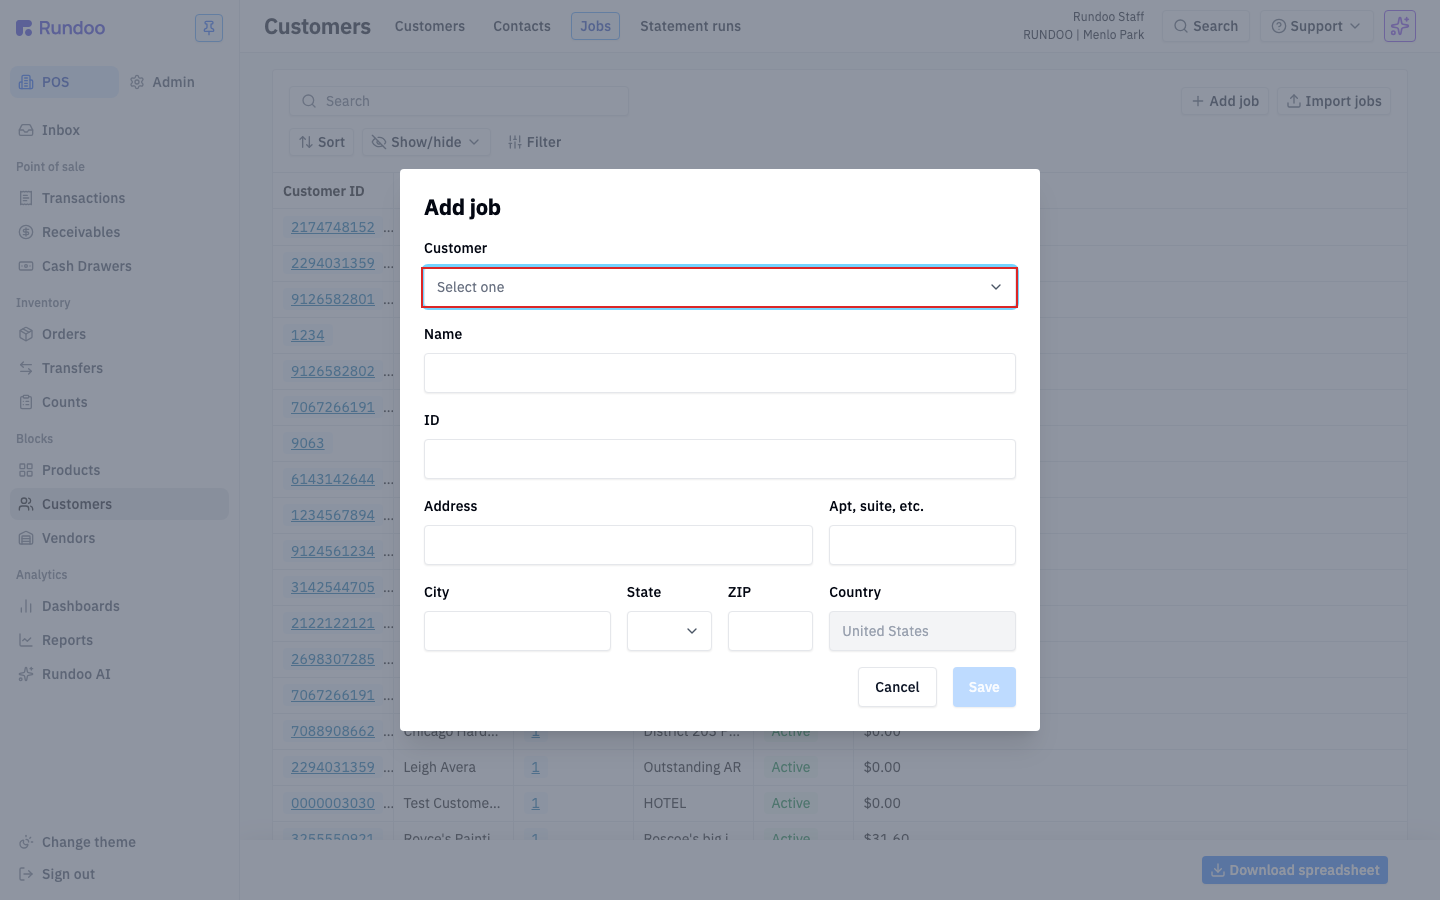
From the Jobs top tab, click Add job in the top-right. You can do this from anywhere, because the first field on the form is the customer. The Add job form asks for only four things: pick the Customer the job belongs to (required, since jobs are tied to one customer), give it a Name you'll recognize at the counter like "123 Main Street Remodel" (required), and optionally add your own ID and a job-site Address. Leave the ID blank and Rundoo auto-numbers it. Click Save and the job is ready to use.
Prefer to start from the customer? Open the customer, switch to their Jobs sub-tab, and click Add job there. Same form, with the customer already filled in.
Ring up the sale the way you always do, and add the customer to the ticket first. As soon as the customer is attached, a Job section with a search box appears in the customer panel on the left of the cart. Type the job's name or ID, pick it, and everything on that ticket is stamped to that project.
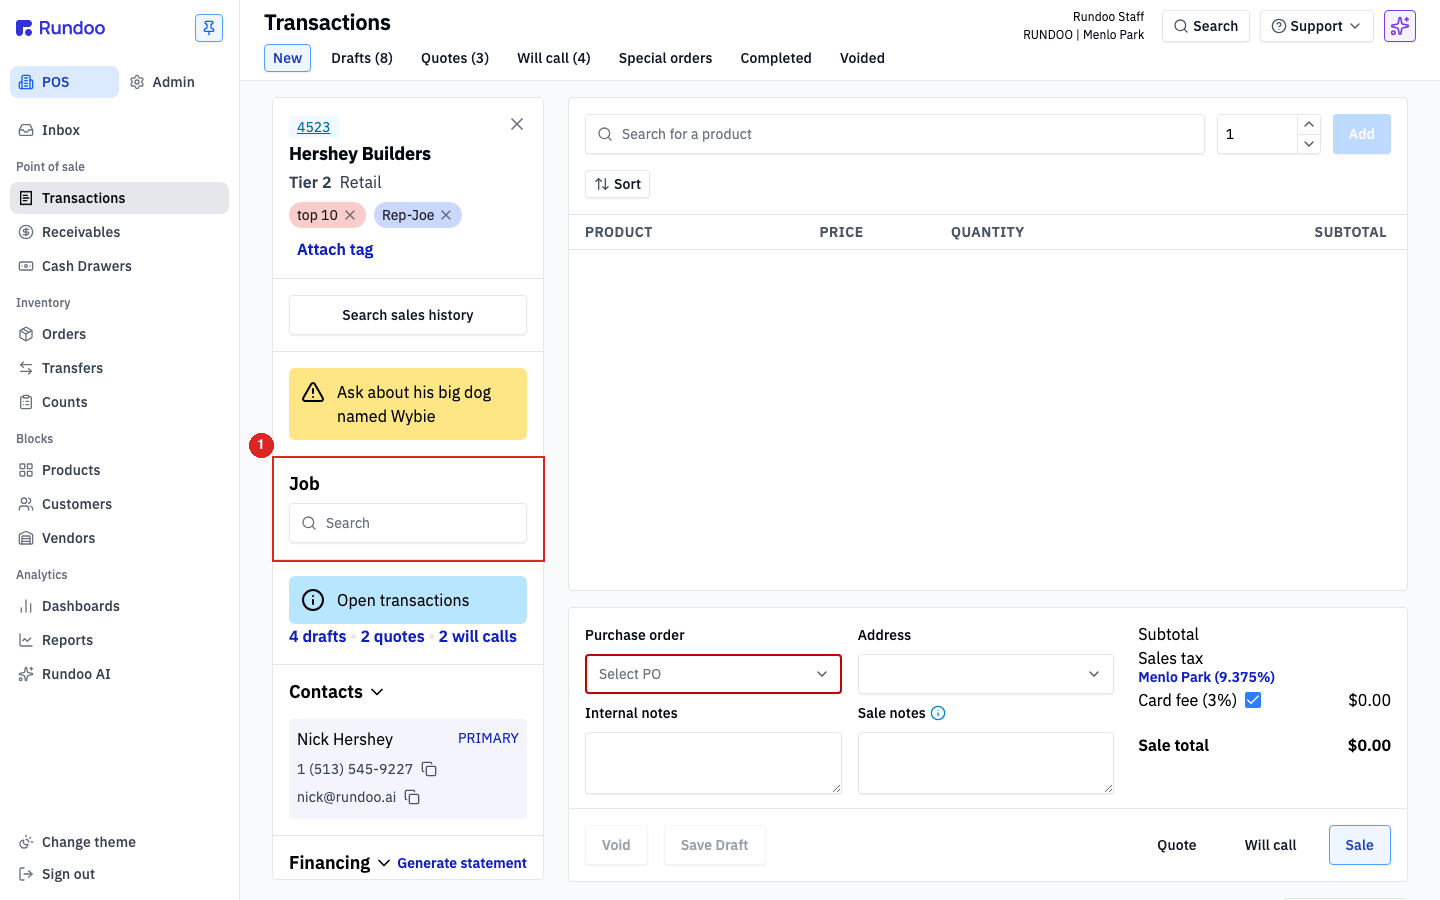
If you leave the job blank, the sale still goes through, it just lands on the customer's Main Account, so nothing ever gets lost.
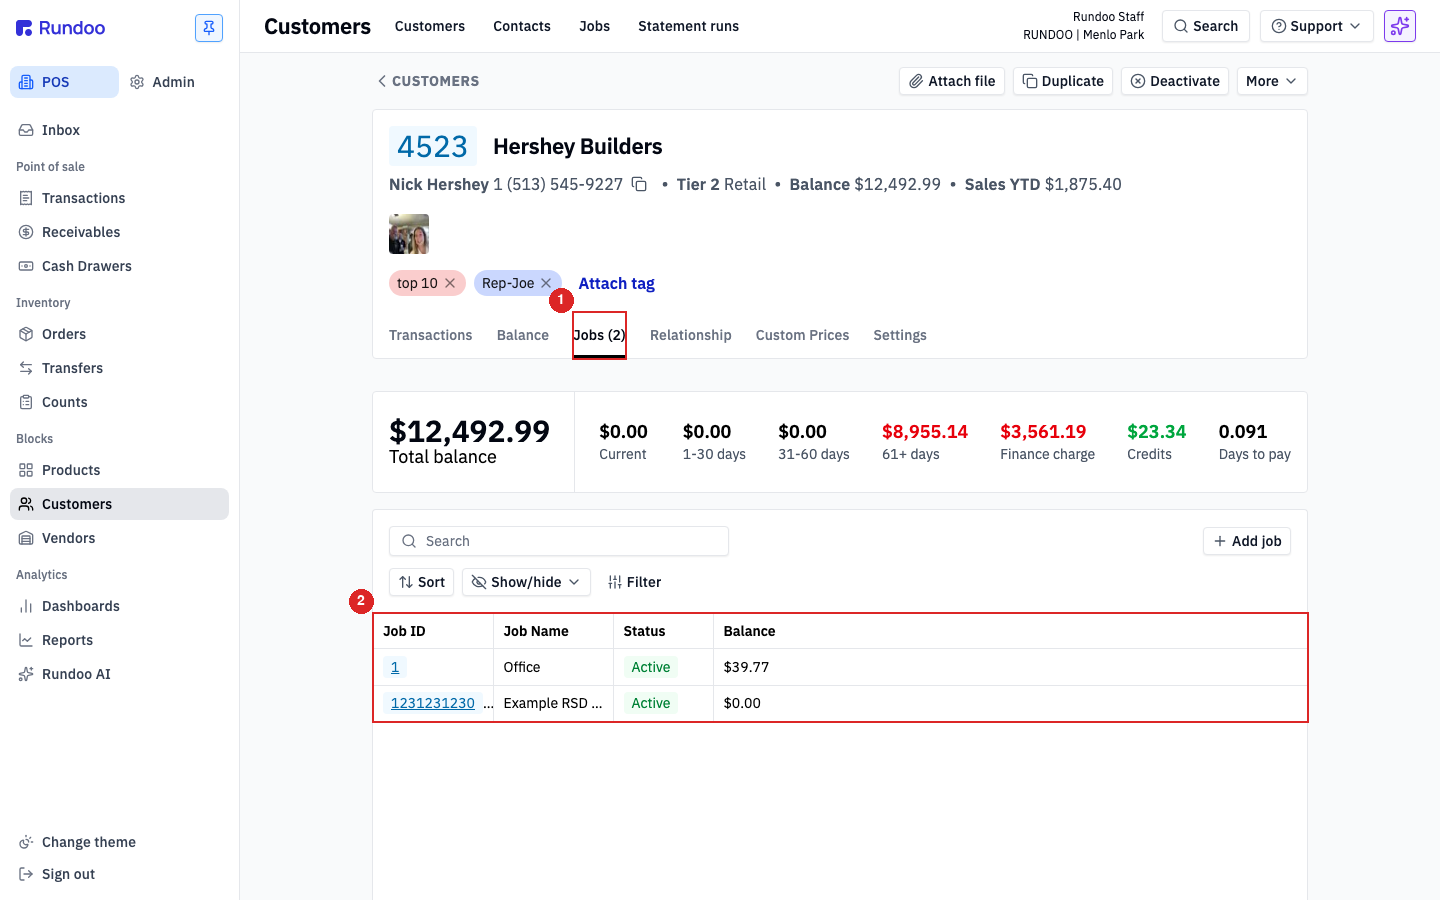
Back on the customer's profile, their Jobs sub-tab shows a balance summary up top and a per-job balance table beneath, so you can see at a glance which project is driving their open balance without running a report. Click a job's name or ID to open its own detail page, with that project's transaction history and balance.
When a project wraps, open the job from its detail page, change its Status away from Active, and Save. That keeps the job and all its history on the customer's record but pulls it out of the everyday picker at the counter, so a wrapped project doesn't clutter the list. Starting a similar project? Use the Duplicate button on a job's detail page so you don't have to retype its fields.
Open
Customers → Jobs tab
In POS mode. Or a customer's Jobs sub-tab.
Create
Add job → Customer + Name
ID and address optional. Then Save.
Tag a sale
Attach customer, pick the Job
No job picked? It goes to Main Account.
Close it out
Edit Status, off Active
History stays. Jobs can't be deleted.
Good to know