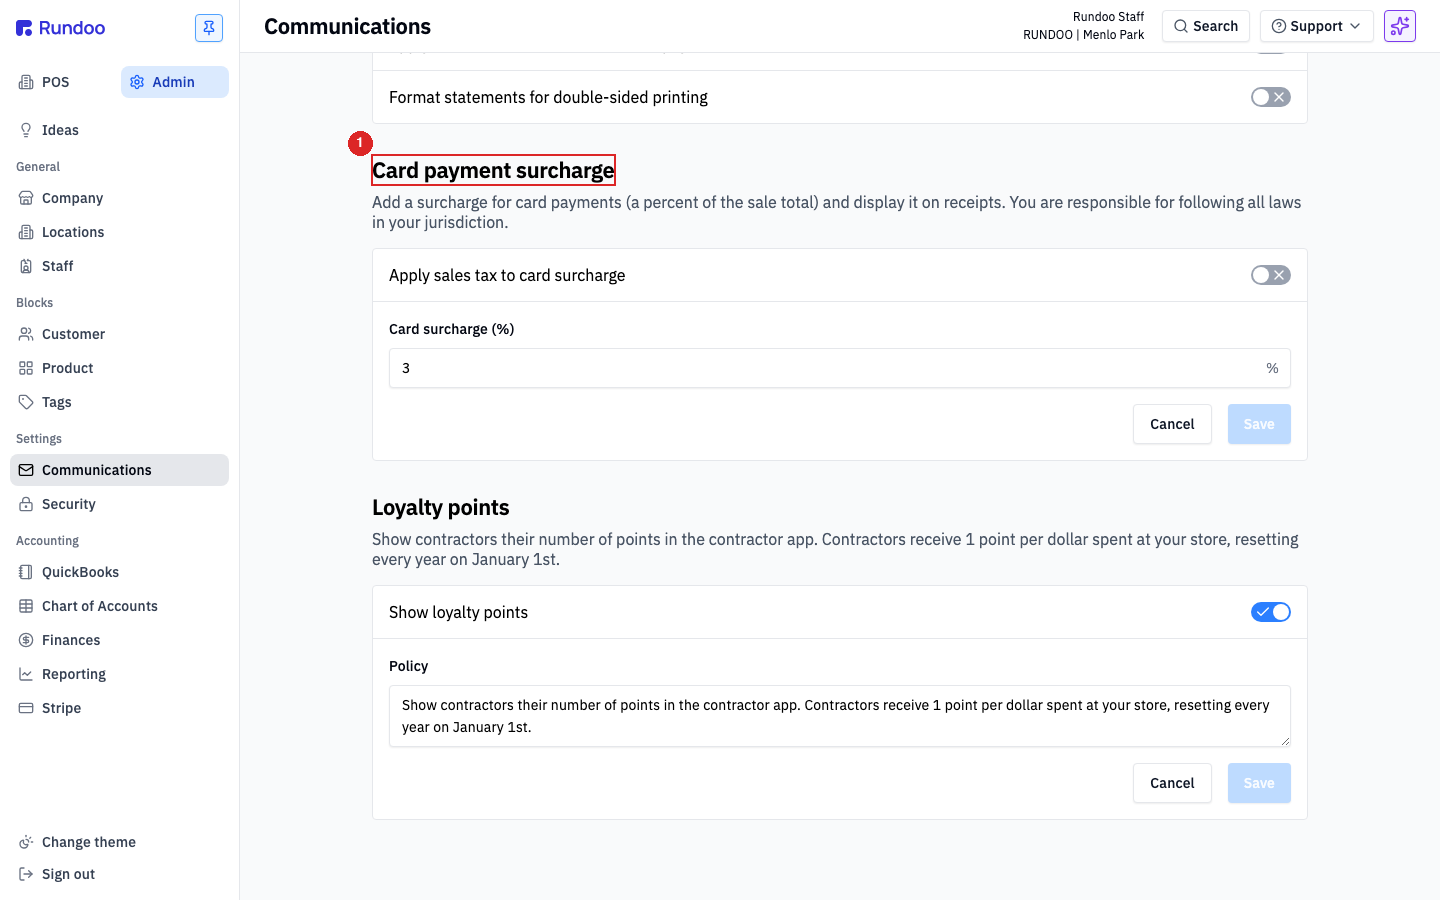
Card surcharge
0% to 4%, card tender only
Off by default. Set the rate to 0 to turn it off.

Getting Started with Rundoo · Setup
Dial in your receipts, surcharges, and register security.
You already know how your shop runs, right down to the details: what your receipts look like, how long a quote is good for, and how your team uses the register. This is about making Rundoo match that. Two tabs in Admin do most of the work, Communications for what prints, and Security for who signs in. This is your practice store, so nothing here touches real inventory or your books. Poke around and find the setup that feels right.
Everything on this page lives in Admin mode. Look at the left sidebar under Settings and you'll see two tabs stacked together: Communications and Security. We'll work through them top to bottom. Any time you change something, remember to hit Save before you move on.
From the main menu, click Admin, then Communications in the left sidebar. The General section at the top is where you control what your customer sees on paper. If you run a paint counter, you can turn on Show color formulas on receipts. You can also decide whether to Show discount percentages on receipts, or Show crossed-out original price so folks see the deal they got.
Scroll down to Number of thermal receipts printed. If one copy for the customer is all you need, change it to 1. Just below, Default quote expiration sets how long a quote stays good. Bump it from 30 to 45 days if that fits how you price.
Whatever you type into the Return policy box prints right at the bottom of every receipt, something like "Returns accepted within 30 days with original receipt." Write it once here and it rides along on every sale. Click Save before you leave the section. (We're skipping Statements for now, that gets its own video.)
Scroll to Card payment surcharge. Some stores add a small percent to card sales to help cover processing costs. Type your rate into Card surcharge (%), the field is capped between 0% and 4%, and 2 or 3 is typical depending on what your processor charges. The Apply sales tax to card surcharge toggle decides whether the surcharge itself gets taxed, and it's off by default. Hit Save and it's live. Setting the rate back to 0 turns it off again.
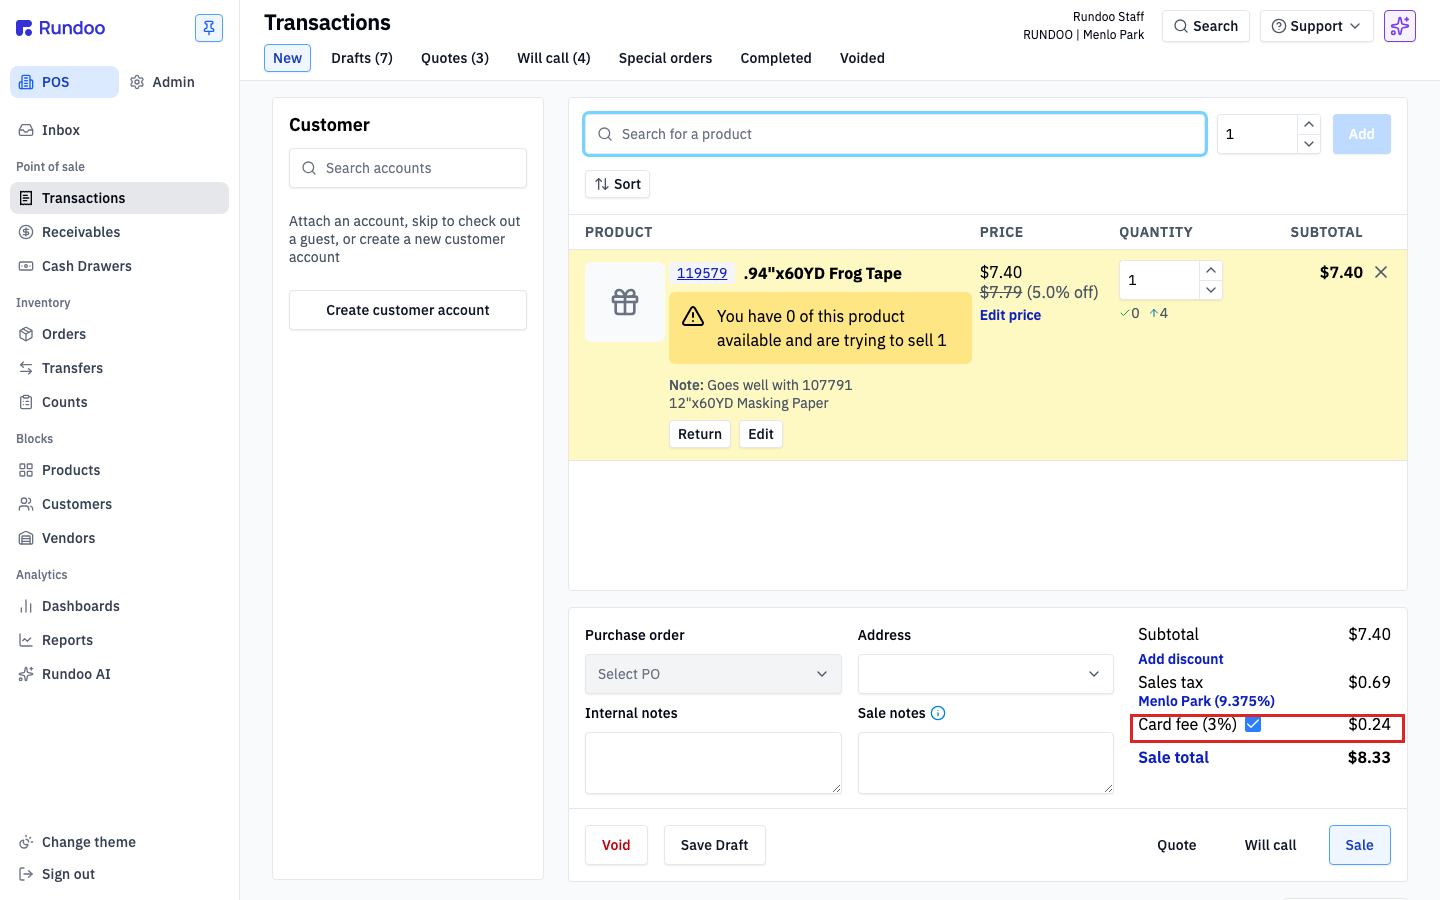
Head to POS → Transactions, drop a simple item in the cart, and you'll see a Card fee (3%) line appear in the totals stack, right between Sales tax and Sale total. It only applies to the Card tender, never cash, check, or a charge account, and it prints on the customer's receipt so they see exactly what they paid. Need to waive it for one sale? Just uncheck the box next to the line and the total updates on the spot.
Last on the Communications tab is Loyalty points. Flip Show loyalty points on and Rundoo tracks one point for every dollar a customer spends, and shows contractors their points in the contractor app. Redeeming points is still being built, so today this is tracking only. No harm in turning it on now so the count is already running when redemption arrives.
Click Security in the left sidebar. The top section, POS settings, opens with Inactivity timeout, the number of minutes a register can sit idle before it signs the user out. A busy paint desk that steps away to mix wants a longer window than a single-terminal hardware counter that should lock fast. Type a number and hit Save.
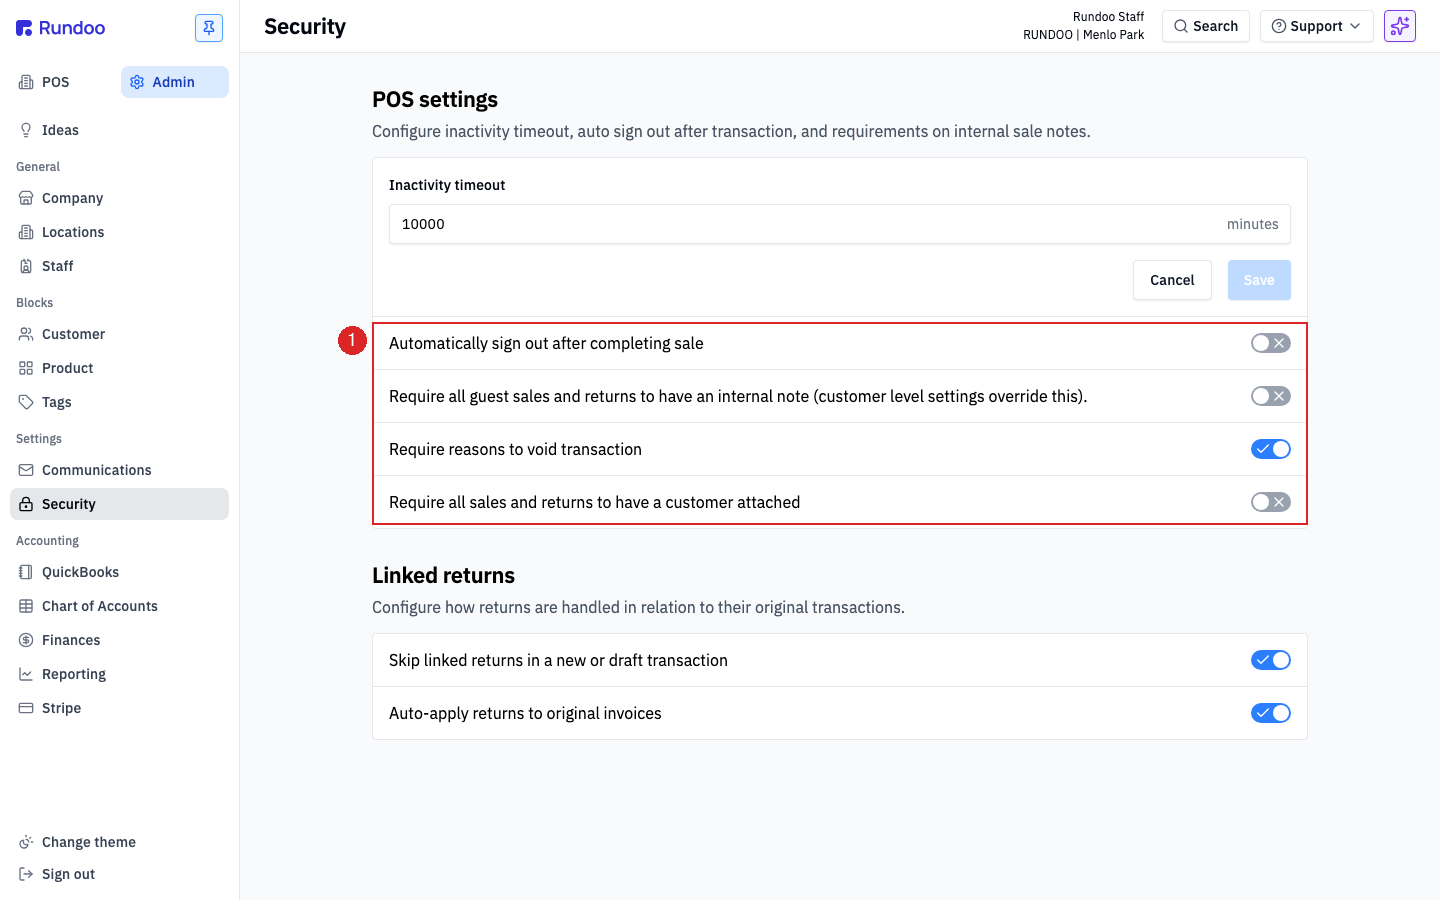
This is the important one. Toggle Automatically sign out after completing sale on and Rundoo signs the cashier out the moment a sale finishes, so the next person re-enters their Staff ID before ringing. That's perfect for a shared terminal at a busy counter, because every sale ties back to the right person. If one cashier runs the same register all shift, leave it off.
Jump back to POS → Transactions, add a simple item, and tender it with Cash. The moment the sale completes, Rundoo drops straight to the sign-in screen, ready for the next person to log in.
Two more handy toggles here. Require all guest sales and returns to have an internal note means a no-customer sale can't finish until the cashier types something in the Internal notes field, a simple way to have staff add their initials. And Require reasons to void transaction pops a confirmation when someone hits Void, so a stray click never wipes a cart the customer is still deciding on.
Down in Linked returns are two toggles, and both default on, which is what most stores want. Skip linked returns in a new or draft transaction lets a cashier process a return without tying it to an original sale, handy for items sold before you were on Rundoo. Auto-apply returns to original invoices makes sure a linked return credits the exact invoice it came from, which keeps your books tidy. Unless your workflow deliberately separates returns from their originals, leave these on.
Card surcharge
0% to 4%, card tender only
Off by default. Set the rate to 0 to turn it off.
Thermal receipts
Set the printed count
Change from 2 to 1 for a single customer copy.
Auto sign-out
On for shared terminals
Ties every sale to the cashier who rang it.
Loyalty points
1 point per $1
Tracking only for now. Redemption is coming.
Good to know