Where
POS > Products > Promotions
Add promotion, top right

Getting Started with Rundoo · Setup
Set a percent off or a fixed price, and the register rings it automatically.
A sale should not mean sticky notes at the register or someone remembering to key in a discount. In Rundoo you build the sale once as a promotion, and the register applies it on its own for every qualifying item, then puts prices back to normal when it ends.
In POS mode, open Products in the sidebar, then the Promotions tab. This list is every sale you run. To build one, click Add promotion in the top right.
No Add promotion button?
Two things to check. Make sure you are on POS > Products > Promotions (the button does not live on an individual product page). And the button is gated by a staff permission, Create, edit, and manage promotions and spiffs, that an admin can switch on from Staff > Permissions.
The New promotion form has five sections. You do not have to fill every field, Rundoo uses sensible defaults. Here is a common one, a weekend sale on a single brand.
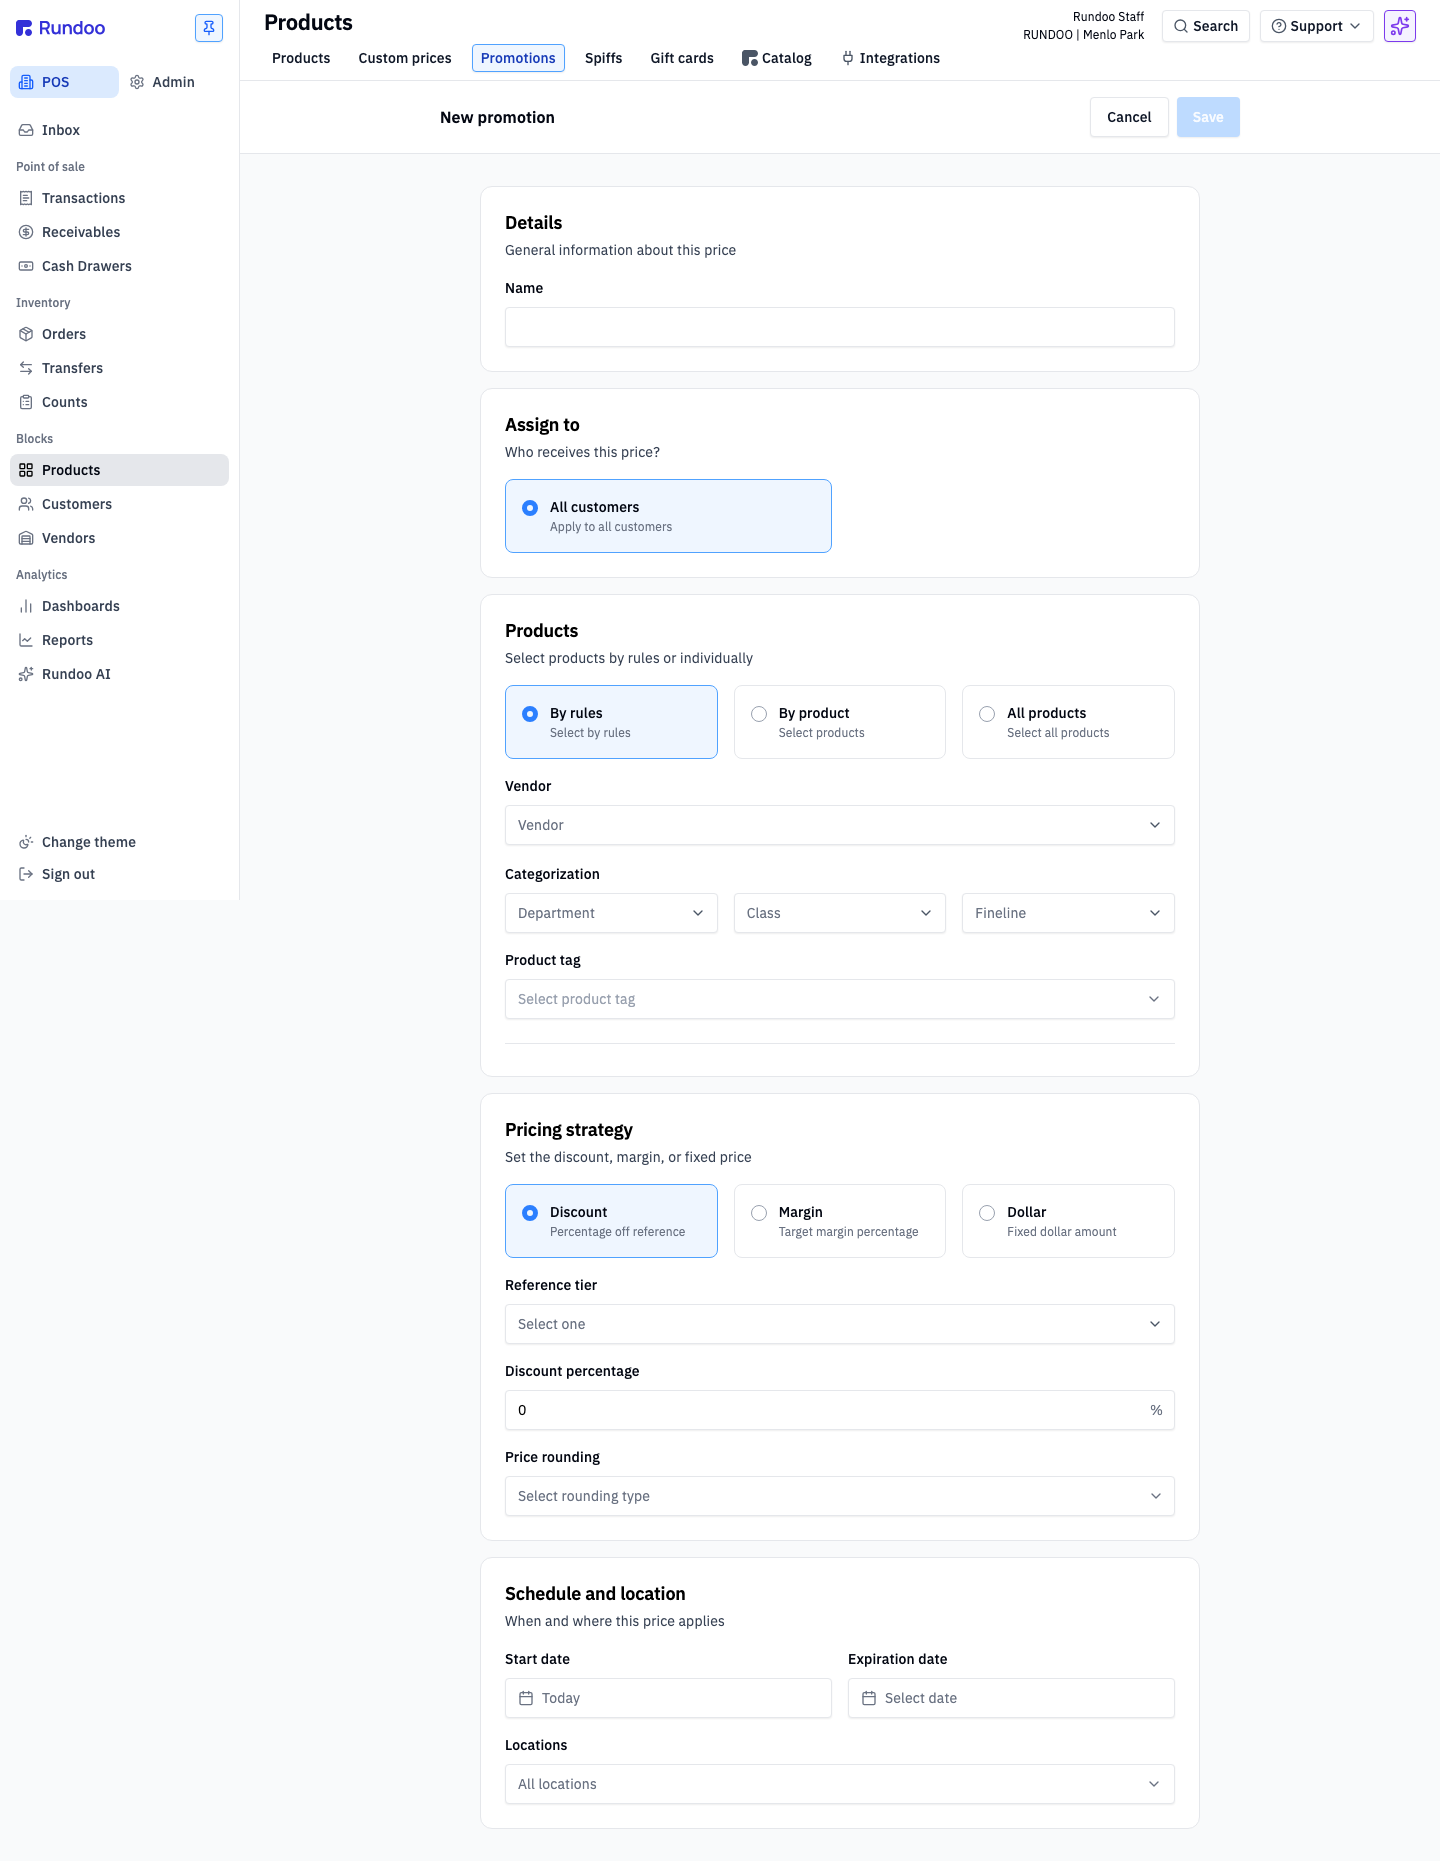
Under Details, give the sale a Name that reads clearly on reports and receipts, like Benjamin Moore Weekend Sale.
Under Assign to, leave the default All customers unless the deal is for a specific group. A price that should stick for one customer permanently belongs in Custom prices, not here.
Under Products, choose one of three ways: By rules (a whole vendor, a department, class or fineline, or a product tag), By product (specific items), or All products (storewide). For a whole brand, pick By rules and select the vendor, for example Benjamin Moore & Co.
Under Pricing strategy, pick Discount for a percent off, Margin to hit a target margin, or Dollar for a flat price. For the weekend sale, choose Discount, set the Reference tier to Retail, and enter 10 percent. Add a Price rounding rule if you want a clean number.
Under Schedule and location, the Start date defaults to today. Add an Expiration date (leave it blank for open-ended), and leave Locations at All locations unless only some stores run it. Click Save in the top right. From the start date on, every matching item rings at the sale price on its own.
There is no native buy one get one type, but there is a clean pattern your Rundoo guide can set up once: a non-stock, non-taxable, $0 product that stands in for the coupon. At the register, ring the real item at full price, add it a second time and use Edit Price to set that line to $0 (the "get one" leg), then add the BOGO item so the redemption is tracked. Pull the Sold Products report on that BOGO item any time to see how many coupons were used.
For a quick change, edit the promotion right in the list: click the Discount % cell (or Price, or Margin %, depending on the strategy), type the new number, and hit Update.
When the sale is over, open it and click Deactivate, or set the Expiration date to today. Either way pricing snaps right back to normal, with no lingering discounts to chase down.
Where
POS > Products > Promotions
Add promotion, top right
Defaults
All customers, today, all locations
Expiration blank = open-ended
Editable after save
Name, strategy and amount, dates
Change these any time
Locked after save
Products, customers, locations
To change scope, deactivate and rebuild
Good to know