The two jobs
Pair, then teach
Pair to the cradle, then scan the config sheet.

Getting Started with Rundoo · Hardware Set-up
Point, beep, and the right item lands on the ticket.
Your scanner is the one piece of counter gear that needs a short, one-time setup before it can talk to Rundoo. It is really two small jobs: pair the scanner to its base, then teach it how to hand a barcode to Rundoo. Take your time here, because getting it right once saves you a headache at the counter later. Do it now and it is done for good.
Rundoo's recommended scanner is the Zebra DS2278, a handheld that reads both the older striped barcodes and the square QR-style codes. It comes with a small base, called the cradle, that the scanner sits in. Any reputable scanner works as long as it can wrap each scan the way we set up below, but the steps here follow the DS2278 your guide most likely shipped you.
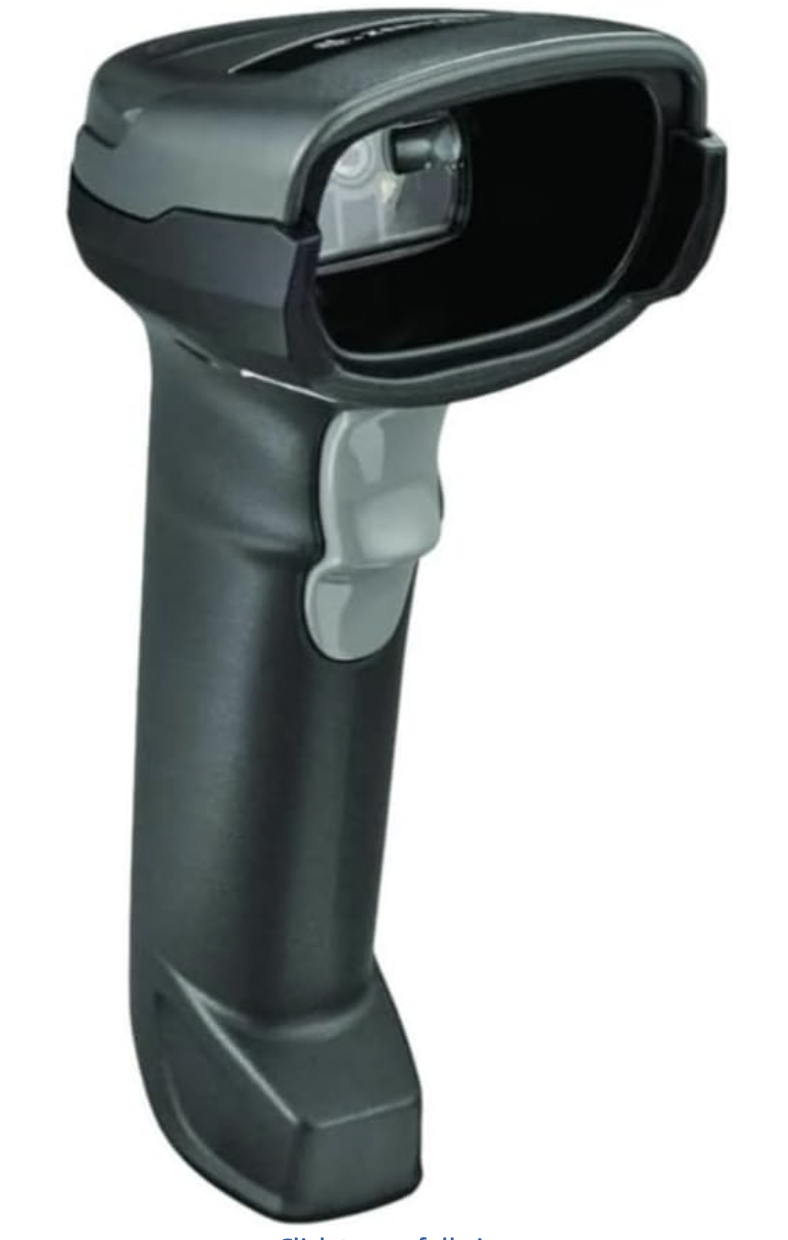
Start with the cradle, that little base the scanner sits in. Plug its USB cable into any USB port on the computer that will use this scanner, on the side or the back of the machine. That powers everything on.
Pick up the scanner, point it at the small QR code printed on the cradle, and pull the trigger. One short beep means they are paired. Set the scanner back on the cradle for about three seconds to let it sync, and job one is done.
Now teach the scanner how to hand a barcode to Rundoo. Your Rundoo guide sends you a one-page DS2278 config sheet. Print it out on paper first. Do not scan it off your screen, because scanners read screens unreliably, and this trips up more people than anything else in the whole setup.
With the sheet printed, point the scanner at the QR code at the top of the page and pull the trigger. You will hear a beep and the scanner is now programmed. You can scan that code anywhere, it is programming the scanner, not entering data, so you do not need Rundoo open for this part.
Here is what that code does: it tells the scanner to wrap every barcode in a vertical bar, a | pipe, on each side. That wrapper is the secret handshake. It is how Rundoo knows a scan is a scan and not somebody typing.
Prove it took before you rely on it. Click into any plain text box that is not Rundoo, a Notepad window or your browser's address bar, and scan any label nearby. You want the number to come out wrapped, like |0123456789|, with a bar on each side.
If you see just the bare number with no bars, the sheet did not take. Reprint it and scan the QR code again.
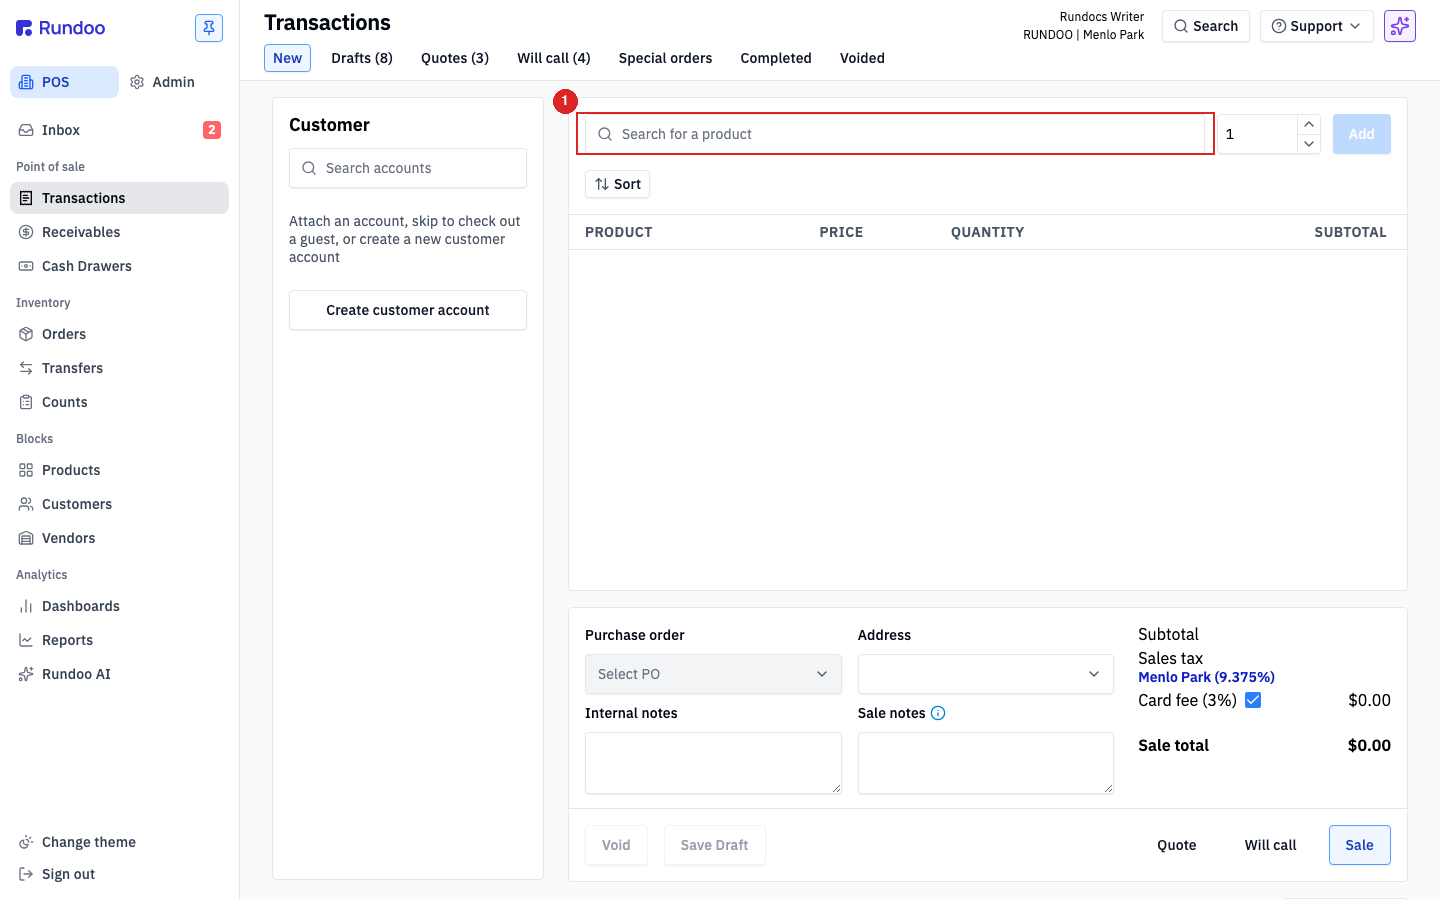
Now the real test. Go to Point of Sale, open the Transactions tab, and land on the New tab, which is the new-sale screen. Click anywhere in the open cart area, and here is the catch, click outside the Search for a product bar. Then scan a product that is already in your system. It drops straight onto the ticket.
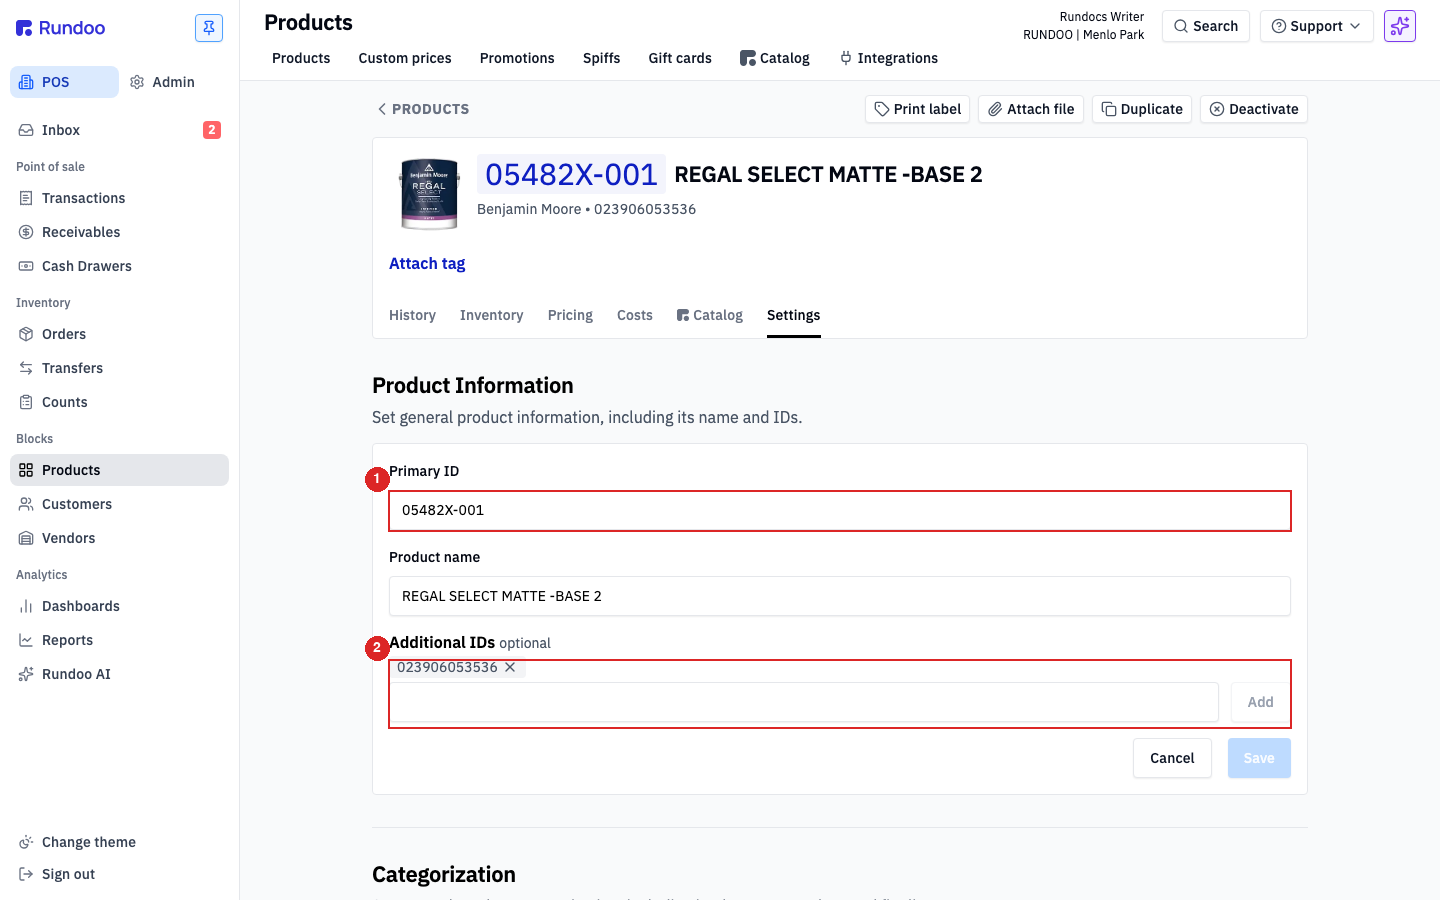
If you scan an item and Rundoo does not recognize it, that barcode number just isn't attached to the product yet, so Rundoo treats the scan as a brand-new item. Attach it once and it works from then on: open the product, go to its Settings tab, click into the Additional IDs field, and scan the barcode. The number populates. Click Save.
The two jobs
Pair, then teach
Pair to the cradle, then scan the config sheet.
The wrap
|0123456789|
Every good scan comes out inside pipes.
Config sheet
Print it, then scan the QR
Print on paper. Never scan it off a screen.
Where to scan
The cart area
Click outside the Search for a product bar first.
Good to know