Where
Admin → Locations → your store
On the General tab, not the POS side.

Getting Started with Rundoo · Transactions
Tell Rundoo the cash you keep in the drawer, so every close-out balances.
At the end of a long day, the last thing you want is a headache closing out the register. You want the numbers to just match. The trick to a clean close-out is telling Rundoo what you start with in the drawer each morning. That standing amount is your cash float, and you set it once. Do it right and every close-out subtracts the float for you, so what's left is exactly what goes to the bank, no phantom short or over.
You ring customers up on the POS side, but the float is a store setting, so it lives on the Admin side. That's the whole reason folks can't find it: they go looking at the register. This is a set-it-once job, so switch modes and you're most of the way there.
Down in the bottom-left corner, click your user icon and pick Admin from the menu. The screen swaps from the register over to your store's settings. You can tell which side you're on by the POS / Admin toggle up top.
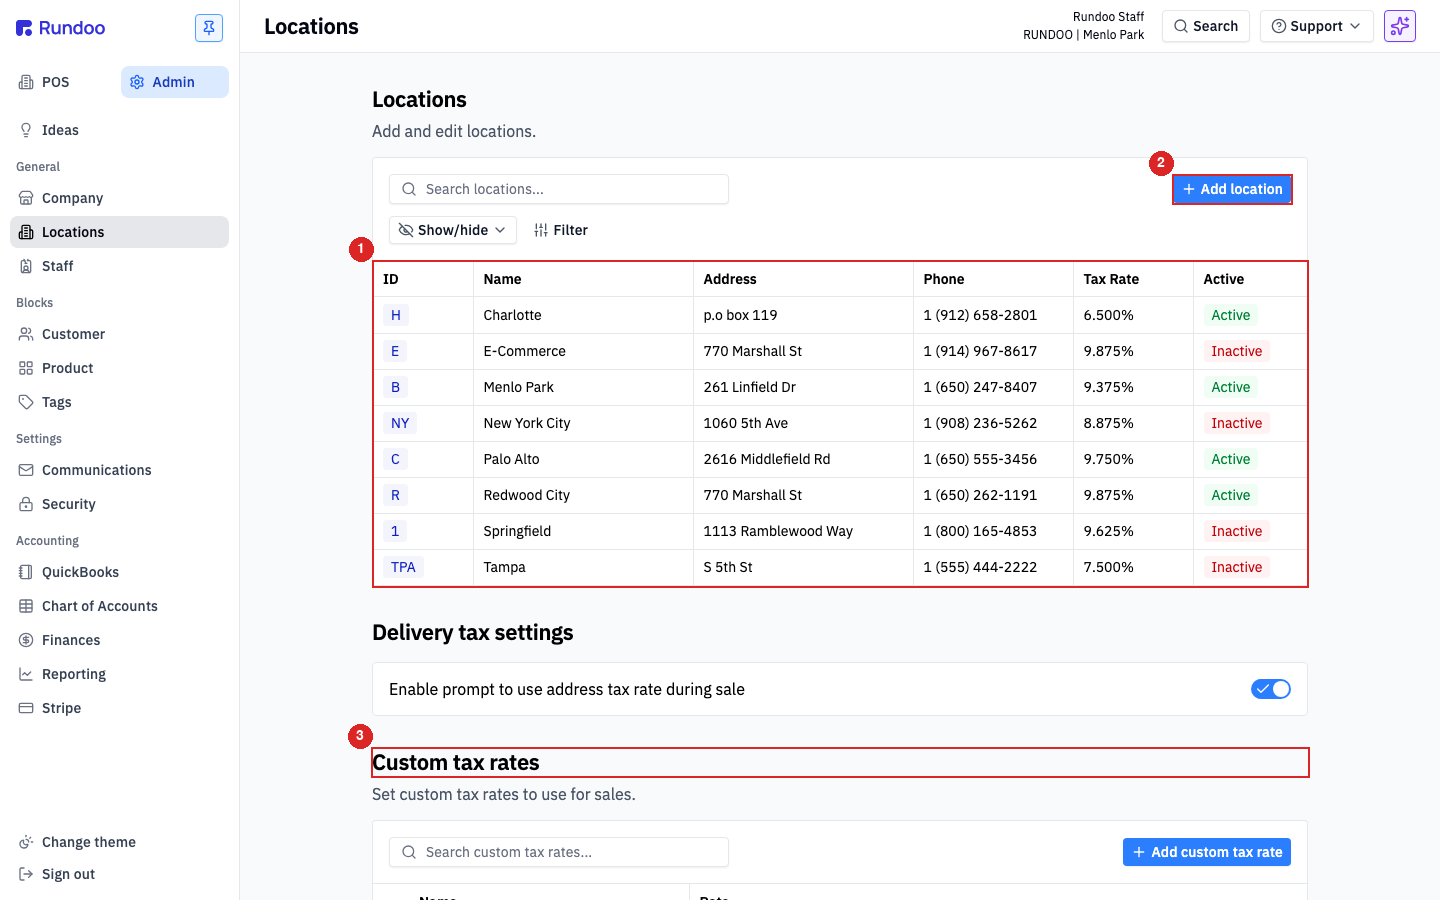
In the left sidebar, click Locations. That's the list of every store you run, each row showing its ID, name, address, phone, and tax rate. Click your store's row to open its settings.
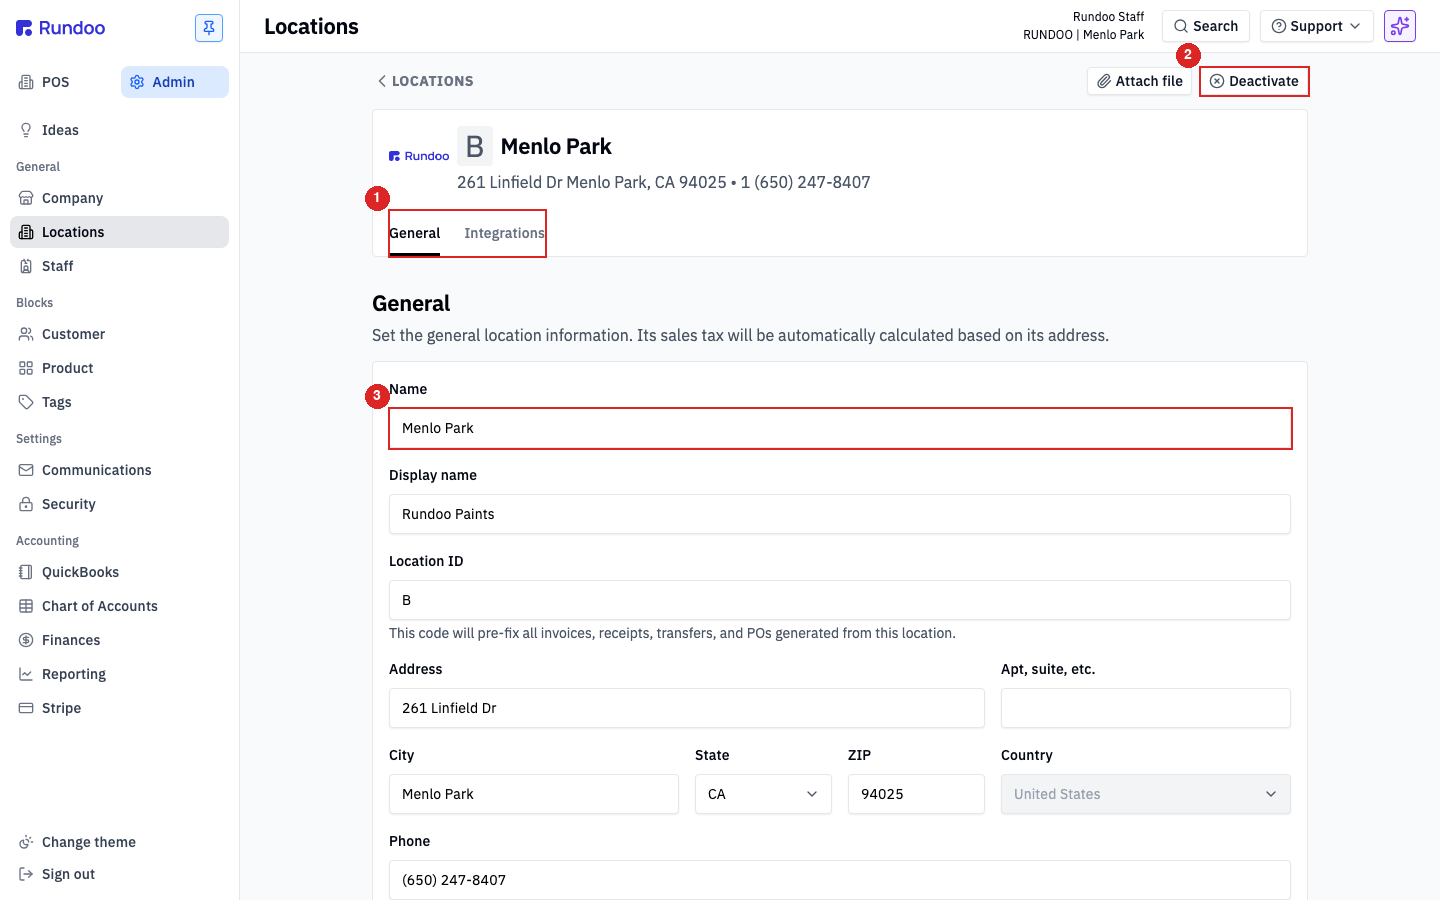
The store opens on its General tab, the same set of fields you'd fill in when adding a location. Scroll down past the name, address, and phone and you'll reach the Cash float field.
Enter the amount you always keep in the drawer to start the day. In the video we use five hundred dollars as an example, so you'd type 500. Pick whatever your shop actually floats.
There's no Save button on this page. Rundoo saves the moment you click out of the box, or tab to the next field. That's the whole setup for a single register.
If you run two tills side by side, say a front counter and a back-counter pickup drawer, scroll to the Cash drawers section on this same page. Click Add cash drawer, give it a name that makes sense for your shop, set its float, and click Save. Each drawer then closes out on its own. (Adding a named drawer does use a Save button, unlike the single-float field above.)
Why this makes the math work
Every day the drawer starts from your float. At close-out you count the drawer, and Rundoo does the arithmetic for you: Cash for deposit = counted Total minus Float. It then compares that to the Expected deposit from the day's sales. When they match, your Short/over is zero and you're balanced.
If the float is wrong or blank, that subtraction is off by the same amount every single day, and you'll chase a short or over that was never really there. Setting it once is what keeps the numbers honest.
Where
Admin → Locations → your store
On the General tab, not the POS side.
The field
Cash float
Your standard starting cash for the day.
How it saves
Inline, no Save button
Saves when you click out of the field.
Close-out math
Deposit = Total − Float
Balanced when Short/over is zero.
Good to know