
Rundocs › POS
Receipt formats
Last updated 2026-09-22
Rundoo can print a receipt as a thermal slip or a full-sheet page, and email, text, or save any receipt as a PDF, so you are never stuck with only the thermal printer. The two printed formats are a narrow thermal slip off a counter receipt printer and a full-sheet 8.5×11 printout off a regular office printer, and you can reprint any completed sale, or save it as a PDF, the same ways. Most stores run thermal at the counter and reach for the PDF or full-sheet version when a customer asks for a copy or when filing for a job. This Rundoc covers when to use which, and what's on each.
The short version
-
Thermal slip at the counter for every sale. Fast, low-cost, small.
-
Full-sheet when a customer needs a formal receipt, when you're filing for a job, or for any sale that's going to live in a binder.
Both formats include the same core data (line items, totals, tax, payment method). The difference is layout, durability, and how much room there is for branding and policy text.
Comparison
| Feature | Thermal slip | Full-sheet |
|---|---|---|
| Paper | ~2–3" thermal roll | Letter or legal, plain |
| Printer | Star Micronics CloudPRNT thermal (see Printer setup) | Any office laser or inkjet |
| Header / branding | Compact logo + store name | Full logo, address, contact details |
| Customer + job info | Yes (job, PO, customer name + contact) | Yes (prominently displayed under DETAILS) |
| Line items | SKU, description, qty, subtotal | SKU, description, mix formulas, qty, subtotal |
| Totals + tax | Subtotal, tax, total, payment method | Subtotal, tax breakdown, total, cash received, change due |
| Return policy | Brief (limited room) | Full policy text |
| Durability | Fades over months in heat or sunlight | Stable for years; easy to file |
| Speed + cost per receipt | Fast, very cheap (paper only) | Slower; paper + ink/toner |
What a thermal slip actually looks like
A typical counter sale prints with the store header, sale + customer details, line items with SKU/quantity/price, totals + tax breakdown, payment method, and a thank-you footer. Mix formulas and tint codes print under the line item when applicable. Here's a representative slip:
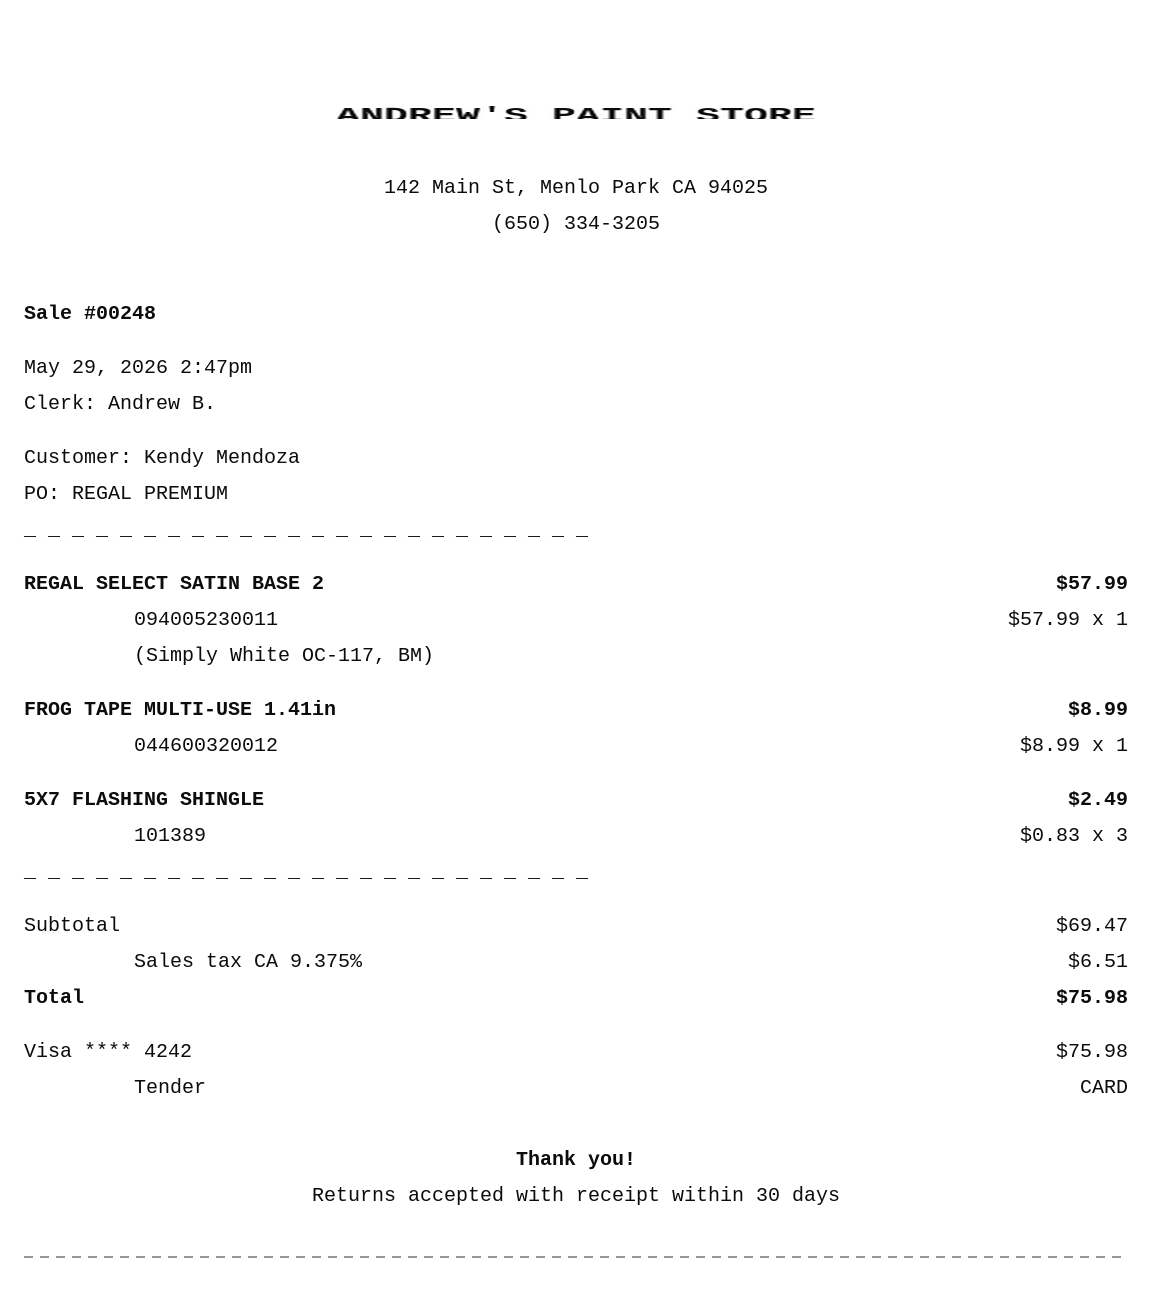
What prints in the header comes from more than one place. Your company name and website print on every document from Admin > Company. Your store logo, address, and phone come from the location that rang the sale, set in Admin > Locations (see Which store address prints on a receipt below). The return-policy text is set on Admin > Communications > General, and the number of thermal receipts printed per sale on Admin > Communications > Printing.
Which store address prints on a receipt
Every sale receipt prints the address (and phone) of the location that rang the sale, the store the register is signed in to. You don't set this on the receipt itself; it flows straight from that location's record. To set up or change what prints, open Admin > Locations, click the store, and edit its Address and Phone (and its Display name if you want a customer-facing store name that differs from the internal one). See Locations for the full field list.
No address on your receipts? The location is missing one. Add it under Admin > Locations and it prints from the next sale on. A blank address also stops Rundoo from auto-calculating that store's sales tax, so it's worth filling in either way.
One address per receipt. A receipt carries only the address of the location that rang the sale. There is no setting to print a second location's address, or all of your locations' addresses, on a single receipt, regardless of where the transaction took place. If a multi-location receipt would help you, it's a good one to raise on the Ideas board in Rundoo.
Hiding the discount details on a receipt or invoice
When a line is discounted, or priced off a quantity break or a customer's tier, the receipt and the full-sheet invoice print the original price struck through with the percent off next to the net price, like $2.75 (59.6% off). If you'd rather the customer only see the price they actually paid, you can turn that off.
Both are store-wide switches under Admin > Communications > Printing, and both ship on:
-
Show crossed out original price on receipts. Turn it off to drop the struck-through original price.
-
Show discount percent on receipts. Turn it off to drop the
(% off)next to the price.
Flip whichever you don't want (or both), then Save. From the next sale on, receipts and invoices show only the net price. There's no per-customer or per-sale version of this, it's the same setting for every printed document.
Same spot controls the rest of the receipt. The Printing section is also where you toggle color formulas, the account balance, price on packing slips, and the number of thermal copies per sale. The return-policy text sits one card up, in General. See Communications for the whole page.
When to use thermal
-
Every sale, by default. Thermal slips are designed for transactional speed at the counter. They print in under a second, don't use ink, and the paper is cheap.
-
Cash sales. The thermal printer is what pops the cash drawer (see Cash drawer).
-
Walk-in retail and small jobs. Customers expect a thermal slip; it goes in a wallet, on a clipboard, or in a pickup bag.
When to use full-sheet
-
Customer asks for a formal receipt. Property managers, fleet accounts, and any pro buyer filing for a job typically want the full-sheet layout.
-
You're filing a hard copy. Thermal fades; full-sheet doesn't. Sales filed in binders or kept for records should be printed full-sheet.
-
Return-policy text needs to be on the receipt. A full return policy and any extended T&Cs only fit on the full-sheet layout.
-
Mix-formula history matters. Tinted paint sales print full mix formulas on the full-sheet layout, useful when a customer comes back for a re-tint and you need the exact formula.
Where to switch between them
In POS, after taking payment the Print action prints to the configured thermal printer for the register. To print the full-sheet version, pick Email or Text (which delivers a PDF) or use the Print full-sheet action on the completed sale view (same sale, different layout, same data).
Branding is set once and both formats render with it: company name and website live in Admin > Company, your store logo, address, and phone come from the location on Admin > Locations, and the return-policy text lives on Admin > Communications > General.
Reprint either format any time, including as a PDF. Open the sale from the Completed top tab in POS > Transactions. The Print button goes to the thermal printer, but that isn't your only option: Print full-sheet prints the 8.5×11 version to any office printer (or your browser's Save as PDF), and Email or Text sends the customer the receipt as a PDF. So you can reprint or save a receipt as a PDF even with no thermal printer set up. No customer-facing data changes between the original print and a reprint.
Quick print: skip the print dialog
By default, clicking the print action opens your browser's print dialog and the cashier has to confirm. Quick print takes that click away: the receipt prints straight to the printer assigned to that location. It's a section of its own on Admin > Communications, along with the per-location printer assignment, see Quick print for every toggle and the gotcha about which ones can be switched off.
Recommended Rundocs
-
Sales, where the Print action lives at the end of a sale.
-
Printer setup (setting up the thermal receipt printer).
-
Printer troubleshooting, when the thermal printer isn't printing.
-
Sale forms, configuring the layout, logo, and return policy text.